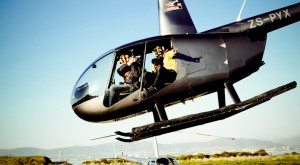
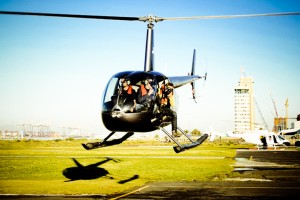
Sometimes shooting from the air is essential. While there are increasingly more options besides a helicopter (we’ve shot more with R/C helis in recent years – click here and click here to see some of the highlights of these fun toys) sometimes there is simply no substitute for a good old-fashioned chopper. For example, the shoot we’re currently working here in Cape Town with Mike Horn and crew demanded that we take to the air for the shot list we’re working on.
Top 5 Tips for Shooting from a Heli:
1. Book with the right operation. Go with a well-recommended outfit. An operation that has pilots who understand photographer/filmer needs is essential. We photographers and filmers have unique time pressures around light and weather considerations – it works out better when your pilot and ground-team understand this.
2. Make sure that the doors can come off for photography and filming. And then make sure they are off when you arrive.
3. Dress warmly. No matter what time of year it is. The rotors make it chilly.
4. Use a safety harness. Attach yourself to heli at two points (eg: the frame and floor) plus your seatbelt. If you do not have a harness – tape the seatbelt clasp liberally with gaffers tape. Ideally you can move about freely. Note: a regular climbing harness and carabiner will work in a pinch but a the full-body roofer harness is preferred.
5. Use camera exposures of higher than 1/1250s. Ideally 1/1600s or greater. This will insure that your shots are free of motion blur. There is lots of motion see inside a heli that you can see and not see (both high and low frequency). Adjust the rest of your settings (ISO/Aperture) to get the proper exposure around that shutter speed.
______
[As another point of reference – some of you might recall the video I ran a couple years ago that was a visual run-through of my pre-flight. Check that out by clicking HERE.]


Hello Chase
After receiving so much information and inspiration from your blog and live broadcasts, I am very happy that I can give something back, in the form of a few additional tips from my experience from shooting from a helicopter:
-shutter speeds: use 1/1250 or above for GUARANTEED motion-free photos, but feel free to experiment with lower shutter speeds. Of course, heli time is expensive and is not the time for experimentation, so you have to have a “safe” strategy (high ISO etc) to bag the shot, and then try something different. I have repeatedly shot blur-free images from helicopters at shutter speeds of down to 1/40 with a wide-angle lens (dusk and night images), but this is obviously hit-and-miss. You shoot on Continuous High and hope to have at least one good frame. In normal daylight I can have most of my frames motion-free at 1/250, if i follow the next tip:
-very important: do not rest your camera, lens or elbows anywhere at all, because you will pick up vibrations from the fuselage. Try to lift your back from the seat and “float” your camera using your body as a shock absorber
-watch out for inexperienced pilots flying the Robinson heli. I never worry when flying with a “proper” (large, 2-engine) helicopter, but the Robinson has created a new breed of civilian pilots who are qualified and “experienced” on paper, but not to be trusted to fly complicated aerial manoeuvres needed for filming
-I always wear a “rigger’s belt” (google it) so that I can safely attach myself to a fence, ledge, scaffolding or helicopter with a locking carabiner and one or two climbing lanyards. I don’t have to wear it when I need it, because I wear it everyday
-do not plan to change lenses mid-flight, especially if you are sitting across an open door all the time. Plan ahead and use the correct lens. You can change a lens during horizontal level flight, but don’t plan to do it in the thick of the action
-if you are flying at night and plan to use a flash, discuss it ahead and test it on the ground with the pilot (you would need a flash to shoot inside the helicopter-here is an example from a night flight with a military UH-1H: http://costaslakafossis.wordpress.com/2011/07/30/huey_nvg/)
-always carry a sick bag with you, even if you have flown before without any problems. You never know if a bout of anxiety or previous health condition might make you sick
I hope that I have offered something useful-I definitely do not mean to be disrespectful and blow my own horns here, it is just that I have found the opportunity to share some information that might help someone else in a similar situation.
Happy landings
Costas
Hi Chase, your information is right but…
If you´re gonna shoot from a helicopter another helo, than the exposure you´ve mentioned won’t do a great job. I´m an aviation photographer specialized in military stuff, and my higher exposure is 1/125. Really!
That´s how I can bring some motion and action to the scene. An exposure higher than that will freeze the main rotor blades and makes everything a little bit strange, like “hey, there´s something wrong here”. In some occasions, it helps me to blur the landscape too, making the picture even cooler.
Chase: Great point about renting the heli. I wonder how renting a helicopter from one of the companies in Seattle could be coordinated with a photoshoot where the models are on the ground whether they are hiking, mountain biking or skiing?
Having an air to ground radio so you can communicate with your talent on the ground is mission critical!
Awesome tips. Hope to use it someday, one day!
I do some aerial photography and always felt safer in fixed wing planes than rotor-craft. Great advice though!
yes- but can it get you the shot you need ? 😉