

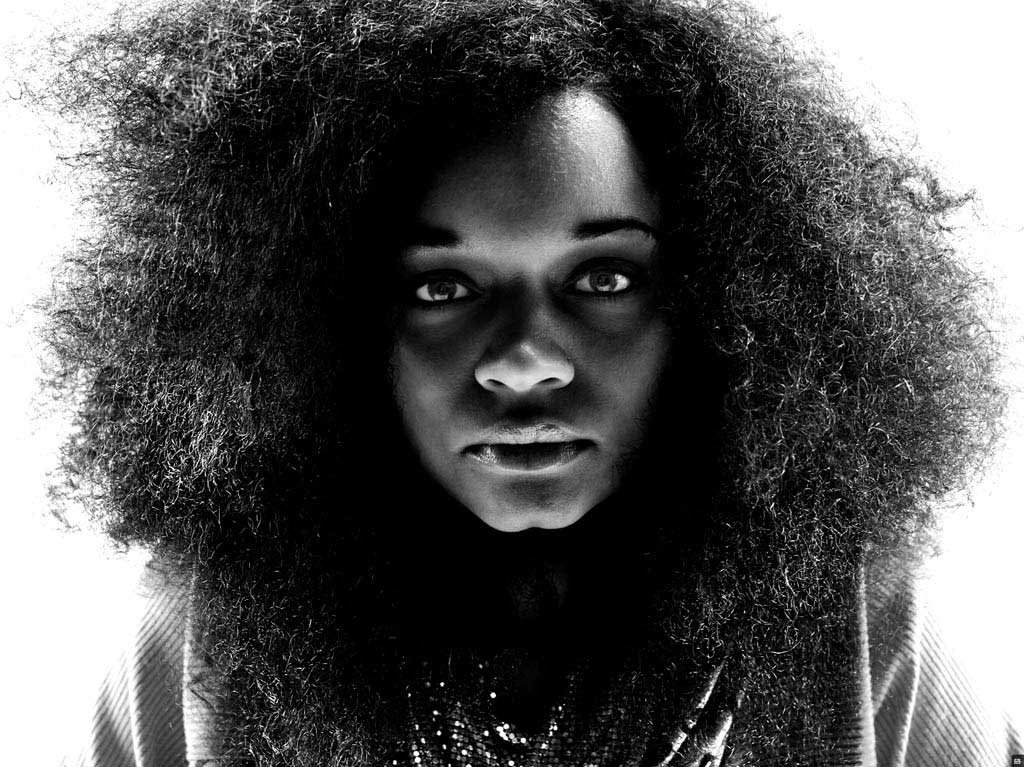
Aperture Finished File
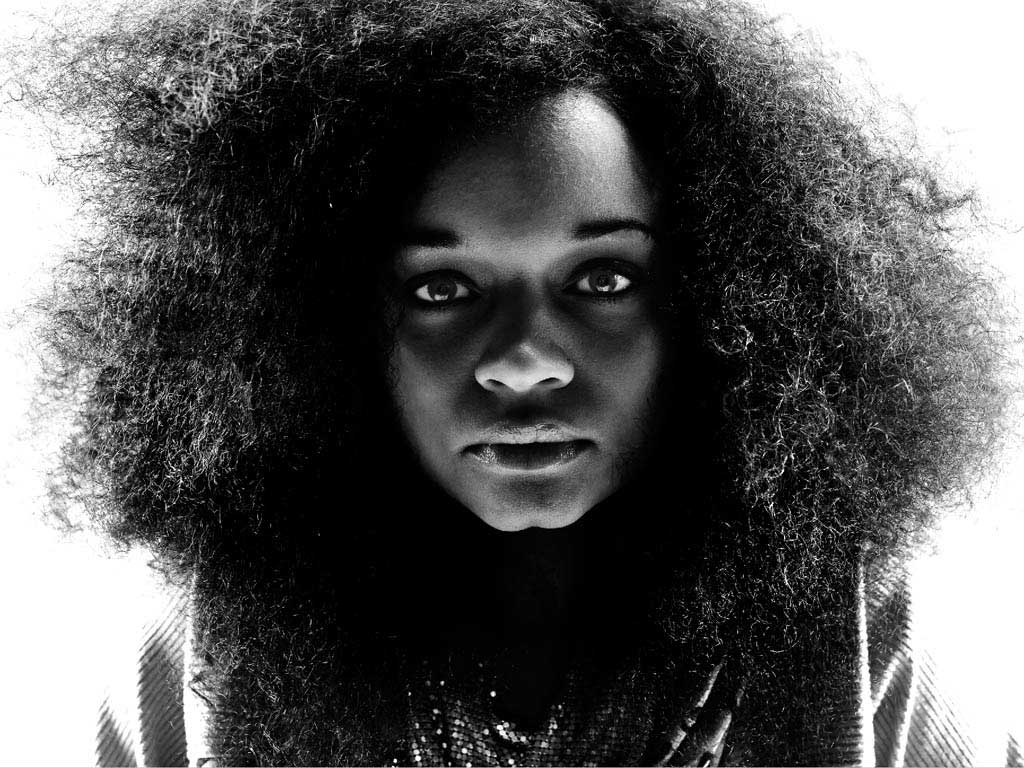
Photoshop Finished File
——–
Note: NO, we didn’t have too much eggnog and accidentally re-publish a post from just before the holidays… We did, however, get a TON of reader requests from a lot of y’all who are using less and less Photoshop, and asked Scott if he could get similar results in Aperture or Lightroom. Short answer is YES. To that end, Scotty re-worked this image using Aperture and wanted to share his process with you here. Take it away Scott!
——-
Update: I just heard that this black & white work from Seattle 100 was just featured today in Communication Arts! I’m a huge fan of Comm Arts… very humbled and very stoked. Please check it out here. [thx Lou Maxon!]
—-
The above file on the left was processed entirely in Aperture. The above file on the right is the Photoshop version that we discussed before the holidays. One can certainly nitpick to find details that are different between the two, I know I did, but that would be missing the point.
Speaking of the point, let me get to it. These two images were processed with different RAW algorithms, retouched, adjusted, smooth, and sharpened with different tools with different abilities and nuances. People will rant and rave ad nauseum online about the differences between software offerings. Yet despite all of the obvious discrepancies between the Aperture and Photoshop methods, the net result is very much the same. The vision is important, the method is not. Join me after the jump to learn more.
Lest I come off ungrateful, let me make clear that I love the tools. Photoshop is a brilliant program that has literally set the bar. Aperture has more features packed in than ever though possible even a couple of years ago, and continues to encroach on ground that has historically been squarely in Adobe’s court while providing usability and integration that is absolutely groundbreaking. These two, and a number of other programs offer the photographer and retoucher a set of tools that provide almost limitless possibilities. These are fun times.
In the spirit of sharing and transparency, I’d like to run through the process that I went through in Aperture in order to create the final image, as long as y’all promise not to get too caught up in the details.
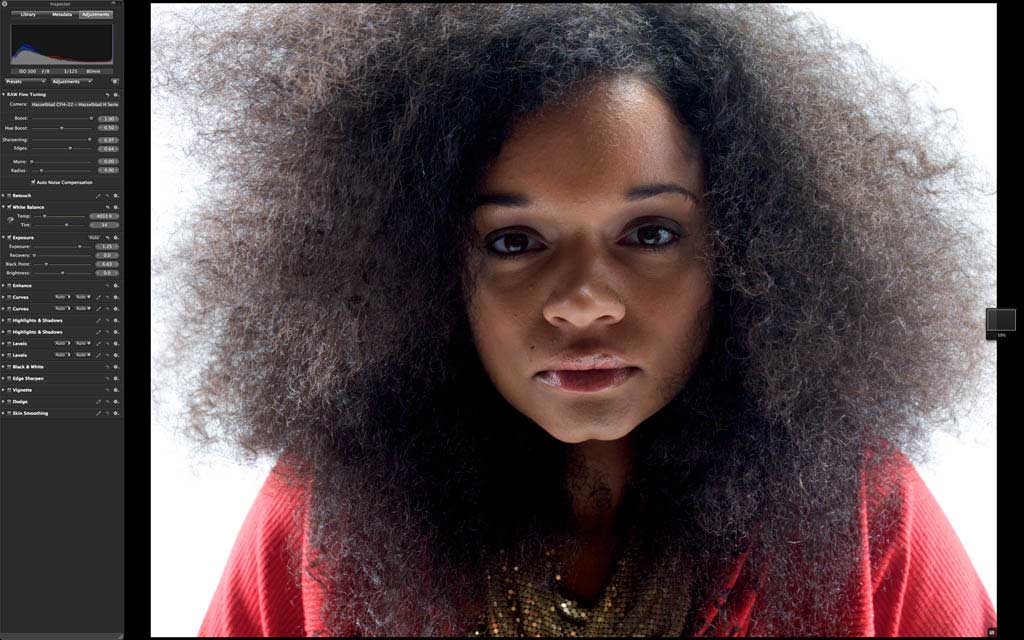
Original DNG in Aperture
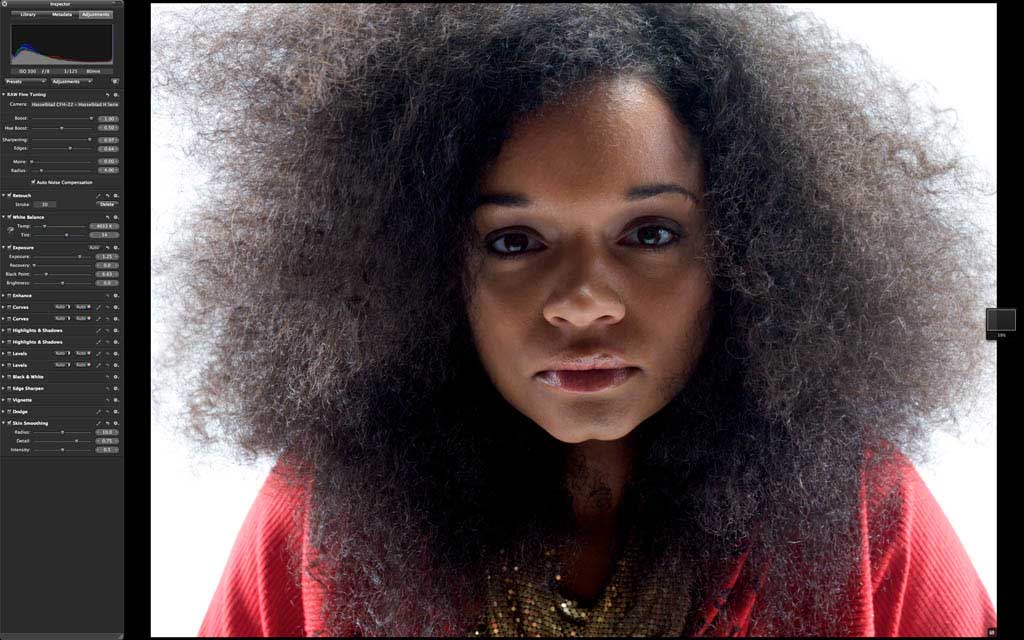
Step 1. Light cosmetic retouching with retouch brush and skin smoothing brush.

Step 2. Converted to black and white using the Aperture Black and White tool.
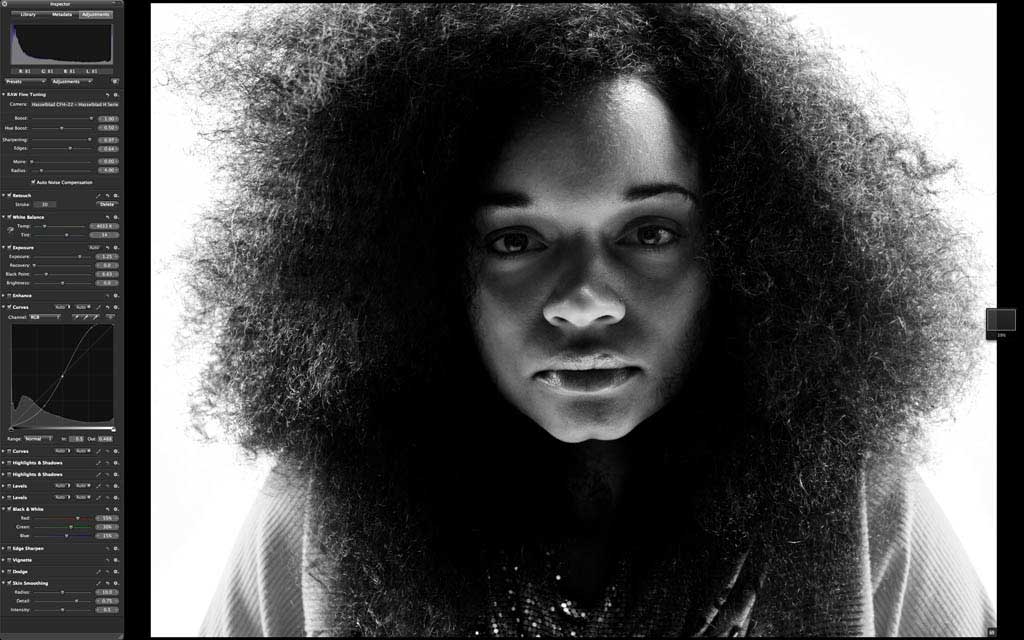
Step 3. Curves to increase overall contrast.
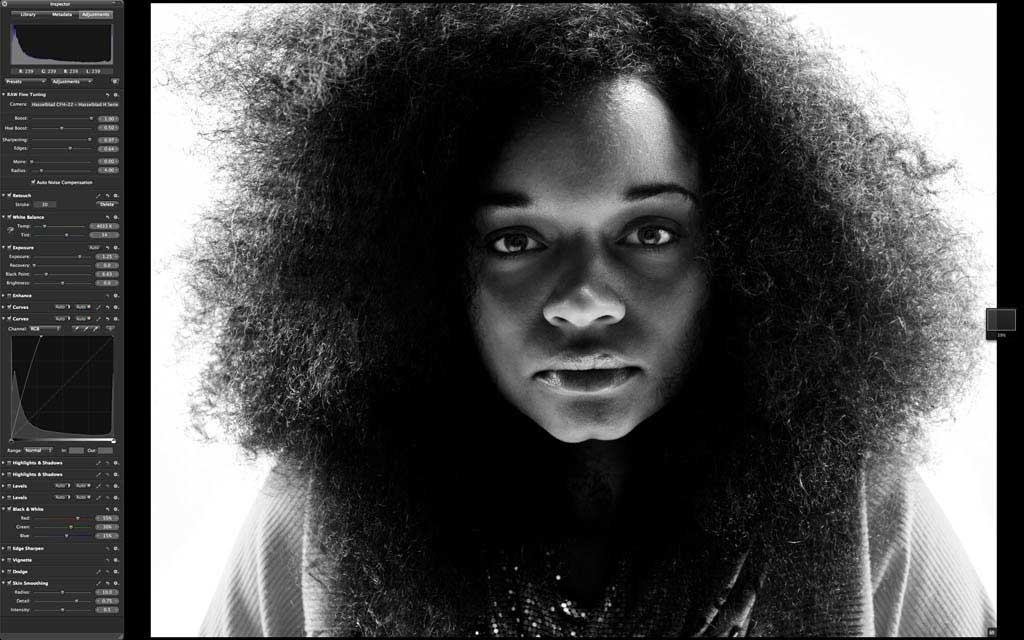
Step 4. Curves brushed in to increase brightness in her eyes.

Step 5. Levels to darken shadows and midtones while maintaining bright highlights.
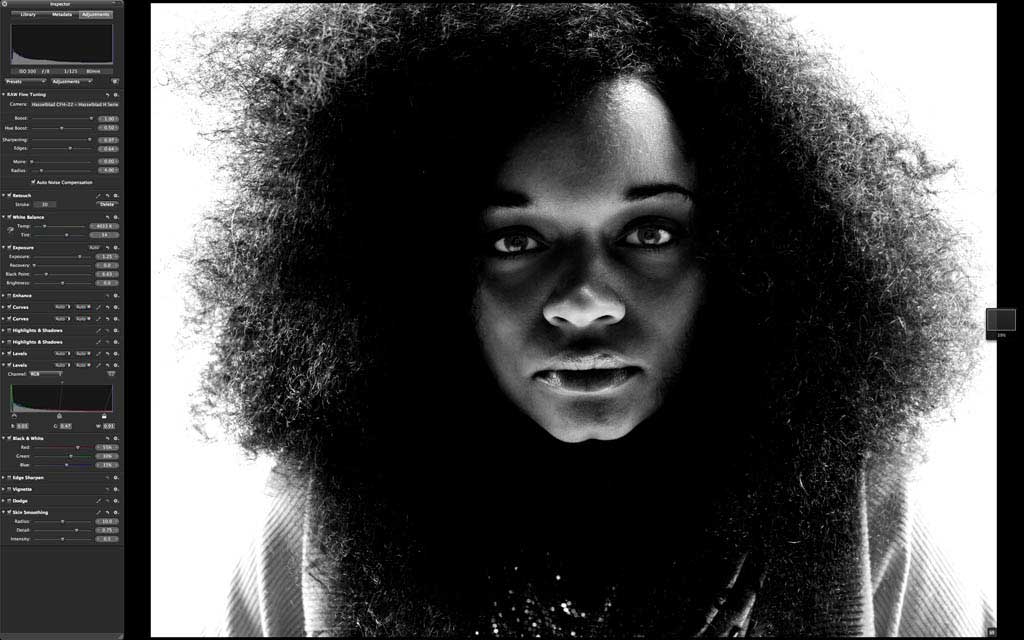
Step 6. Levels to push whites in exterior areas to bright white.
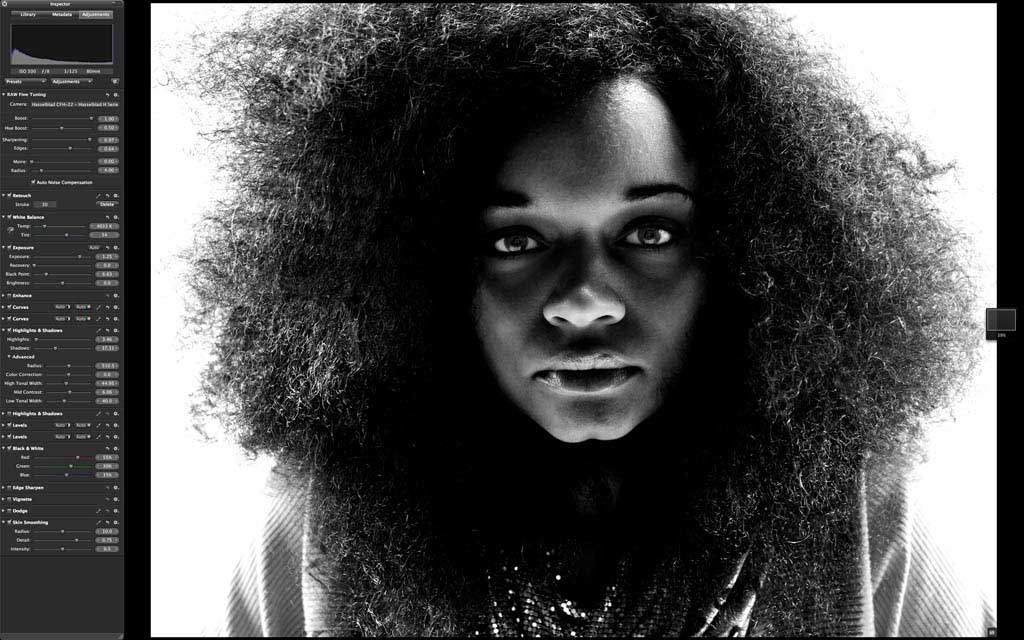
Step 7. Highlights and Shadows tool brushed in to increase hair texture.

Step 8. More of the same with the Highlights and Shadows tool.
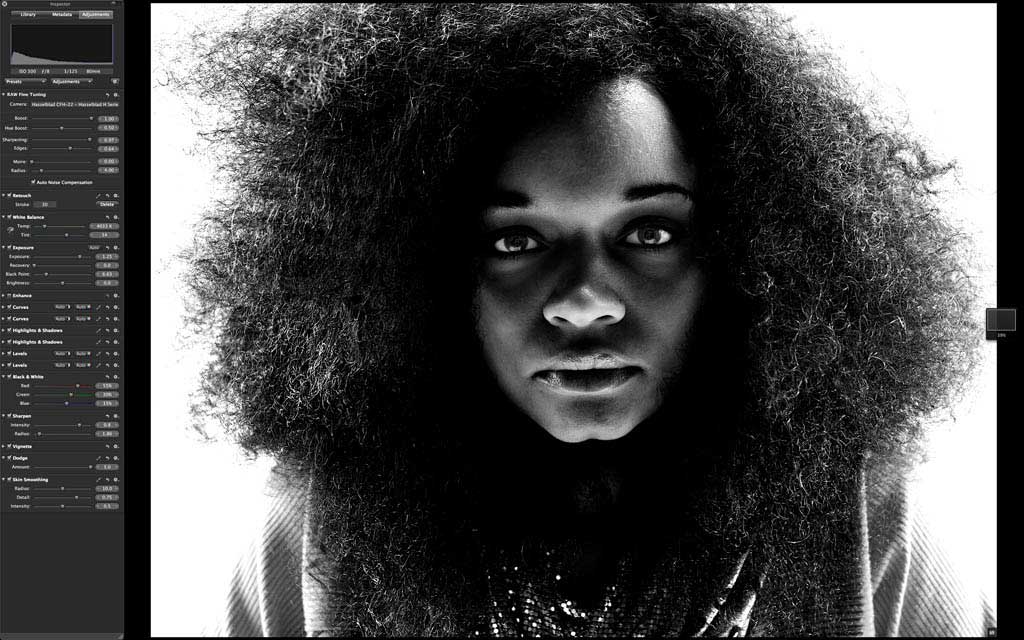
Step 9. A little dodging brush in the eyes, a light vignette to keep the hair on the far edges from blowing out, and some moderate sharpening with the sharpen tool.
That’s it. Cool, eh? Let’s all go forth and play. Any software, any hardware. Just bring your creativity, it’s all you need.
BTW, if you haven’t seen the snazzy Seattle 100 site developed by our friends at TheSuperformula, there are about 900 more B&W images, plus a whole lot more. Check it out here and click around a little–it’s not to be missed. Happy New Year! -Scott












Scott, I would be interested to know how long it took you to do this in Aperture vs Photoshop? I see lightroom and aperture as fantastic tools that allow us to do many of the things we have done in Photoshop up till now, however, I find that these tasks can be done quicker in Photoshop (and with more flexibility because of layers).
I find the tools a little more clunky to use in Lightroom, but I don’t have specific Aperture experience.
Brence,
I don’t really have a fair comparison since when I was initially working this image up in Photoshop I was developing the aesthetic as I went so there was some trial and error. When I did it in Aperture I was matching the file I already had, so it was quicker.
I used to be a lot faster in Photoshop than Aperture when making complex adjustments, but now it’s probably about even, it’s just a matter of getting comfortable with the tools and workflow.
Regarding “The vision is important, the method is not”, the method does play a part in what it costs to use it… once you get proficient with an integrated workflow tool like Aperture (or in my case, Lightroom), you’ll be substantially more productive after a shoot than having to exit your workflow to Photoshop on a case-by-case, one-by-one basis. It “costs” less to quickly play around with an image (or a 100 images en masse) in Aperture than in Photoshop, allowing you to explore more images more creatively in less time and with less commitment to a specific idea that may not pan out.
None of this really matters if you’re given a specific task for a specific image, but coming back after a shoot with 1,000 images, you’ll be able to explore and probe and experiment orders of magnitude more with Aperture, opening yourself up to some serendipitous surprises.
Scott,
I’m very glad to hear that Aperture is an option for something like this. There are times still when I need photoshop, but I prefer to stay in Aperture as much as possible and I think this is pretty neat!!
BTW – by DNG do you mean the NEF from Nikon? Or do you convert the NEF to DNG like for the H3D?
Thanks for time/work on this post!
Dave
My bad, we keep the Nikon files in the NEF format and the Hasselblad files are converted to DNG.
I would love to see a side by side of a Lightroom and Aperture photo done by Chase and his crew. Since apple opened up the app store and lowered the price of Aperture to $79 I decided to give it a try the other day. I found a trial version and did my own side by side and thought the results were way better in Lightroom. The only thing I didn’t like about aperture, was the speed, and processing. Everything else was beautiful. The other thing is that I have thousands of photos in my Lightroom library with some sort of processing done to it, major and minor, on almost all of them. I don’t think there is anyway to switch those over and keep all the changes.
Im not going to lie, to my eye I can’t really tell the difference (I can see small differences!) But great to know photoshop isn’t the only option anymore, with Aperture being so cheep in the mac app store now it really gives photoshop some competition in terms of features vs price!
Great blog!
(Saved me from going insane doing spanish!)
Very inspiring!
Do you always convert and use the raw files as DNG?
Johan, we keep the Nikon files in their DNG format. This image was shot with the Hasselblad H3D. We convert the Hasselblad FFF files into DNG before we do the raw work.
Oops, I mean we keep the Nikon files in NEF format.