
You have a killer mood board, a specific lighting setup you love, or a textural quality that defines your brand. But applying that exact “vibe” to a completely different subject, or across a hundred different assets? That used to take hours in post-production, complex lighting grids, or endless attempts at prompting.
But today, I’ll show you how to take the style of one image and surgically apply it to the “content” of another, with zero bleed-over.
We’re doing this using the new Gemini 3 model, specifically the image creation function called Nano Banana Pro, which is ridiculously good at understanding texture, lighting, and saturation. I’m going to show you how to do this in a node environment like Weavy, and then how to do a quick version in the Gemini app on your phone.
![]()
The Concept: Separating Style from Content
Most AI image generators mash everything together. You type a prompt, hope for the best, and get a slot-machine result.
To do professional work, we need control. We need to tell the AI: “See this image? I only want its lighting and texture. See this other image? I only want its subject.”
This is called style transfer, but the Nano Banana Pro model takes it to a level I haven’t seen before. It doesn’t just slap a filter over your image; it re-renders the subject from the ground up using the physics of the style reference.
![]()
How to do Nano Banana style transfer in Weavy
Style Transfer Using Weavy (aka Figma Weave)
For complex projects where I need absolute control over inputs and outputs, I use a node-based interface like Flora or Weavy (now known as Figma Weave). If you’ve ever used Nuke or Davinci Resolve Fusion, this will feel familiar. If not, don’t panic- it’s just connecting dots.
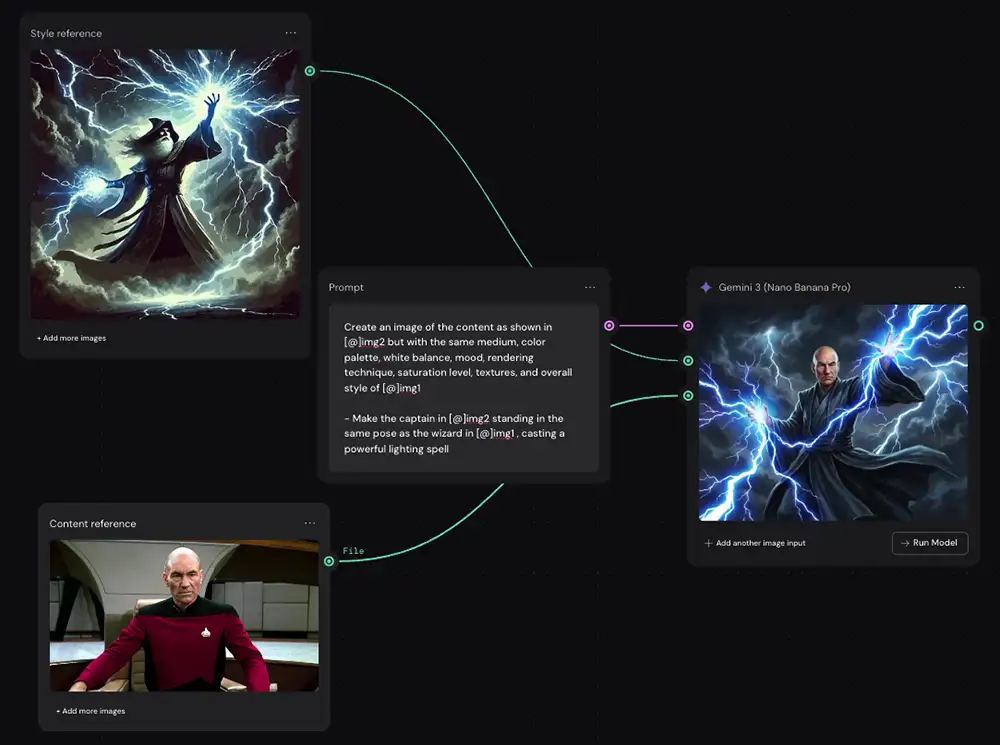
Look at this setup. It looks complicated, but it’s actually just three steps.
Step 1: Define Your Inputs
In Weavy, we set up two distinct input nodes via “Import” nodes:
-
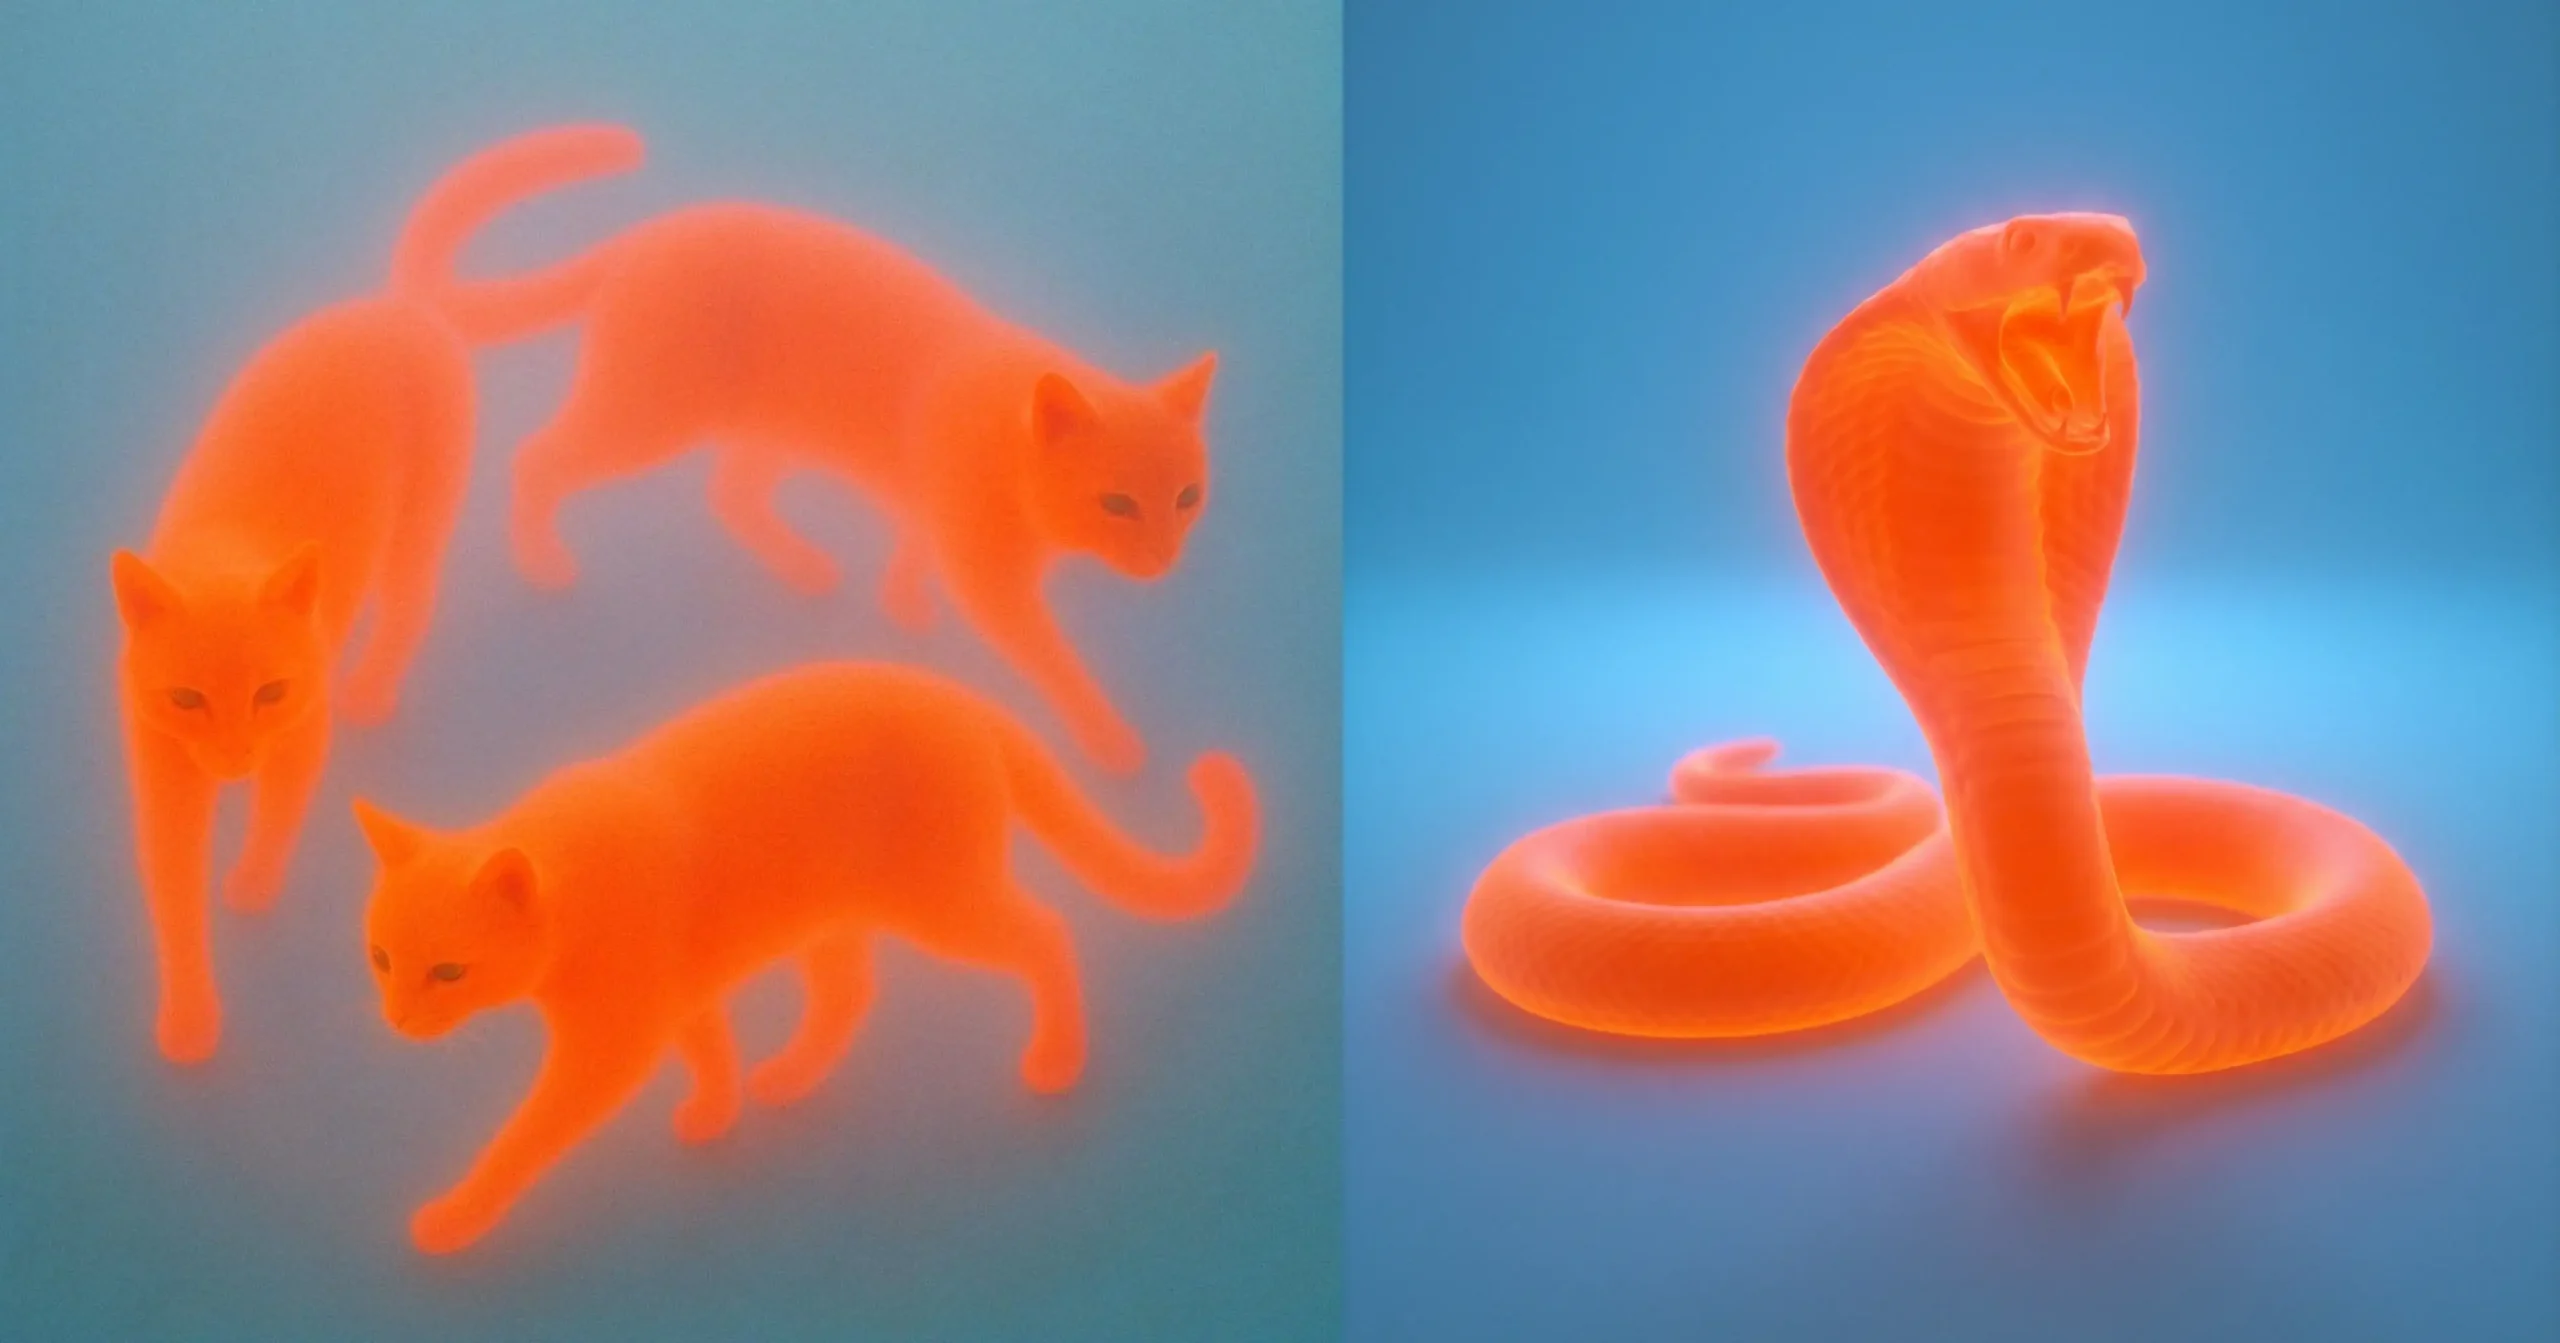
The Style Reference: This is the “vibe.” In my example, I’m using an image of cats rendered in a glowing, subsurface-scattering, vibrant orange style against a blue background. I don’t want cats in my final image; I just want that radioactive, gummy texture and lighting.
-
The Content Reference: This is the “subject.” Here, it’s a standard photograph of a king cobra.
Step 2: Creating the new image with Nano Banana Pro
Now, feed both the style image and the content image into the Gemini 3 node.
But we don’t just plug them in randomly. We use a text prompt node to act as the director. The prompt explicitly tells the model how to handle the two inputs.
The prompt I used is important:
“Create an image of the content as shown in [@]img2 but with the same medium, color palette, mood, rendering technique, saturation level, textures, and overall style of [@]img1”
Notice the precision. I’m asking for the medium, rendering technique, and textures of the style reference.
Creating a custom prompt that mentions the details of the images will almost always work, but it isn’t as scalable so I suggest avoiding it if possible
Step 3: Review the output, finalize in Photoshop if needed
The result is almost flawless. The model identified the cobra (content), stripped away its original photographic texture, and re-sculpted it using the glowing orange, translucent style of the reference cats.
It didn’t try to turn the snake into a cat. It understood the assignment perfectly: style transfer.
Notes:
- This prompt should work with any two images, so you can just drop them in and run it (or use the prompt concatenator for more flexibility)
- You may need to re-run this a few times to get exactly what you want. Don’t give up on the first try.
- As a last resort, you can write a custom prompt and that should work every time.
- You may need to make a few adjustments in Photoshop, for example you can see the saturation and white balance are slightly off in this one.
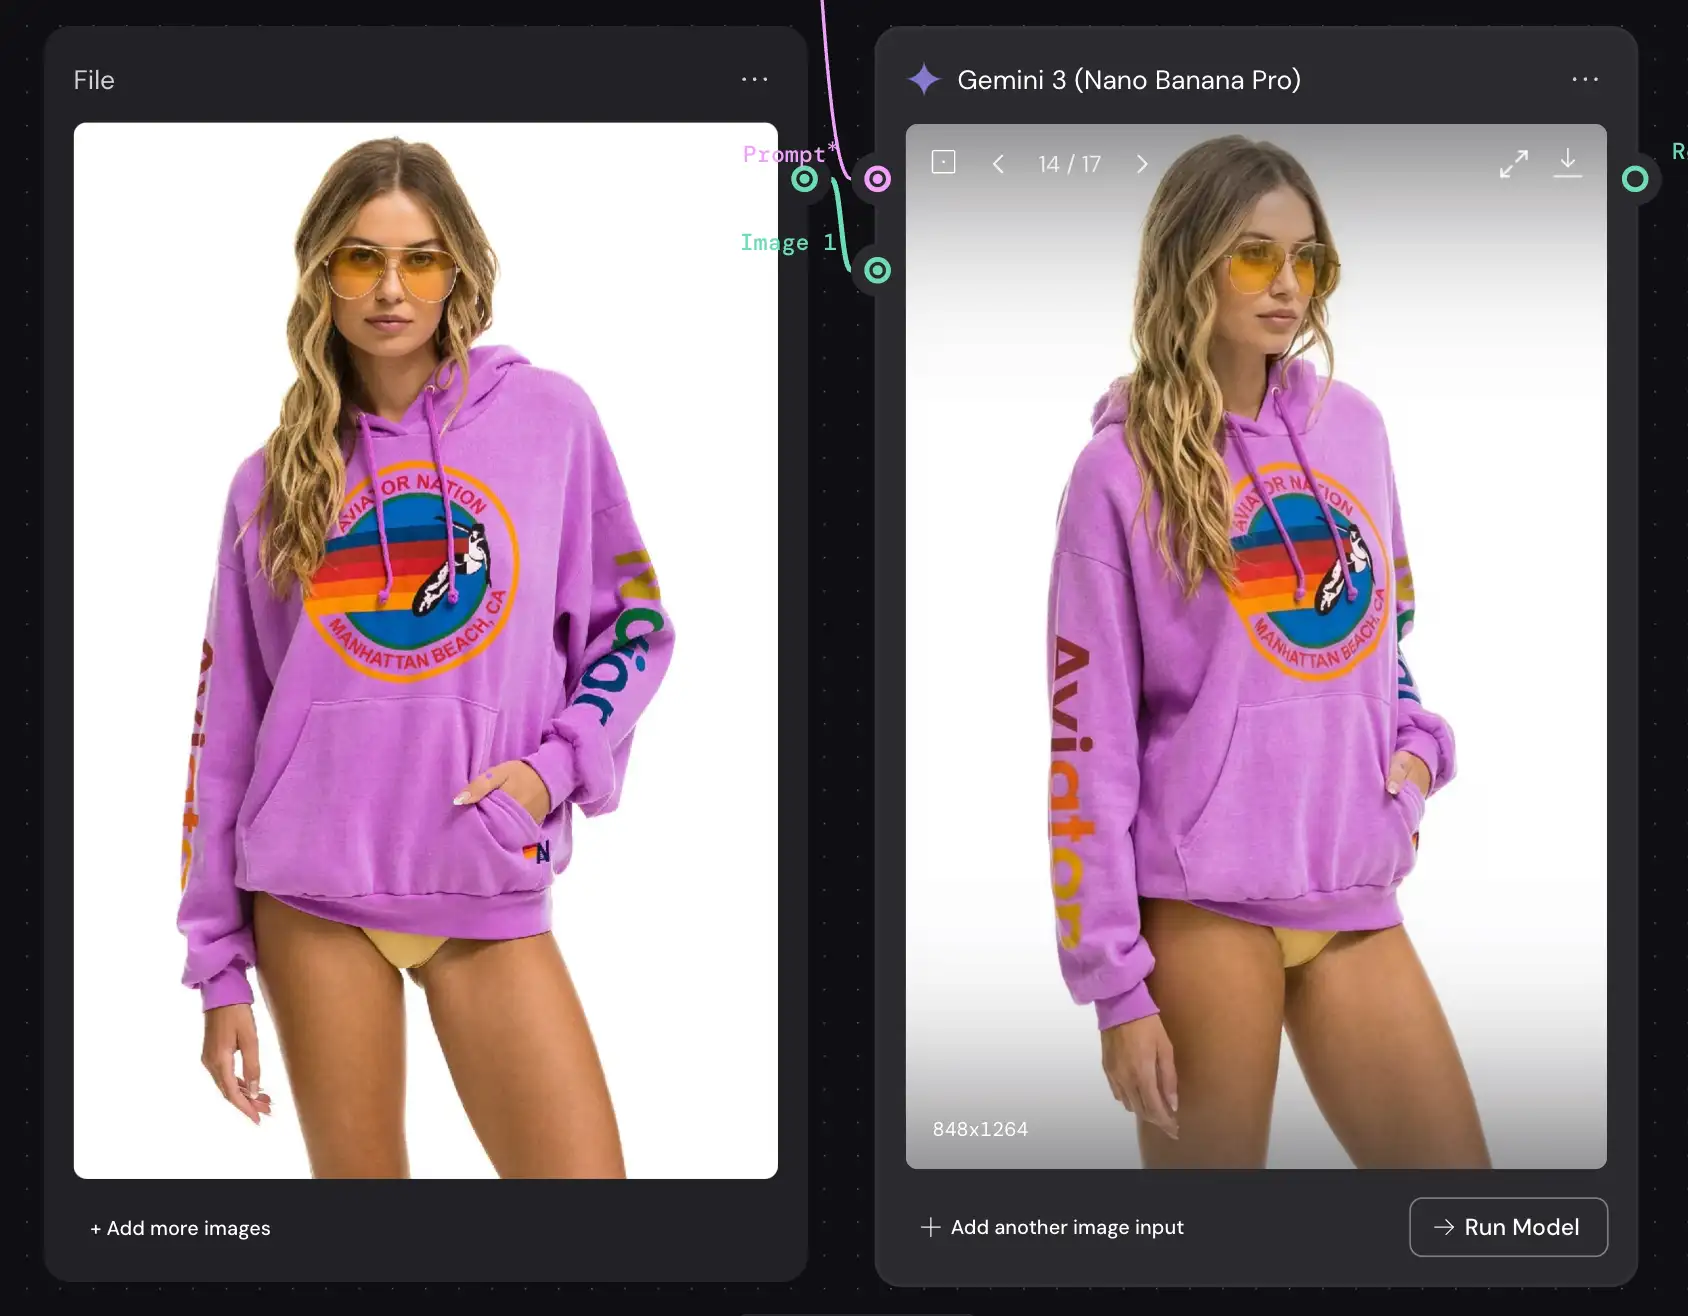
![]()
The same prompt and approach works in just about any app that uses Nano Banana (Higgsfield, in this case)
Style Transfer Using the Gemini App
If you’re on the go, don’t have Weavy etc, this works with the the Gemini app too. It won’t have the surgical node precision or organization of Weavy, but for rapid ideation, it does the job (although it will have a watermark).
Here is how you talk to Gemini to get this done:
-
Open the Gemini App. Make sure you’re using Nano Banana Pro
-
Upload Your Images. You’ll need to upload both your style reference and your content reference into the chat.
-
The Prompt. “Create an image of the content as shown in [@]img2 but with the same medium, color palette, mood, rendering technique, saturation level, textures, and overall style of [@]img1”
- Click “Download full resolution” in the upper right of the generated image to get the 4K file.
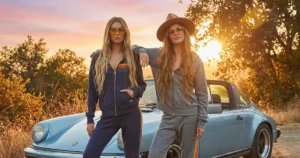
![]()
But note that the Gemini app has some annoying limitations:
- Harder to iterate. You can try giving it feedback (“That’s close, but make the neon reflections on the leather sharper, like in the reference image”) but it tends to get stuck on the first image and ignore your direction.
- It adds a watermark (not great for any kind of pro work)
- Aspect ratio must be specified in your prompt
Switching to Weavy, Higgsfield, Freepik, etc fixes all of these – definitely recommended for anyone doing this professionally, eg setting up a virtual fashion product shoot (and reposing the models like this if needed), or editing an image from Midjourney.
Why This Matters
This isn’t just a cool party trick. This is about creative leverage.
-
Brand Consistency: You can define a “master style image” for a campaign and ensure every single asset generated matches that exact lighting and texture.
-
Rapid Prototyping: Show a client a product shot in five different distinct photography styles in minutes, without setting up a single light.
-
Unblocking Creativity: Sometimes you know what you want to shoot, but not how it should look. Grab style references from wildly different mediums – oil paintings, 3D renders, microscopic photography, etc – and apply them to your subject to see what happens.
The tools are here. The Nano Banana Pro model is a beast for this kind of work. Don’t let the tech intimidate you. Dive in, connect the nodes, write the prompts, and create something today.
PS – Here’s how to remove the watermark…


")


")
")

