

 HDSLR video is a great way to get high quality footage on a micro budget; and a great way to keep that budget micro is to be picky about what accessories are right for your setup. I recently received an email question focused on this and–in particular–if I had to choose between the Rode Stereo Videomic or the Zoom H4n, which would I use? So here’s a little background on my thinking…
1. Cost. They cost roughly the same amount, and I use both on a regular basis, so the question is a tough one.
2. The Rode. I recently did a blog post about the Rode Mic a few months ago. You should read it, but to summarize; I love the thing for its straight forward simplicity. It allows me to just shoot and not worry about sound, but…
3. The Zoom. …When I DO need to worry about the sound (such as an interview or a scene in a narrative film) I bust out the Zoom H4n. It captures better files that the straight camera – remember it’s sole function is audio.
So, while my preference is to have both, if forced to chose one, I would buy the H4n. Here’s why: with a little hack, spending a little more cash and buying one extra cable plus a hot shoe adapter you can turn the Zoom H4n into a badass on-camera mic. Here’s how:
First, get a hot shoe adapter like this one and mount your H4n on top of your camera.
Second, plug this line-out splitter into the headphone jack of the H4n and plug the male end of it into the mic input on your camera. Now your camera will record what the H4n’s microphones are picking up and your H4n will record a high quality, AGC (automatic gain control) free backup file.
Third, you can even monitor what the H4n is recording with 1/8” headphone jack on the fancy new cable you bought.
Lastly, an important tip. Make sure the H4n is recording! It’s easy to forget to start your audio recorder when the director just yells “Roll camera!”.
This is a little more of piecemeal one-man-band kinda setup than using just a microphone like the Rode, so make sure you’re familiar enough with your equipment to make it work properly without slowing down the production while you make adjustments. You’ll probably be in the role of be being audio guy and camera guy, so make sure to practice to get good at both.
Here’s an enlarged image of the thumbnail above, highlighting the cabling. Keep in mind that these cables were purchased at RadioShack a while back just to test out my original hack job/experiment. If you buy the cables I linked to above from B&H, your setup will look much slicker than this first attempt pictured here.
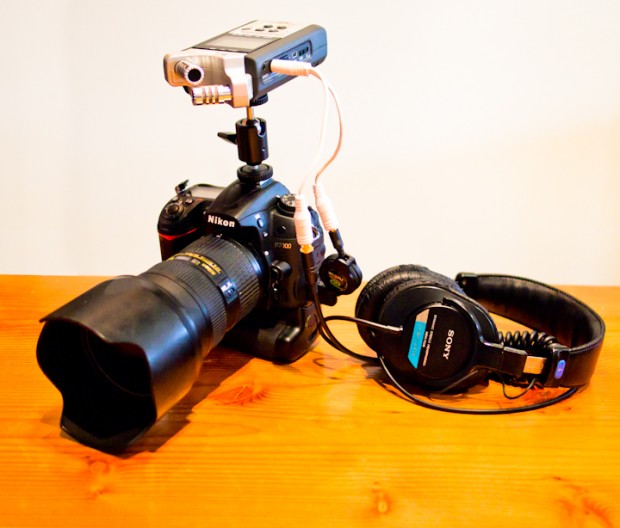
Here’s a picture of my setup with cables purchased at RadioShack. If you buy the cables I linked to above, your setup will look much slicker than mine.


")


Thanks Eric!
Ho well, too late cause i bought the Rode mic two weeks ago.
I didn’t even test it yet, but il will.
Thanks for the tip anyway.
How do you attach the Zoom to the ballhead? I assume it doesn’t come with a tripod socket.
It does have a screw mount on the bottom.
Hey Chase! I follow your blog constantly and myself am trying to get to the point to shoot full time. I actually work for the company that manufactures those Sescom cables and I have to honestly say, they work pretty awesome. I don’t do a ton of video stuff myself yet, but they are a pretty easy workaround in a cable. Neutrik or switchcraft connectors and belden cable. I hate that I feel like I’m promoting these right now being a fan but I saw the one link and figured I’d say something since they are pretty handy. I can have a few sent to you if you wanted to check them out too!
I’d also highly recommend a good windsock for the H4n too – I bought one from Redhead Windscreens and for the past two days have been shooting out in blowing winds on assignment here in Michigan and it was amazing good. Zero wind noise.