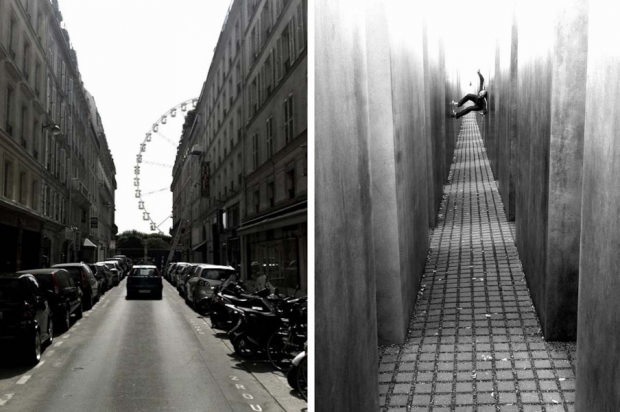
My iPhone has been like crack to me since the day one on the market, June 3, 2007. Most of us iPhone users make regular and swift use of the impressive ‘Net, email, and location-based tools, but as a professional creative I’m always using the built-in camera to grab snaps of anything that catches my eye for ideas, inspiration, and such. In fact–in case you didn’t know–I post daily mobile iPhone snaps to my Facebook page and my Twitter account for fun (friend/follow if you’re interested.)
That said, I dunno if it’s been the pile of comments I’ve received from those sources, the numerous ranting requests via email, or the hilarious fact that someone actually started a Facebook group called “Chase Jarvis Shoots Better Pics with His iPhone Than I Could With a Hasselblad”, but I figured–since people have grumbled to me about such challenges and since grabbing snapshots is a part of my daily creative routine for staying fresh and inspired–that it would be good fun to post a quick ‘how to’ checklist for making great iPhone pictures. So here goes:
Tip 1. Hold the camera still, using two hands.
Seriously. Whether shooting vertically (portrait) or horizontally (landscape), day or night, inside or out, use two hands and don’t wiggle until the shutter has entirely closed in the viewer. This is 75% of the battle.
Tip 2. Compose the shot with your finger on the camera button.
The shutter release on this camera goes click when you release your finger from this button, not when you press the button. As such, do all your composing with your finger on the trigger and simply lift your finger when you like what you see in the viewer. This will help you keep the sucker steady (Tip 1) and will help with your timing.
Tip 3. Avoid fast-moving subjects and low light.
Let’s face it, a little phone camera doesn’t have the same smarts as your Nikon D90 (ams)or D3x (pros), so don’t ask it to behave like one. Without dissecting the boring details, this camera just isn’t made to shoot slick action images of skateboarding or sexy images of your significant other on the dance floor at 2am. [Click the ‘continue reading’ link below for more tips and sample photos after the jump…]
—
Tip
4. Keep it simple.
I’ve never been much of a traditionalist, but my style is typically pretty clean. Take this to heart and we’ll skip the composition lesson, but in the meantime we can boil things down to this: pictures with one or two graphic elements are generally better than busy images with tons of clutter. This concept is amplified with the iPhone camera which lacks the chops to render the subtleties that your dSLR can. So just like Tip 3, don’t ask it to try. Keep your subject matter simple and your pictures will be better.
Tip
5. Buy three applications for your iPhone: Best Camera, Camera Bag and Pano. Best Camera ($2.99) app lets you shoot, creatively edit and quickly share your iPhone photos with the world. Offering multi-tasking, new filters, a customizable filter interface and sharing options, Best Camera app offers a powerful and easy-to-use set of filters and effects for your iPhone. Stack them. Mix them. Remix them. The possibilities are virtually infinite. When you’re ready to share your images, Best Camera lets you quickly and easily upload them to Facebook, Twitter, Flickr, SmugMug, email and of course, thebestcamera.com. Exclusive to Best Camera, touch the app’s globe icon to view a real-time gallery of images streaming in from other Best Camera users all over the planet. [Full disclosure – Best Camera is my invention]
Camera Bag ($2.99) has a series of pre-selected aesthetics, including “Ansel” and “1962” (black & white), “Instant” (polaroid), “Helga” and “Lolo” (vignetted, toy camera), “1974” (funky muted colors), “Fisheye” and “Infrared” (self-explanatory), and “Cinema” (cinematic 16X9 aspect ratio) that takes your vanilla iPhone snap and spits out something more interesting. Pano ($2.99), another great app, lets you take series of pictures and sew them together seamlessly in-camera to make one giant horizontal by following a series of simple prompts. Goodbye Photoshop. Both these apps allow you to save the final “new” picture directly to the Camera Roll in your iPhone, and will really help bring your snapshots to life.
Gasworks Park, Seattle. “1962” Theme from Camera Bag.
Gasworks Park, Seattle. 3-photo panorama from Pano.
That’s it. Seriously. So, whether you’re a pro shooter using the gadget of the century to help fuel your creative inspiration, or a you’re just looking for a way to take a picture of your girlfriend that doesn’t suck, I hope these tips help demystify the great iPhone snap.
[In case you’re interested in following these low-brow snapshots, or any of this ‘creative discovery/means of inspiration’ stuff that doesn’t always make it to my blog, it usually goes down on my Twitter feed or my Facebook page, so I’d love to have your ‘friend’ and ‘follow’ accordingly.In contrast, if you’re visiting here via Facebook or Twitter, the more comprehensive behind-the-scenes highlights (videos and pithy topics, spectacles and disasters) always filter there way here to my blog, so I’d encourage you to subscribe to this beast via email or RSS if you don’t already.]


Valuable information ..I am delighted to read this article..many thanks for giving us this valuable information. Fantastic walk-through. I appreciate this post.
thanks for this one..very helpfull and pretty impressive…
great article … can’t wait to use it on my iphone