
You have too many tabs open.
If you’re a working creative today, you know the drill. You have Midjourney in Discord for generation, Magnific open for upscaling, Photoshop for compositing, and maybe Runway or Kling for video. Your files are scattered across three different hard drives and a “Downloads” folder that looks like a digital landfill.
![]()
We are entering a new phase of AI adoption. The “slot machine” phase—where you type a prompt and hope for a lucky spin—is over for professionals. We need reliability. We need systems. We need to be able to do it again, exactly the same way, but different.
Enter Freepik Spaces.
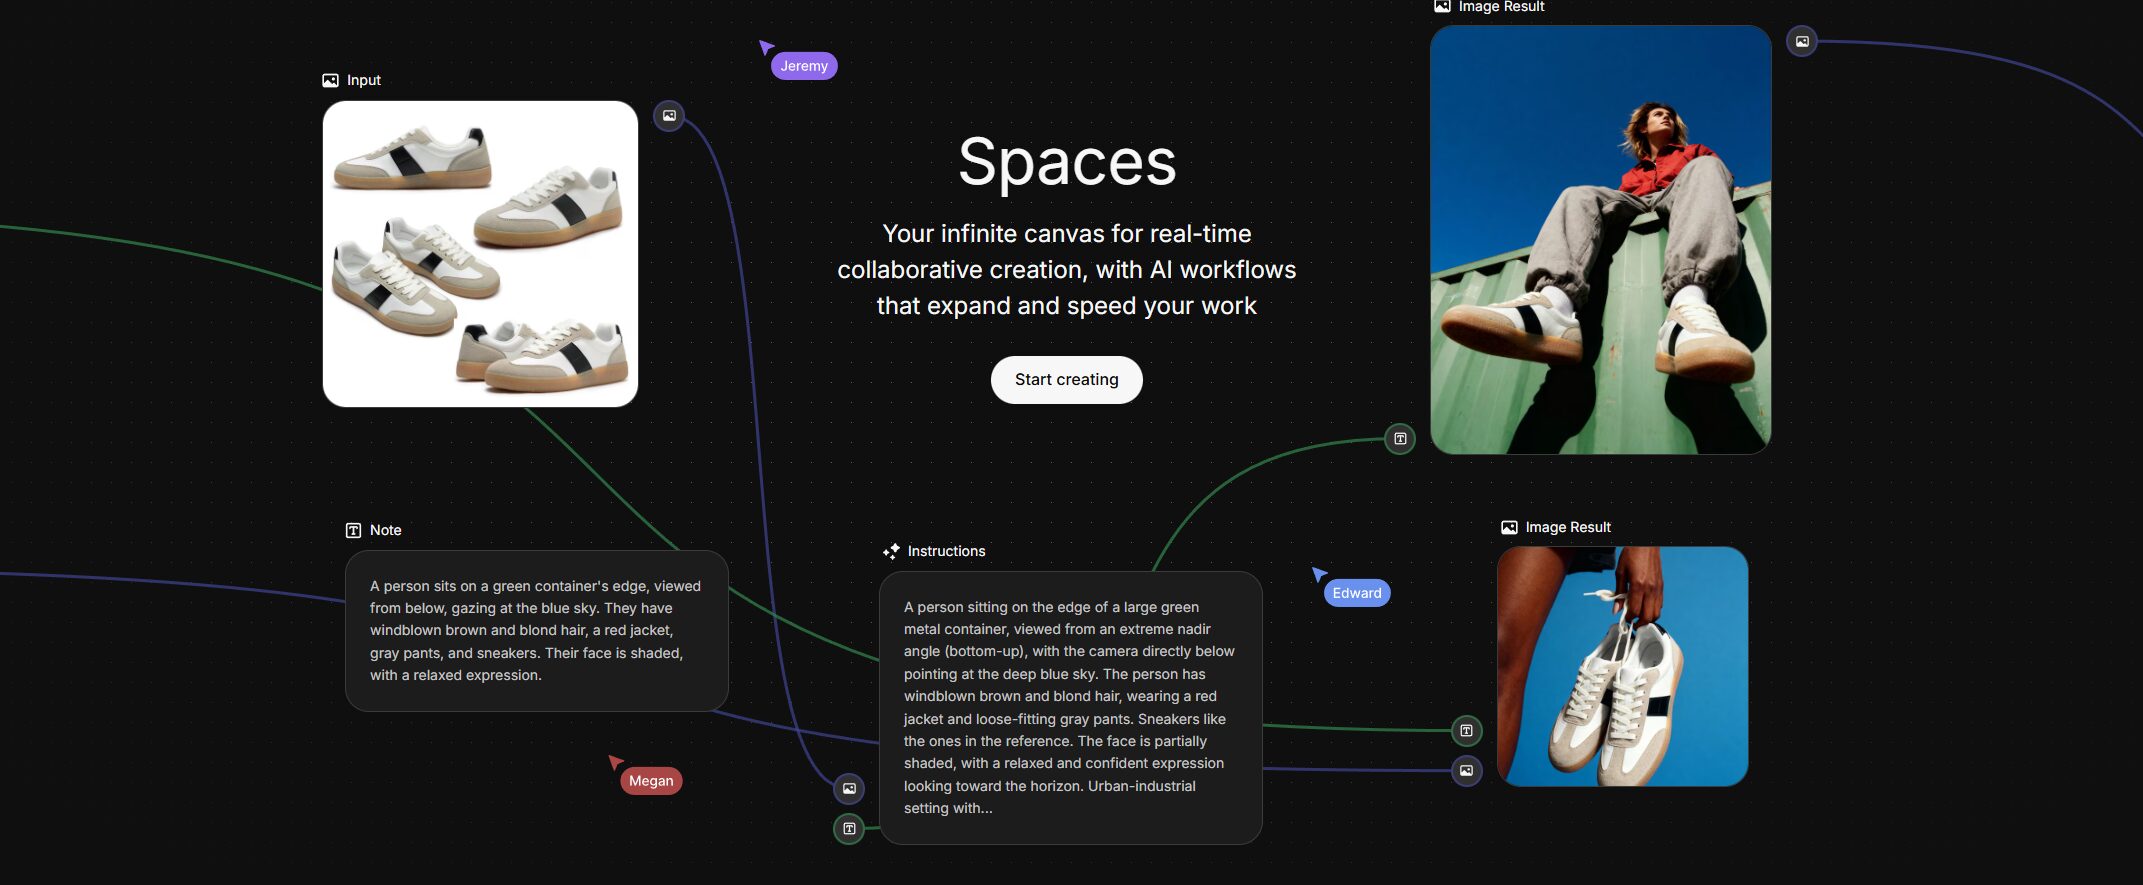
This isn’t just another image generator. It is an attempt to build an operating system for creative workflows. It replaces the chaos of app-switching with a single, infinite canvas where you can chain tools together.
Here is the honest breakdown of what it is, how it works, and whether it deserves a spot in your professional toolkit.
What Exactly Is Freepik Spaces?
At its simplest, Freepik Spaces is a node-based design environment.
If you have ever used tools like ComfyUI, DaVinci Resolve’s Fusion tab, or Blender’s geometry nodes, you understand the power of nodes. But if those tools give you a headache, don’t worry—Freepik has built a version that doesn’t require a degree in computer, science.
Instead of a linear chat box (like ChatGPT or Midjourney), Spaces gives you an infinite whiteboard. on this board, you place “Nodes”—blocks that perform specific tasks.
- Node A might be a text prompt.
- Node B is an image generator (running a model like Mystic or Flux).
- Node C is an upscaler (using Magnific technology).
You connect these nodes with wires. Text flows into the generator; the image flows into the upscaler; the final asset flows into a project folder.
This structure allows you to build pipelines. Once you get a look you like, you don’t just have a PNG; you have a recipe. You can swap out the text prompt at the beginning, and the entire chain updates automatically, giving you a consistent result without reinventing the wheel.
You can check it out directly at the official Freepik Spaces website.
How Can Creative Professionals Use It?
The biggest mistake novices make is treating AI like a magic trick. Pros treat it like a manufacturing process. Spaces is designed for the latter. Here are three specific workflows where this tool shines.
1. The “Consistent Character” Pipeline
One of the hardest things to do in generative AI is keeping a character looking the same across five different shots. Usually, this involves a lot of seed-swapping and praying.
In Spaces, you can stabilize this process using specific models like Nano Banana Pro.
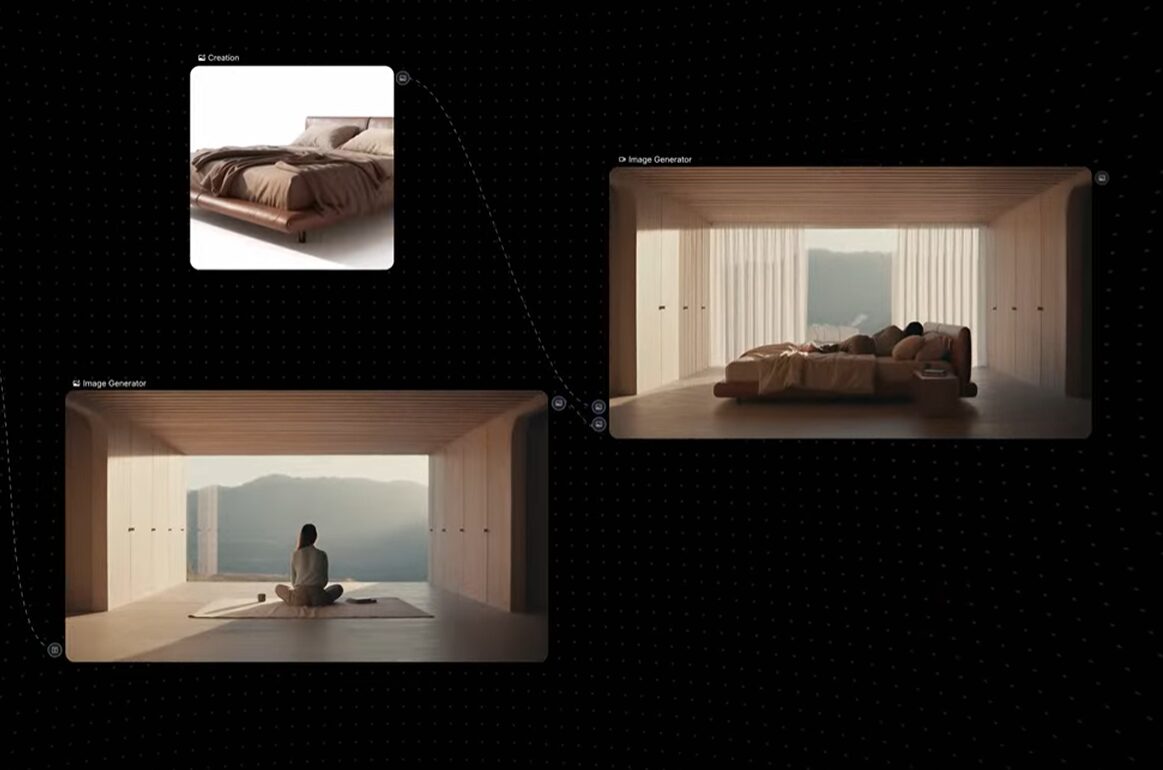
- The Setup: Create a “Character Reference” node with your subject’s base image. Connect this to multiple “Scene” nodes.
- The Workflow: You feed the same character data into three parallel generators. One puts them in a coffee shop, one in a boardroom, and one on a subway.
- Why it matters: Because the reference input is locked in a node, you ensure that facial structural identity remains consistent across all outputs. You aren’t re-rolling the dice on who your character is; you’re just re-rolling where they are.
2. High-Fidelity Asset Production (The Multi-Model Chain)
Freepik has aggressively acquired and integrated top-tier tech. You aren’t stuck with one generic model. You can daisy-chain the best tools in the industry on a single canvas.
- Step 1: Ideation. Use the Fast model to churn out 20 layout concepts quickly. It’s cheap and fast.
- Step 2: Generation. Pick the winner and feed it into Freepik Mystic. This is their high-end, Flux-based model. It provides photorealistic texture and lighting that rivals decent photography.
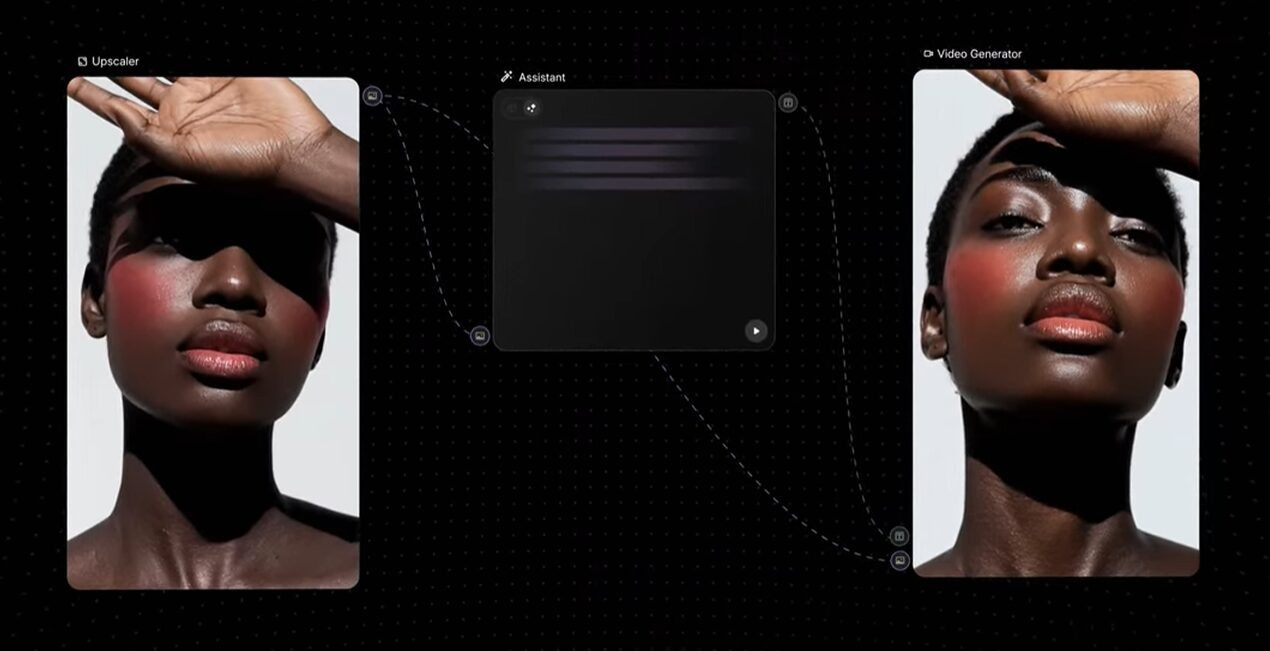
- Step 3: Upscaling. Connect the output to the Magnific node. This isn’t basic sharpening; it hallucinates detail, adding skin texture and fabric weaves that didn’t exist in the original generation.
- Result: You go from a rough concept to a 4K, print-ready asset without dragging a single file between browser tabs.
3. rapid Video Storyboarding
If you work in video, Spaces is a killer prototyping tool.
- Start with a text node to outline your script.
- Feed scene descriptions into image generators to create storyboards.
- The Kicker: Connect your storyboard frames directly to a Kling video generation node.
- You can watch your static storyboard turn into 5-second motion clips right on the canvas. If a client hates the lighting in shot 3, you tweak the prompt in the image node, and the video node downstream automatically updates.
Is Freepik Spaces Right For You?
Let’s cut to the chase.
You should use Freepik Spaces if:
- You need control. You are tired of prompts giving you random results. You want a system where changing an input reliability changes the output.
- You are an “App Hoppe.” If your current workflow involves downloading from Discord to upload to a web upscaler to download to Photoshop, this will save you hours of admin time.
- You work in a team. The canvas is collaborative. You can invite your art director to the board to tweak a prompt directly, rather than emailing “Version_Final_Final_v2.jpg” back and forth.
You should skip it if:
- You want one-click magic. If you just want to type “funny cat” and get a picture, this is overkill. Stick to a standard chat interface.
- You are a dedicated ComfyUI engineer. If you are already building complex Python workflows and training your own LoRAs locally, Spaces might feel too simplified for your technical depth.
Freepik Spaces is a bridge. It brings the power of node-based architecture to creatives who don’t want to code. It transforms AI from a toy into a toolbelt. If you’re serious about building a career that leverages AI rather than being replaced by it, you need to learn to build workflows, not just prompts. This is the best place to start.


? The 100% honest review...")
")
")


