
Midjourney is arguably the most aesthetic tool in our kit right now, but let’s be honest: it can be a nightmare to control.
It’s like working with a world-class painter who refuses to listen to your feedback. And specifically, editing in Midjourney has historically been unpredictable – but it IS possible, as long as you don’t expect it to work miracles. Ideally you want to one-shot your Midjourney images with the right style and image references (see my guide here).
That said, if you DO need to edit (aka inpainting) here’s 4 options I like to use:

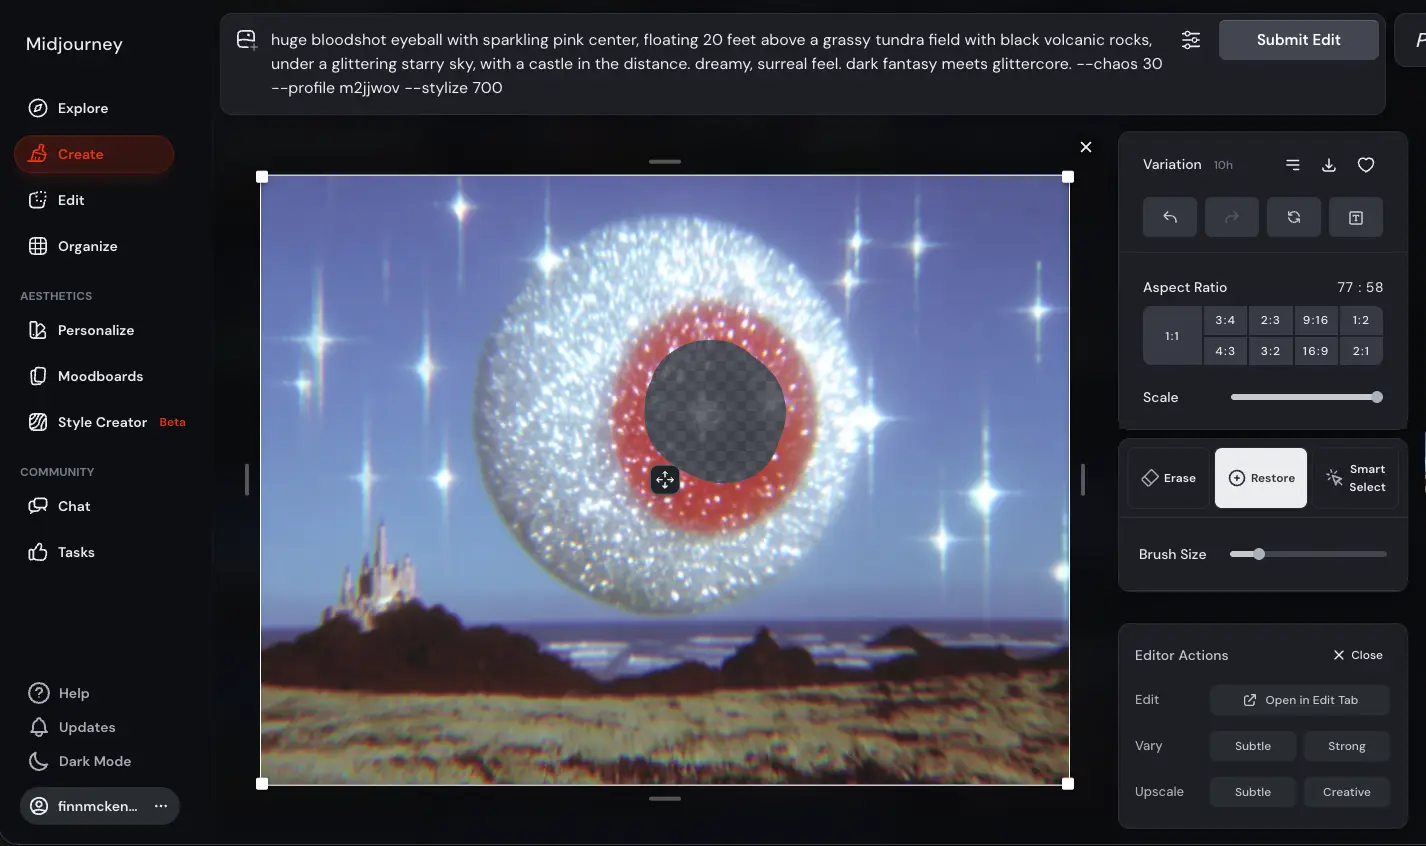
Option 1: The Edit Button (surgical fix)
This is your go-to for inpainting small details. Maybe you love a portrait but the iris of the eye has a distracting, sparkly artifact (like in the eyeball example below). Or maybe there’s a weird bird in the background of your landscape that’s ruining the focus.
The Workflow:
-
Select your upscaled image and click the “Edit” button (or “Vary Region” in Discord).
-
Use the brush to erase the specific area that’s bugging you.
-
Submit the edit with your original prompt.
By doing this, you’re telling Midjourney: “Don’t touch the rest of the canvas, just re-roll this specific patch.” It’s the fastest way to clean up “AI funk” without losing the magic of the original generation (the holy grail of inpainting).
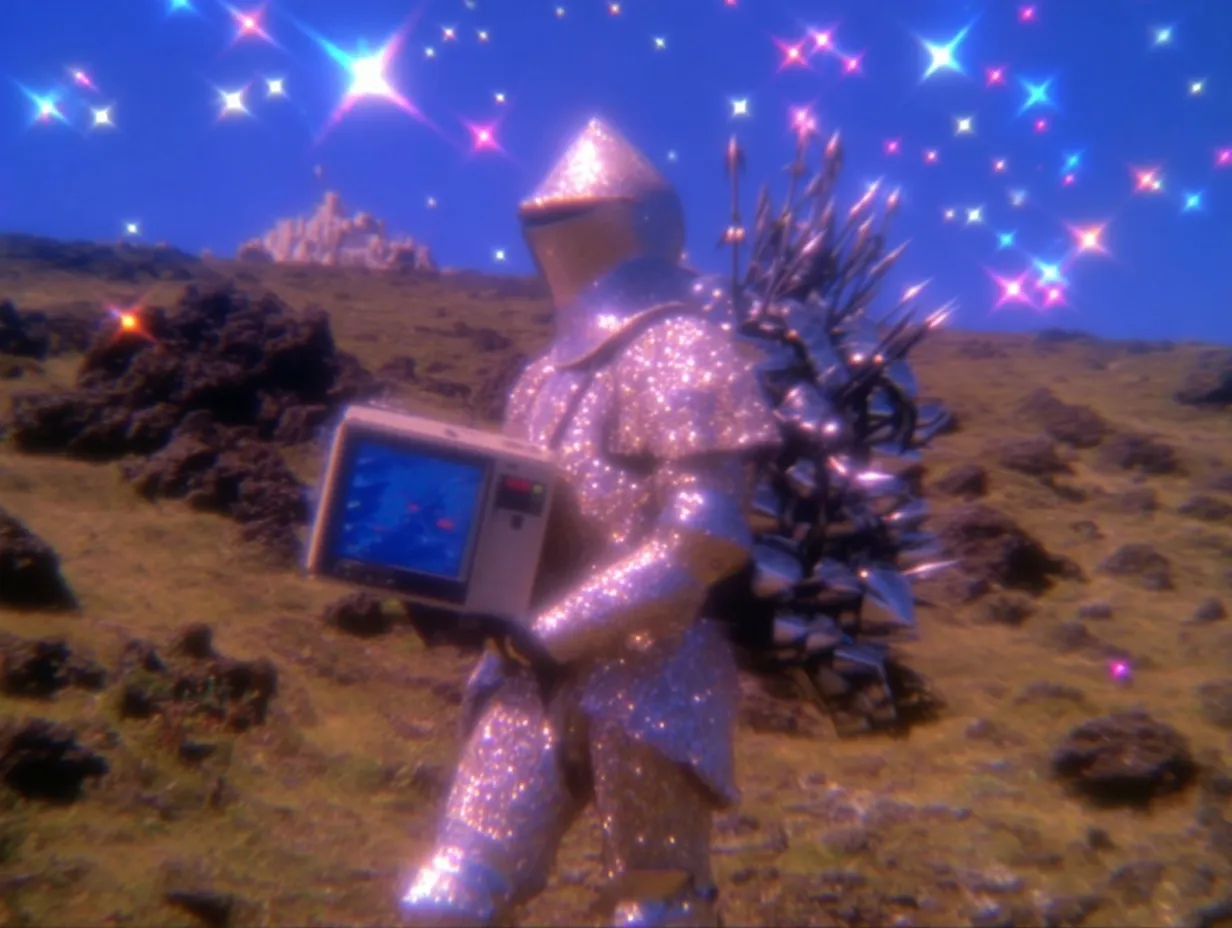
Option 2: The Edit Tab (hail Mary)
Sometimes you need to change something significant—like adding a complex piece of gear to a character. In this example, I wanted my knight to be carrying a massive, clunky, Death Stranding-style communications backpack.
The Workflow:
-
Open your image in the Edit Tab on the Midjourney website.
-
Erase a large area where you want the new object to live.
-
Update the prompt to describe the change (e.g., “Add a bulky, complex military backpack with antennas”).
-
Optional but usually needed: upload an image reference here to guide the shape.
I’ll be real with you: this is my least favorite method. It can be hit-or-miss because Midjourney often struggles to blend a brand-new, complex object into an existing lighting environment. But if you’ve got an image you otherwise love, it’s a solid “hail mary” to save the shot.
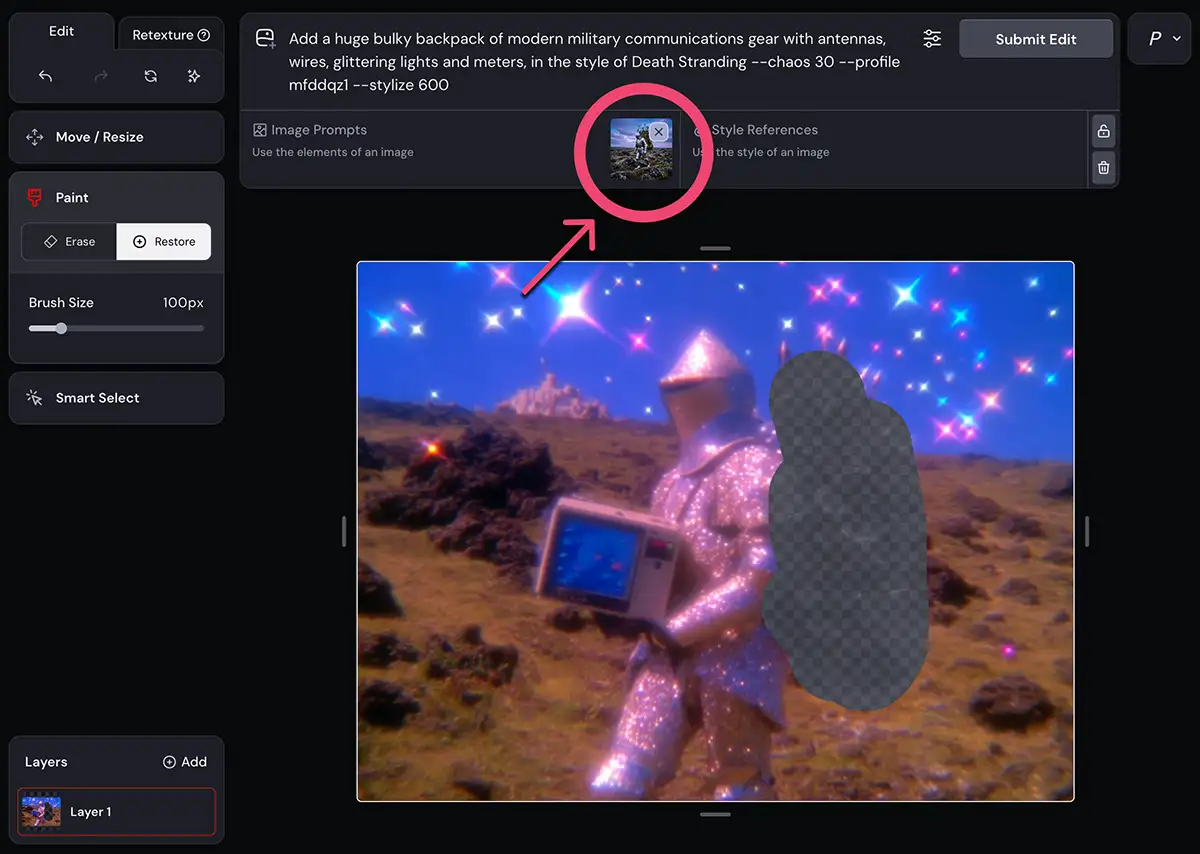
Option 3: Make An Image Reference & Re-roll
Technically, this isn’t “editing” a file… it’s editing the concept. If you have a style you love but the content just isn’t hitting what you need, stop fighting the text prompt.
The issue is that the model just doesn’t have the right context it needs to give you what you want – so you’ll CREATE that context:
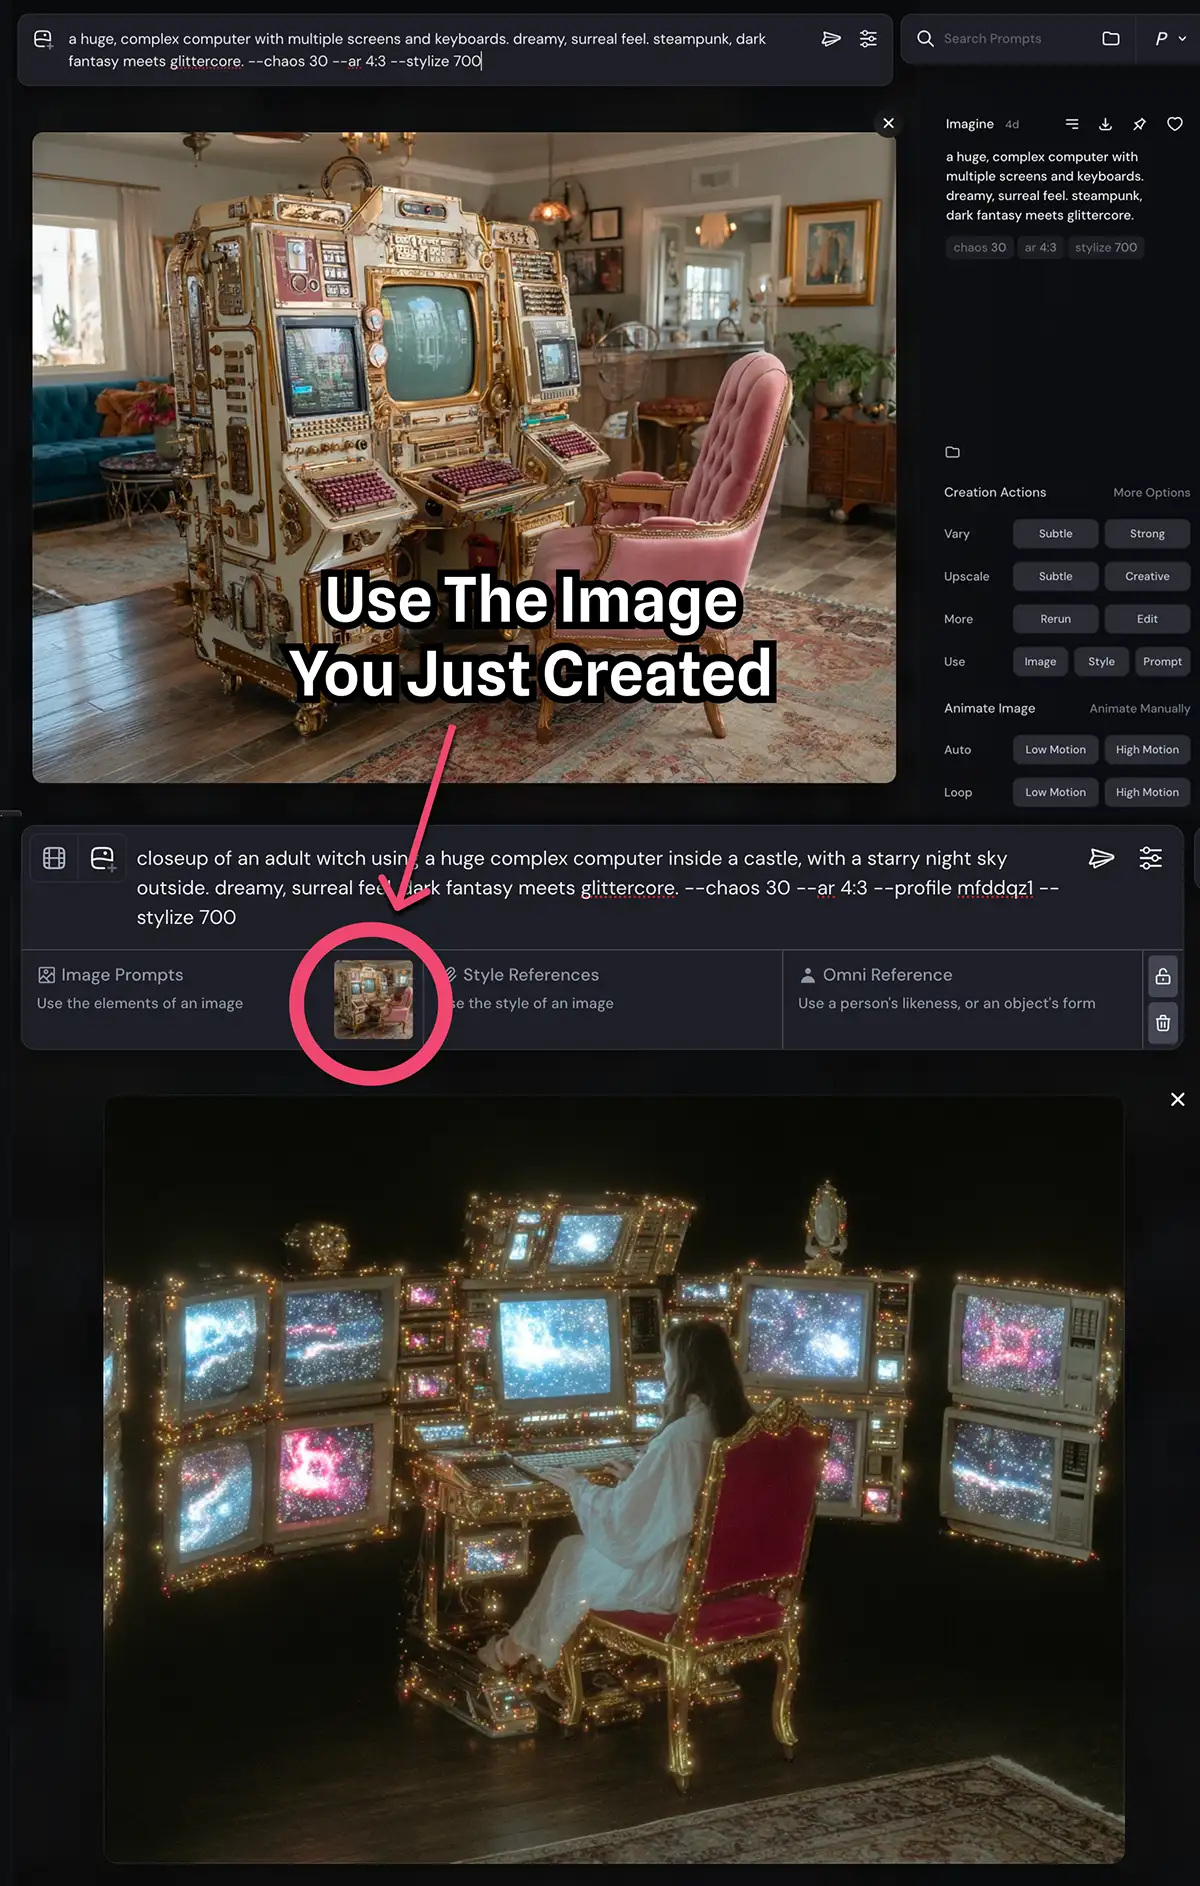
For this scene of a woman at a computer, I couldn’t get the computer to look large or complex enough with prompting alone. So, I took a step back and created a separate image that had the exact “cluttered tech” look I wanted.
I then used that new image as an Image Reference in my main prompt, which worked perfectly. However, it does mean you’re walking away from a previously-generated image, which isn’t always ideal.
You can also use it as an Omni Reference, but this takes it much more literally and tries to composite the image in – and for me at least, it usually doesn’t come out well.
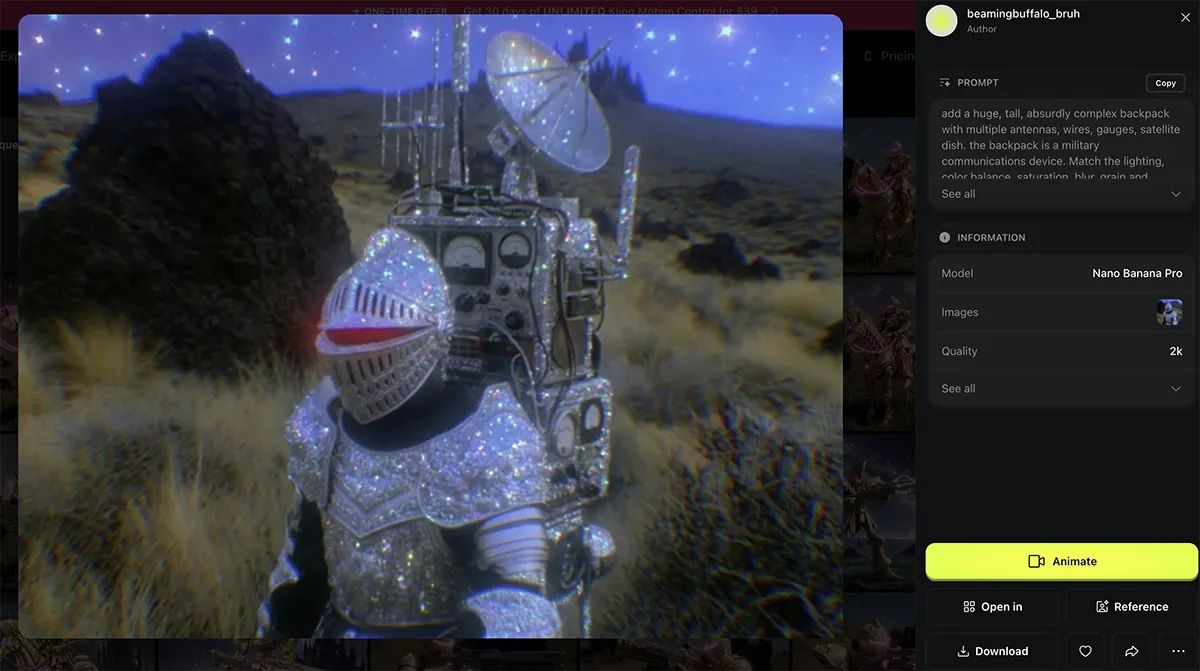
Option 4: Use Nano Banana
If you need absolute, granular control, it’s time to look outside of Midjourney. Nano Banana Pro (I used Higgsfield here but there are many options) is currently the gold standard for precise image editing/inpainting.
Prompt:
“Add a huge, tall, absurdly complex backpack with multiple antennas, wires, gauges, satellite dish. the backpack is a military communications device. Match the lighting, color balance, saturation, blur, grain and overall style of [image1]”
While Midjourney is an artist that takes your prompt as a suggestion, Nano Banana is a technician that follows your guidelines with surgical precision. In the example of our sparkling knight, I used a backpack image I’d already made as a guideline.
More details on editing images in Nano Banana here.
The Trade-off: Nano Banana can sometimes struggle to perfectly match the hyper-stylized “dreamcore” or “painterly” textures that Midjourney is famous for. It’s a more literal model. But if you need an object to be in a specific place with a specific look, it’s much more reliable. Just be prepared to re-roll a few times to get the texture blend right.


")
")


? The 100% honest review...")

