

Need to change the lighting in an image after you’ve shot it? Nano Banana Pro is surprisingly good at it. We’re talking about results that are on par with a high-end retoucher, but accessible on your devices 24/7.
The best part? If you’re already using Nano Banana, you don’t need another subscription. You just need to know how to talk to it.
But here’s the secret: getting the best results isn’t about some fancy “secret prompt.” It’s about understanding photography basics.
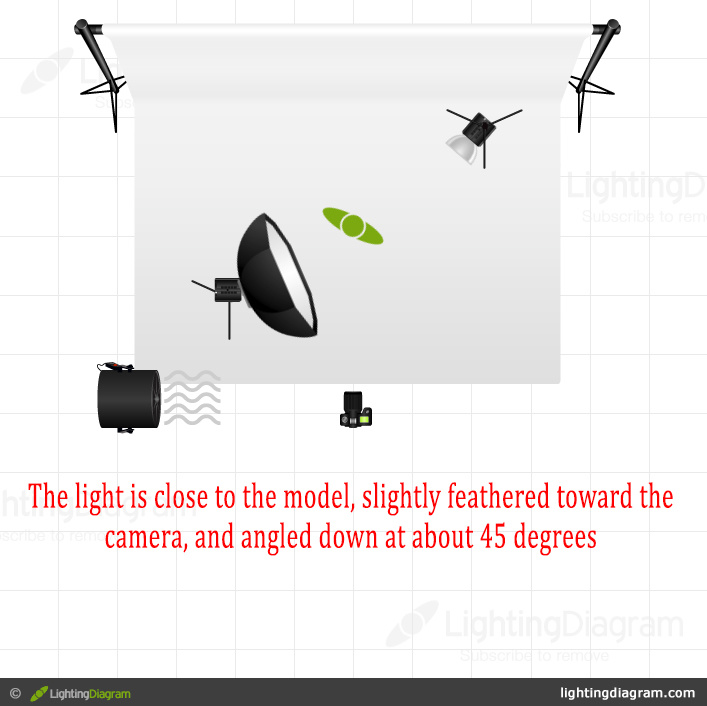
LightingDiagram.com is a great tool to visualize lighting if you need a refresher
Step 1: Reverse Engineer The Lighting Setup
Work backwards. Decide exactly what lighting setup would create the look you want, and then describe that setup.
-
Where is the light coming from? (Left, right, behind?)
-
What kind of light is it? (Key light, fill light, rim light?)
-
What is the quality? (Hard, soft, diffused?)
-
What is the color? (Warm sunset, cool blue, stylized purple?)
Step 2: Prompt Nano Banana Like A Photographer
Nano Banana Pro understands photographic terminology. So when you prompt it, describe the light just like you would to someone on a real set.
Here’s a few examples from my recent experiments to show you how specific you need to be – I used Higgsfield, but the same prompts will work in the Gemini app or anything else with Nano Banana Pro support.
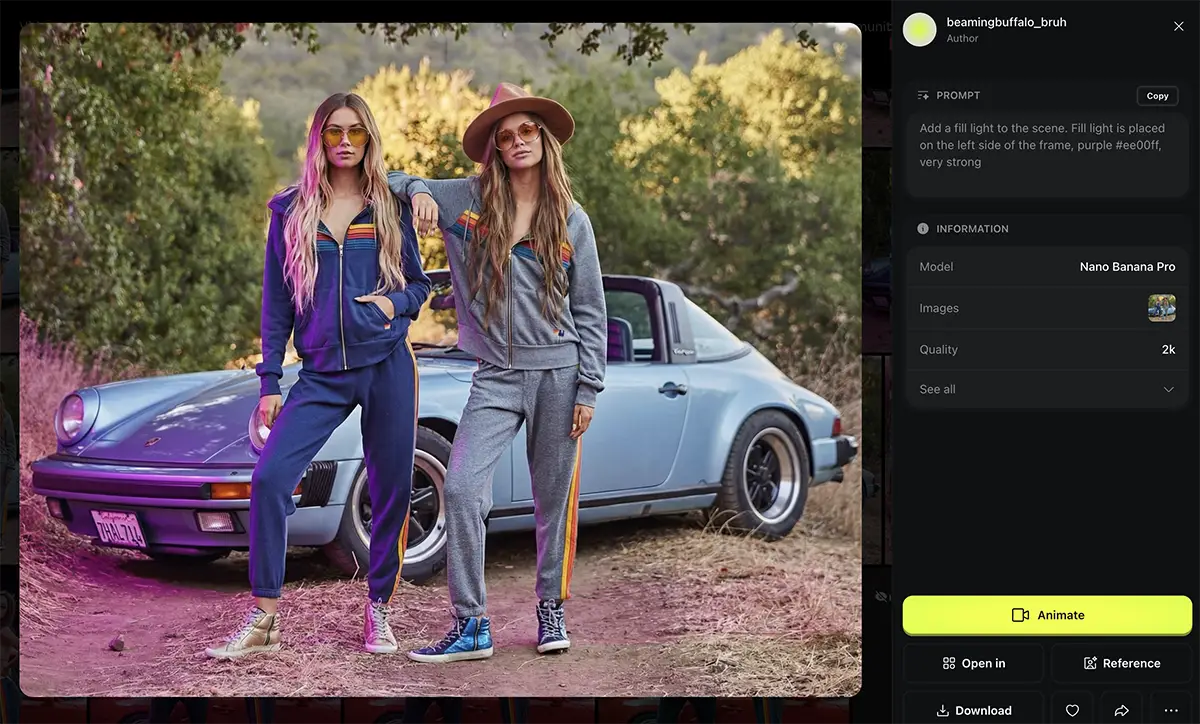
Image via Aviator Nation
Example A: The Stylized Fill
In this shot, I wanted to introduce a strong, stylized color as a test of how the model would handle non-standard lighting. Note that I didn’t just ask for “purple light.” I specified the role of the light.
The Prompt:
“Add a fill light to the scene. Fill light is placed on the left side of the frame, purple #ee00ff, very strong”
The Result: You get that deep, moody violet wash hitting the side of the car and the models, but it respects the shadows.
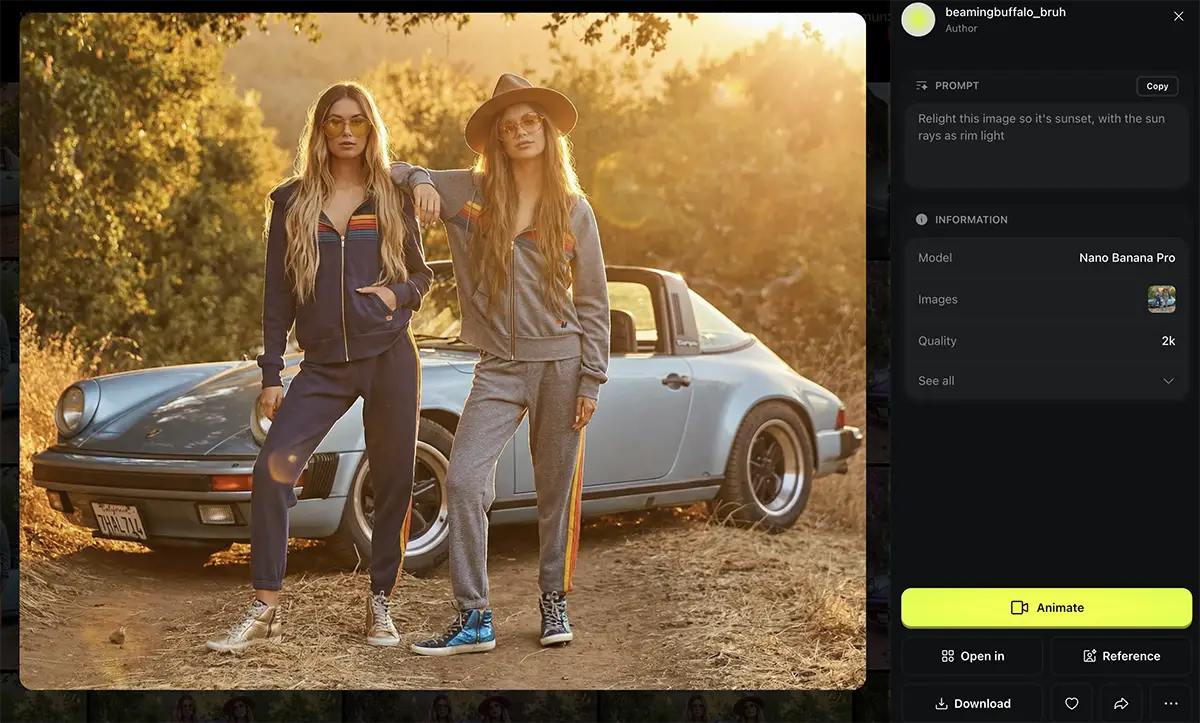
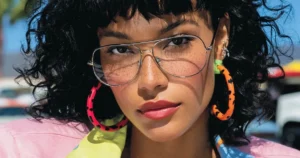
Example B: The Rim Light (Golden Hour)
You shot it at noon, but you want it to feel like 7:00 PM (the holy grail for a lot of outdoor lifestyle photography).
The Prompt:
“Relight this image so it’s sunset, with the sun rays as rim light”
The Result: Notice how the model understands “rim light.” It catches the edges of the hair and the shoulders, separating them from the background. This isn’t a filter – it’s actually re-calculating how light hits the geometry of the subjects.
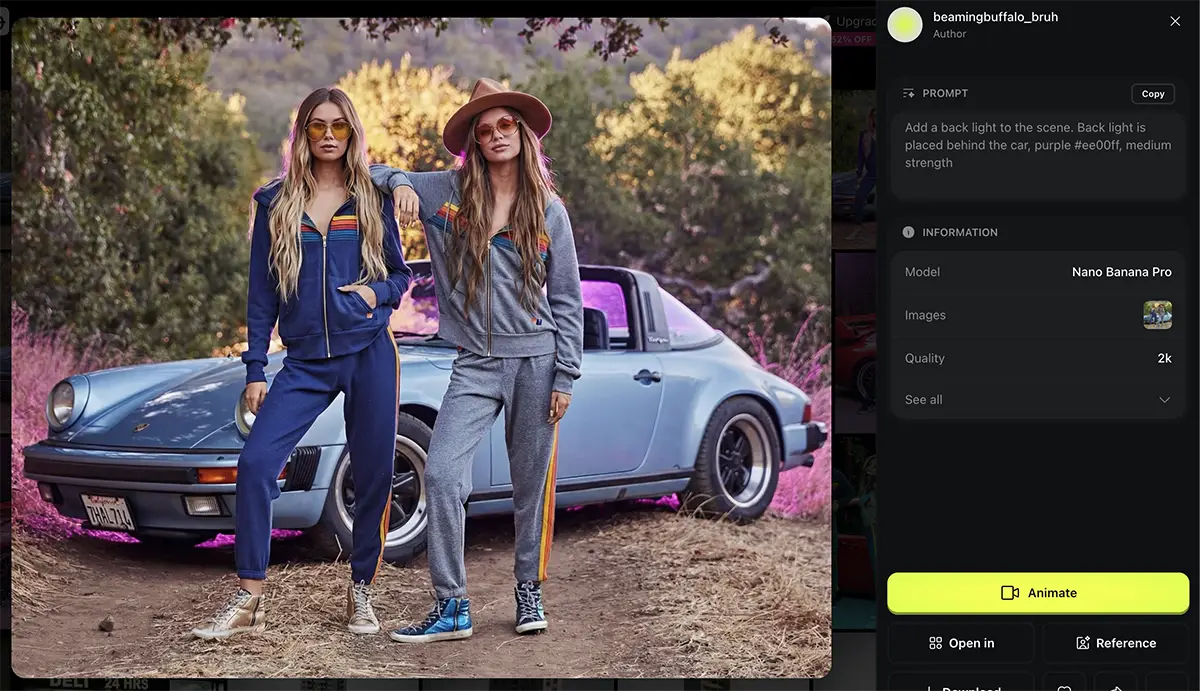
Example C: The Backlight
Sometimes you need drama. Bring out the purple back light!
The Prompt:
“Add a back light to the scene. Back light is placed behind the car, purple #ee00ff, medium strength”
The Result: This creates a silhouette effect and adds depth behind the Porsche, making the subjects pop forward.
Step 3: Iterate and Refine
You aren’t going to bat a thousand every time. And that’s okay.
-
Re-roll is your friend: If the light looks “fake” or the shadows fall in the wrong direction, just hit generate again.
-
Work in 4K: I strongly recommend working with the highest resolution images possible. When you upload a 4K image, you are giving the model more pixels as context. More context equals better understanding of the scene’s geometry, which leads to more realistic lighting fall-off.
Notes for Pros
Is this going to replace a $50,000 lighting package and a master photographer on a commercial set? Not yet. The results may not always be 100% technically physics-accurate.
But for social content, mood boards, concept art, or saving a shot where the natural light just went flat? It is absolutely incredible. And it’s certainly better – and cheaper – than re-shooting.
More on Nano Banana Pro
- How to repose a model
- How to do style transfer in Nano Banana
- Nano Banana FAQs
- Does JSON prompting work?
- How to master Nano Banana prompting
- Extend an image
- How to use Midjourney with Nano Banana Pro
- Remove the Nano Banana watermark
- Set up a virtual product shoot with Nano Banana
- Upscale an image to 4K
- Add texture to a logo


")


