
Because you’re reading this, you’ve likely hit the wall. You have an image – maybe it’s a killer shot from an iPhone 8 that you held onto too long, a client’s low-res logo, or a Midjourney generation that looks incredible on your phone but falls apart on a 27-inch monitor.
Five years ago, you were stuck. You’d use “Bicubic Smoother” in Photoshop, add some noise to hide the blur, and pray nobody looked too close- but now, we have options.
The Two Types of AI Upscaling
Before you download anything, understand that “upscaling” now means two different things – and using the right one is a critical part of the modern AI image workflow.
1. Faithful Restoration
These upscalers want the image to look exactly like the original, just sharper and larger. You do not want the AI to invent new details. If the subject has big pores eyes, they need to stay big. If the texture of the fabric is denim, it shouldn’t turn into silk.
- Goal: Fidelity.
- Best Tool: Topaz Gigapixel AI (or Photo AI).
2. Creative Enhancement (Hallucination)
This is for concept artists, designers using Generative AI (like Midjourney or Stable Diffusion), and illustrators. You have a low-res base, and you actually want the AI to add texture, pores, and stray hairs that weren’t in the original file. You are giving the AI permission to “hallucinate” details to sell the illusion of high resolution.
- Goal: Hyper-realism.
- Best Tool: Enhancor
Topaz Gigapixel AI / Photo AI
Best For: Photographers, Print Reproduction, and Faithful Restoration.
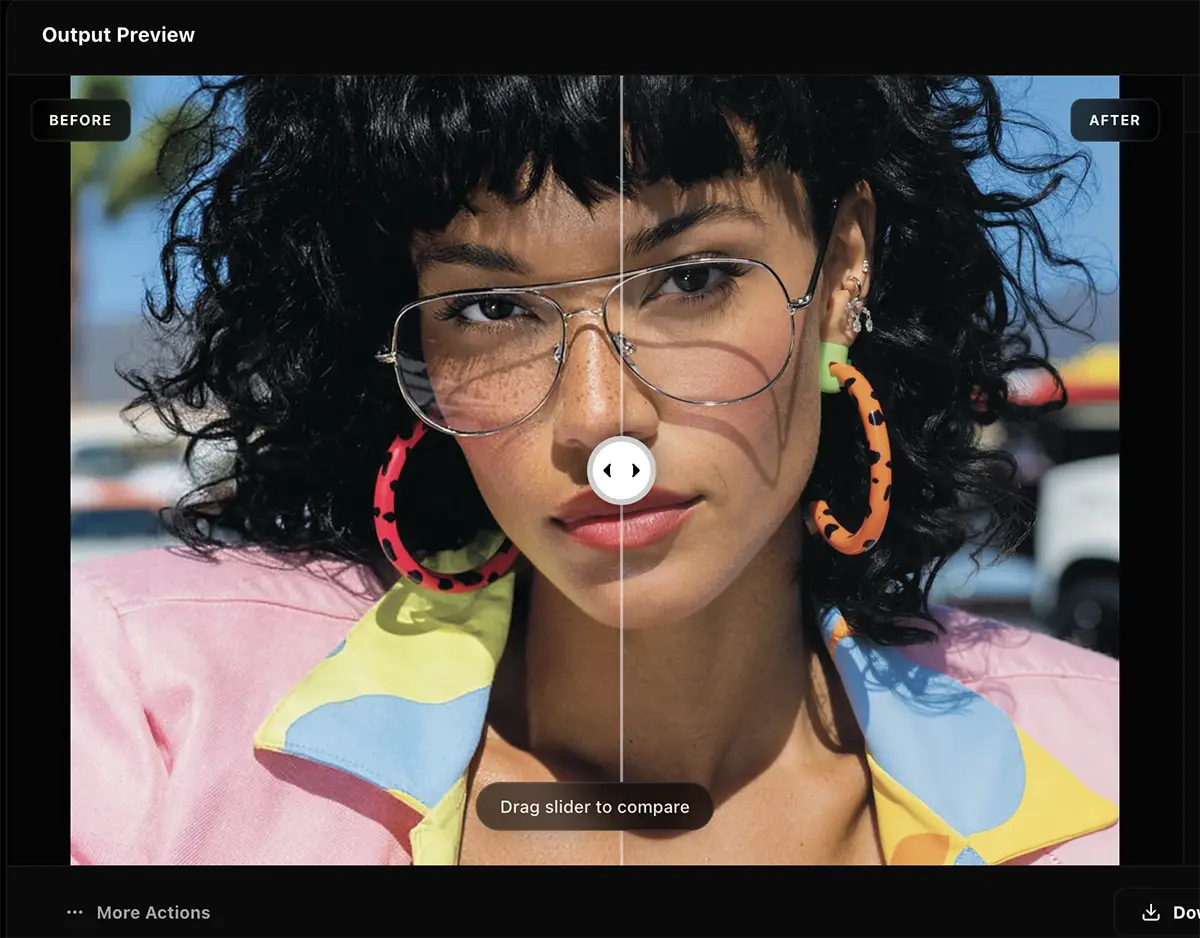
![]()
Topaz Labs has been the king of the hill for a long time, and for good reason. They were the first to really nail the “enhance” trope from sci-fi movies without making the result look like a watercolor painting.
Topaz now offers two main flavors: Gigapixel AI (standalone upscaling) and Topaz Photo AI (a suite that includes denoising and sharpening). For pure upscaling, Gigapixel is still the gold standard.
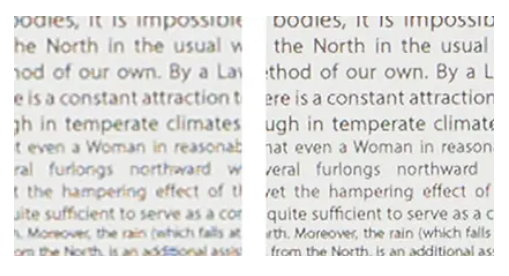
Why It Works
Topaz runs locally on your machine. This is critical for NDAs and privacy. It uses your GPU to analyze the image and recognizes specific structures—feathers, fur, architectural lines, and text.
The Workflow
Don’t just leave it on “Auto.” That’s amateur hour.
- Standard Model: Use this for 80% of your work. It balances sharpness with noise reduction.
- Low Resolution Model: If you are rescuing a tiny web image (under 1000px), switch to this. It’s aggressive about fixing JPEG artifacts.
- Recovery: This is the newer feature set. It can actually reconstruct faces that are slightly out of focus. Be careful here—push it too far, and your subject starts to look like a wax figure.
The Verdict: If you need to print a billboard from a crop, or you’re a wedding photographer fixing a missed focus shot, this is the tool. It respects the source material.
Magnific AI
Best For: AI Artists, Concept Art, and “re-imagining” low-res assets.
Magnific AI changed the game in late 2023 and continues to dominate the “creative upscaling” space in 2025. Unlike Topaz, Magnific is a “hallucination engine.” It uses similar technology to Stable Diffusion to dream up new details based on your image.
Why It Works
It allows you to control the “Creativity” and “Resemblance.”
- Creativity Slider: This is your most dangerous and powerful setting. Set it to ‘0’, and it acts like a normal upscaler. Crank it to ‘5’, and it will start adding wrinkles to skin, stitching to clothes, and leaves to trees.
- Prompting: You can actually type a text prompt to guide the upscale. If you’re upscaling a portrait, you can prompt “highly detailed skin texture, 8k, photography.” The AI uses that text to inject specific details into the upscale process.
The Trade-off
It is cloud-based and expensive. You are paying a monthly subscription for the compute power. Also, it will change your image. If you upscale a photo of a specific person with high creativity, it might slightly alter their facial structure.
The Verdict: Essential for anyone working with Midjourney or DALL-E. It turns a flat, 1024px generation into a 4k masterpiece that looks indistinguishable from a high-end photo shoot.
Enhancor
Enhancor has emerged as a specialized alternative to Topaz and Magnific, specifically targeting the “plastic” or “smooth” look common in AI-generated images. While Topaz focuses on sharpening and Magnific focuses on hallucinating new details (generative upscaling), Enhancor focuses on texture reconstruction.
This tool is particularly effective for photorealistic workflows (eg Midjourney, Flux, Stable Diffusion) where the base generation has perfect lighting but lacks biological reality. Enhancor’s models are trained to re-introduce specific micro-textures like skin pores, fabric weave, and film grain that strictly adhere to the original subject.
Key differentiation:
-
vs. Topaz: Topaz is conservative; if the original image is smooth, Topaz will simply make it a sharper smooth image. Enhancor will actively invent the missing texture.
-
vs. Magnific: Magnific is aggressive; it often changes the geometry of a face or adds unwanted elements (like earrings or background buildings) to increase “detail.” Enhancor is constrained to preserve identity and geometry, making it safer for commercial work where the subject cannot change.
It’s currently my preferred choice for high-end “AI photography” workflows where the goal is to make your AI image look filmic.
TTPlanet Workflow (ComfyUI)
If you’re in the Comfy ecosystem, TTPlanet is the current industry standard for local upscaling. Unlike standalone apps, this is a specific node configuration (created by user TTPlanetPig) that relies on Tiled Diffusion and ControlNet logic.
The workflow operates by breaking the image into small, overlapping squares (“tiles”) and processing each one individually before stitching them back together. This allows a standard consumer GPU (like an RTX 3090 or even 4070) to generate images at 8K, 16K, or higher resolution without crashing.
Why it works:
-
VRAM Efficiency: Because it processes small tiles one at a time, it never loads the entire 16K image into memory at once.
-
ControlNet Guidance: It uses a “Tile” ControlNet model to ensure that as it adds detail to each square, it respects the original lines and shapes. This prevents the AI from “hallucinating” new objects or changing the subject’s face during the upscale.
-
Cost: It runs locally, meaning it is free (after hardware costs) and private.
The trade-off: It is technically complex. Setting it up requires installing ComfyUI, managing Python dependencies, and downloading specific ControlNet models (usually huge .safetensors files). Be aware that this is NOT easy to configure.
Adobe Generative Upscale (Lightroom/Camera Raw)
Best For: The “I’m already here” workflow, minor bumps (2x).
If you’re subscribed to the Creative Cloud, you already have this. It’s buried in Lightroom and Photoshop (via Camera Raw).
How to use it
Right-click your RAW file in Lightroom -> Enhance -> Super Resolution.
The Reality
It’s consistent, but conservative. It doubles the linear resolution (4x total pixel count). It’s excellent because it stays inside your raw workflow. You get a DNG file back that you can edit just like the original raw. However, it lacks the aggressive detail recovery of Topaz. It won’t fix a blurry photo; it just makes a clean photo bigger.
The Verdict: Use this first. If it does the job, you’re done. If you need more horsepower, move to Topaz.
Upscayl
Best For: Budget-conscious pros, Linux users, and batch processing on a local machine.
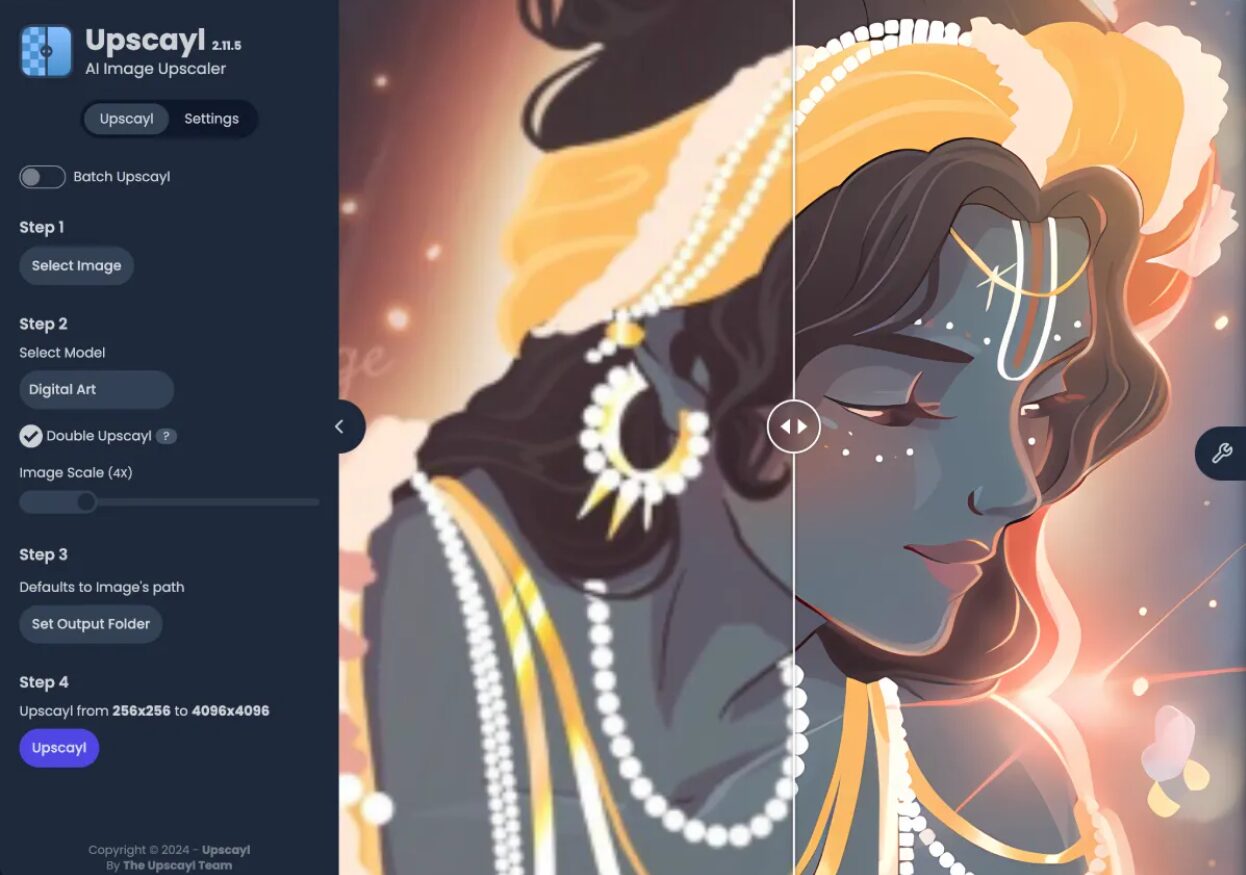
Upscayl is an open-source tool that lets you run powerful AI models (like Real-ESRGAN) locally for free.
Why It Works
It’s incredibly sharp. For graphic design elements, line art, and illustrations, it often outperforms the paid giants because it produces very clean, hard edges without the “painterly” look some photo-focused upscalers create.
The Catch
It lacks the refined UI and “face recovery” polish of Topaz. You might get weird artifacts in complex natural textures (like grass or gravel). But for the price of $0, it is a mandatory install on your workstation, joining a growing list of powerful free AI tools for creatives.
The Verdict: The best free tool, period. Great for graphic designers upscaling vectors-turned-raster or clean studio shots.
The Professional Workflow: putting it together
You don’t just pick one tool. You build a pipeline. Here is how a pro handles a low-res client asset.
Step 1: Assess the Damage
Open the file. Is it a clean low-res file (like a logo or a vector export), or is it a dirty, compressed JPEG?
- Clean: Go to Adobe Super Resolution or Upscayl.
- Dirty/Compressed: Go to Topaz Gigapixel.
Step 2: The Pre-Process
If the image is noisy, handle the noise before you upscale. Upscaling noise just gives you high-definition noise. Use a dedicated denoiser (Topaz Denoise or Lightroom’s AI Denoise) first.
Step 3: The Upscale
Run the upscale.
- For Print: Target your specific output size. Do not just blindly hit “4x.” If you need 300 DPI at 20 inches, do the math: 20 inches * 300 pixels/inch = 6000 pixels on the long edge. Set that specific number in the software.
- Verify at 100%: Zoom in. Look at eyes, text, and foliage. These are the first things to break. If the eyes look weird, mask them out in Photoshop and use the original (lower res) eyes, blending them in. Soft eyes are better than demon eyes.
Step 4: The Finish
Upscalers often kill film grain. They make the image look unnaturally smooth and plastic.
Pro Move: Add a layer of uniform monochromatic noise (grain) over the final upscaled image in Photoshop. Set the blend mode to Overlay and opacity to 3-5%. This ties the image back together and hides the “AI look.”
Conclusion
Resolution is no longer a barrier to entry. The tools available to you right now can save a project that would have been dead in the water five years ago.
But these tools are not a crutch for bad work. They are amplifiers. If you feed them garbage, you get high-resolution garbage. If you feed them quality work that just happens to be small, you unlock massive potential.
Stop waiting for the perfect camera or the perfect sensor. Create the work, upscale it, and get it out the door.


")


")

