
We’ve all seen it: that “uncanny valley” look where an AI-generated image is just a little too perfect, and grain can be the antidote for that.
If you’re looking for absolute world-class results, I’m still going to point you toward dedicated plugins like Dehancer Film or Real Nice Images. But lately, I’ve been experimenting with Nano Banana Pro. While it lacks the surgical precision of a dedicated film emulator, it’s surprisingly capable for the basics – plus, you can automate it.
If you’re processing a high volume of images and don’t need to tweak every individual silver halide crystal, this might be your new best friend.
Here are the three ways to get it done, ranked from “Pro” to “Meh” (using Weavy, but the same prompts will work in the Gemini app or anywhere else).
Option 1: Use a reference image
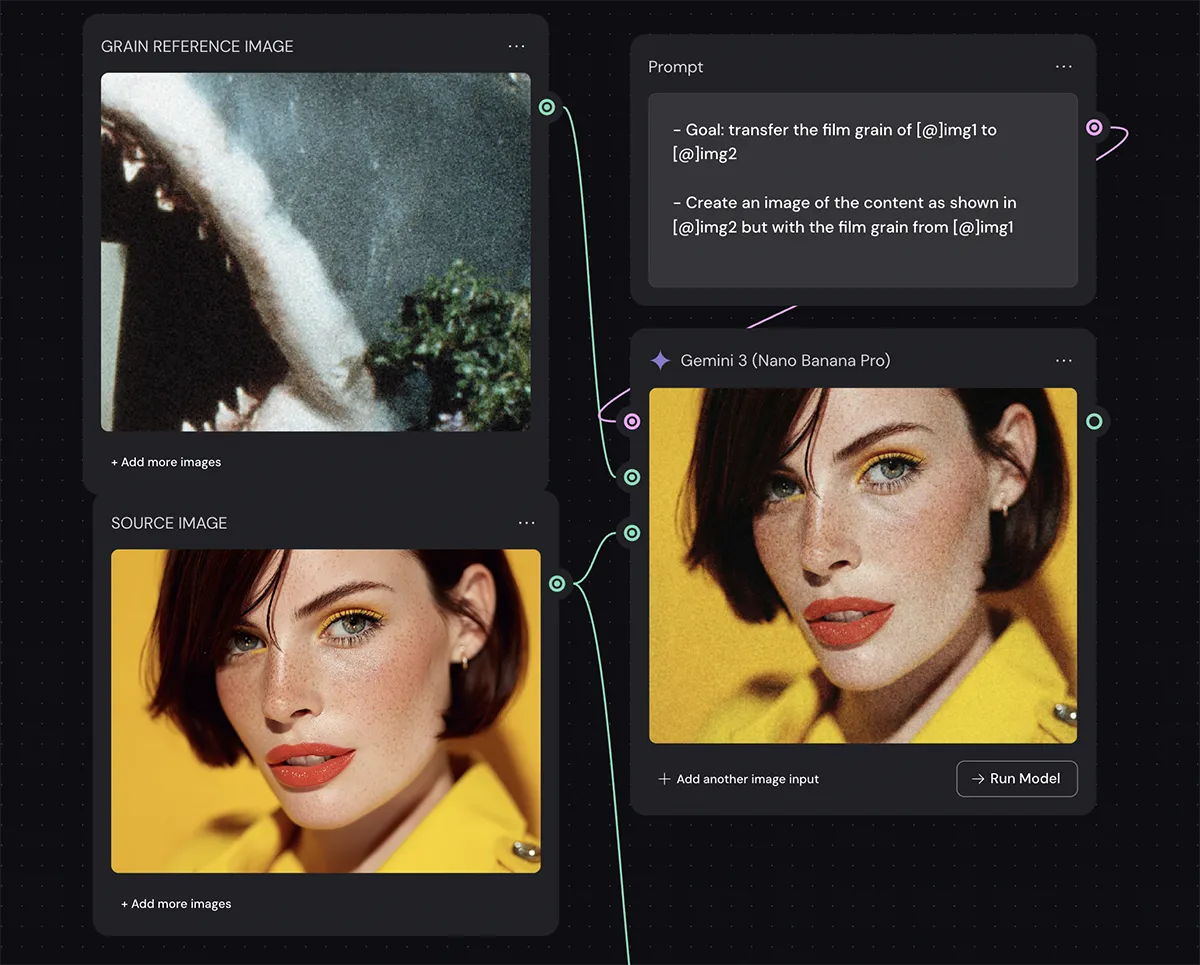
In my testing, this is the way to go. It’s the most intentional way to work with Nano Banana. Instead of letting the AI guess what “vintage” means to you, you show it. Prompt:
– Goal: transfer the film grain of [@]img1 to [@]img2
– Create an image of the content as shown in [@]img2 but with the film grain from [@]img1
-
How to do it: Don’t just upload a full photo. Crop in and zoom in on a detail of the grain from a film stock you love.
-
Pro Tip: You can actually “bridge” your tools here. Create a high-quality grain reference using a plugin like Dehancer, save that as a reference file, and then use Nano Banana to apply that specific “look” at scale to hundreds of other images. It gives you the most control over the final texture.
Option 2: Create a grid of options
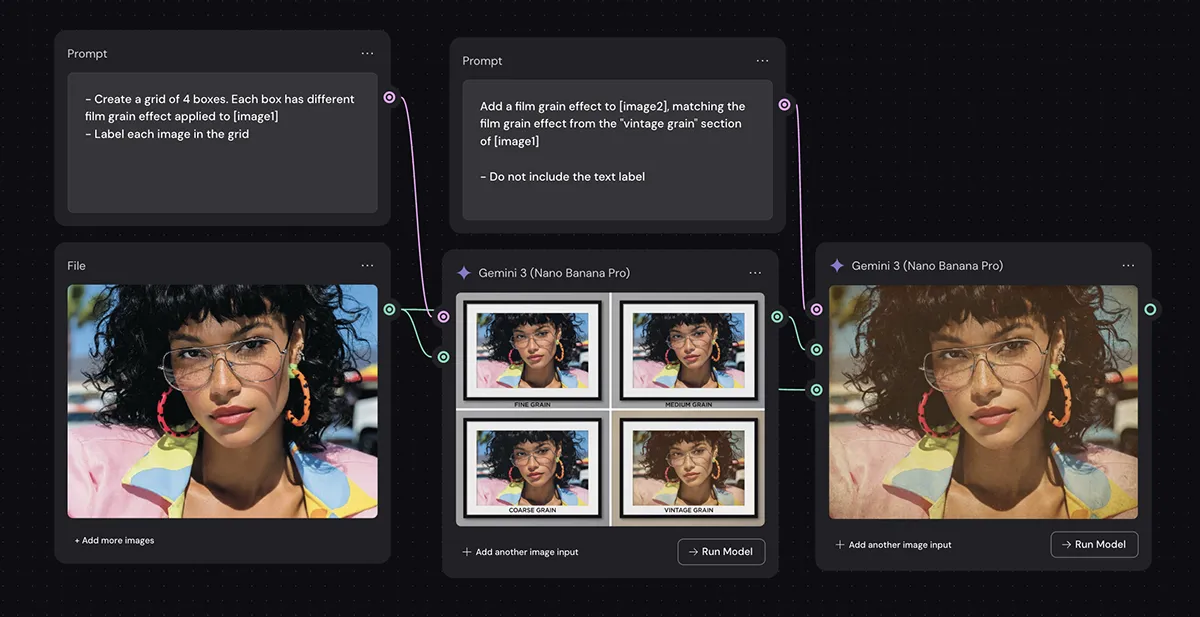
If you aren’t quite sure what vibe you’re after, you can ask the model to generate a grid of options. Prompt:
– Create a grid of 4 boxes. Each box has different film grain effect applied to [image1]
– Label each image in the grid
-
How to do it: Prompt the model to create a 4-way or 6-way split, each with varying grain intensities. Once it spits out the grid, you pick your favorite and use a second prompt to apply that specific style to your full-res image.
-
The Downside: It’s a bit of a “spray and pray” method. You’re picking from what the AI gives you rather than being the primary driver of the aesthetic. It’s okay for brainstorming, but less ideal for a specific vision.
Option 3: Use a descriptive prompt
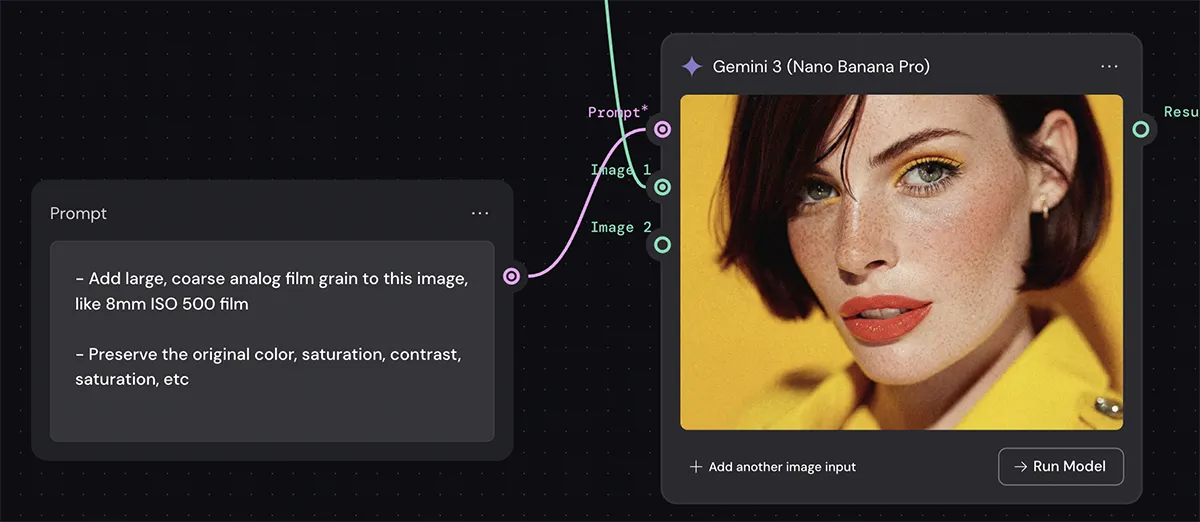
This is the most direct way, but honestly, it’s the least reliable. You can tell the model you want “8mm ISO 500 grain,” and while it’ll get the hint that you want things a bit crunchy, it’s not exactly historically accurate. Prompt:
– Add large, coarse analog film grain to this image, like 8mm ISO 500 film
– Preserve the original color, saturation, contrast, saturation, etc
-
The Reality Check: In my experience, the model doesn’t really distinguish between the subtleties of 35mm vs. 8mm grain sizes or different ISO speeds. It’s a “vibe” tool, not a scientific one. Use this if you’re in a rush, but don’t rely on it for your hero shots.
Tips for best results
To get the most out of Nano Banana Pro, you’ve got to feed the beast correctly.
-
Always Run at 4K: Always. Not just for the final file quality, but because the model needs that extra resolution to actually “see” and render the grain patterns. If you run at low res, the grain just turns into digital noise.
-
Lock Your Seed: If your app supports it (I’ve been using Weavy AI for this), uncheck that “random seed” option. This gives you way more predictability. If you find a grain structure you love, keeping the seed consistent helps you replicate that look across a series of images.
The Bottom Line
Is Nano Banana Pro going to replace a dedicated film emulsion plugin for a high-end gallery print? No. But for a fast, automatable, and “good enough” solution for digital workflows, it’s a solid addition to the toolkit. It’s about choosing the right tool for the job, and sometimes, speed and automation win the day.
PS – More on Nano Banana Pro:
- How to repose a model
- How to do style transfer in Nano Banana
- Nano Banana FAQs
- Does JSON prompting work?
- How to master Nano Banana prompting
- Extend an image
- How to use Midjourney with Nano Banana Pro
- Remove the Nano Banana watermark
- Set up a virtual product shoot with Nano Banana
- Upscale an image to 4K
- Add texture to a logo


")

? The 100% honest review...")
")


")