
“Nano Banana” sounds ridiculous. It sounds like a meme, a toy, or something you’d find in a children’s cartoon. If you are a serious creative professional—a photographer, an art director, a high-end retoucher… your instinct might be to scroll past it.
Don’t. It’s an incredible tool that almost any creative pro can and should be using, part of the (also incredible) Gemini 3.0 release. You may have heard people raving about it, and yes… it IS that good.
That said, if you want to stay ahead of the curve, you need to understand how this tool works, and that starts with mastering Nano Banana prompts.
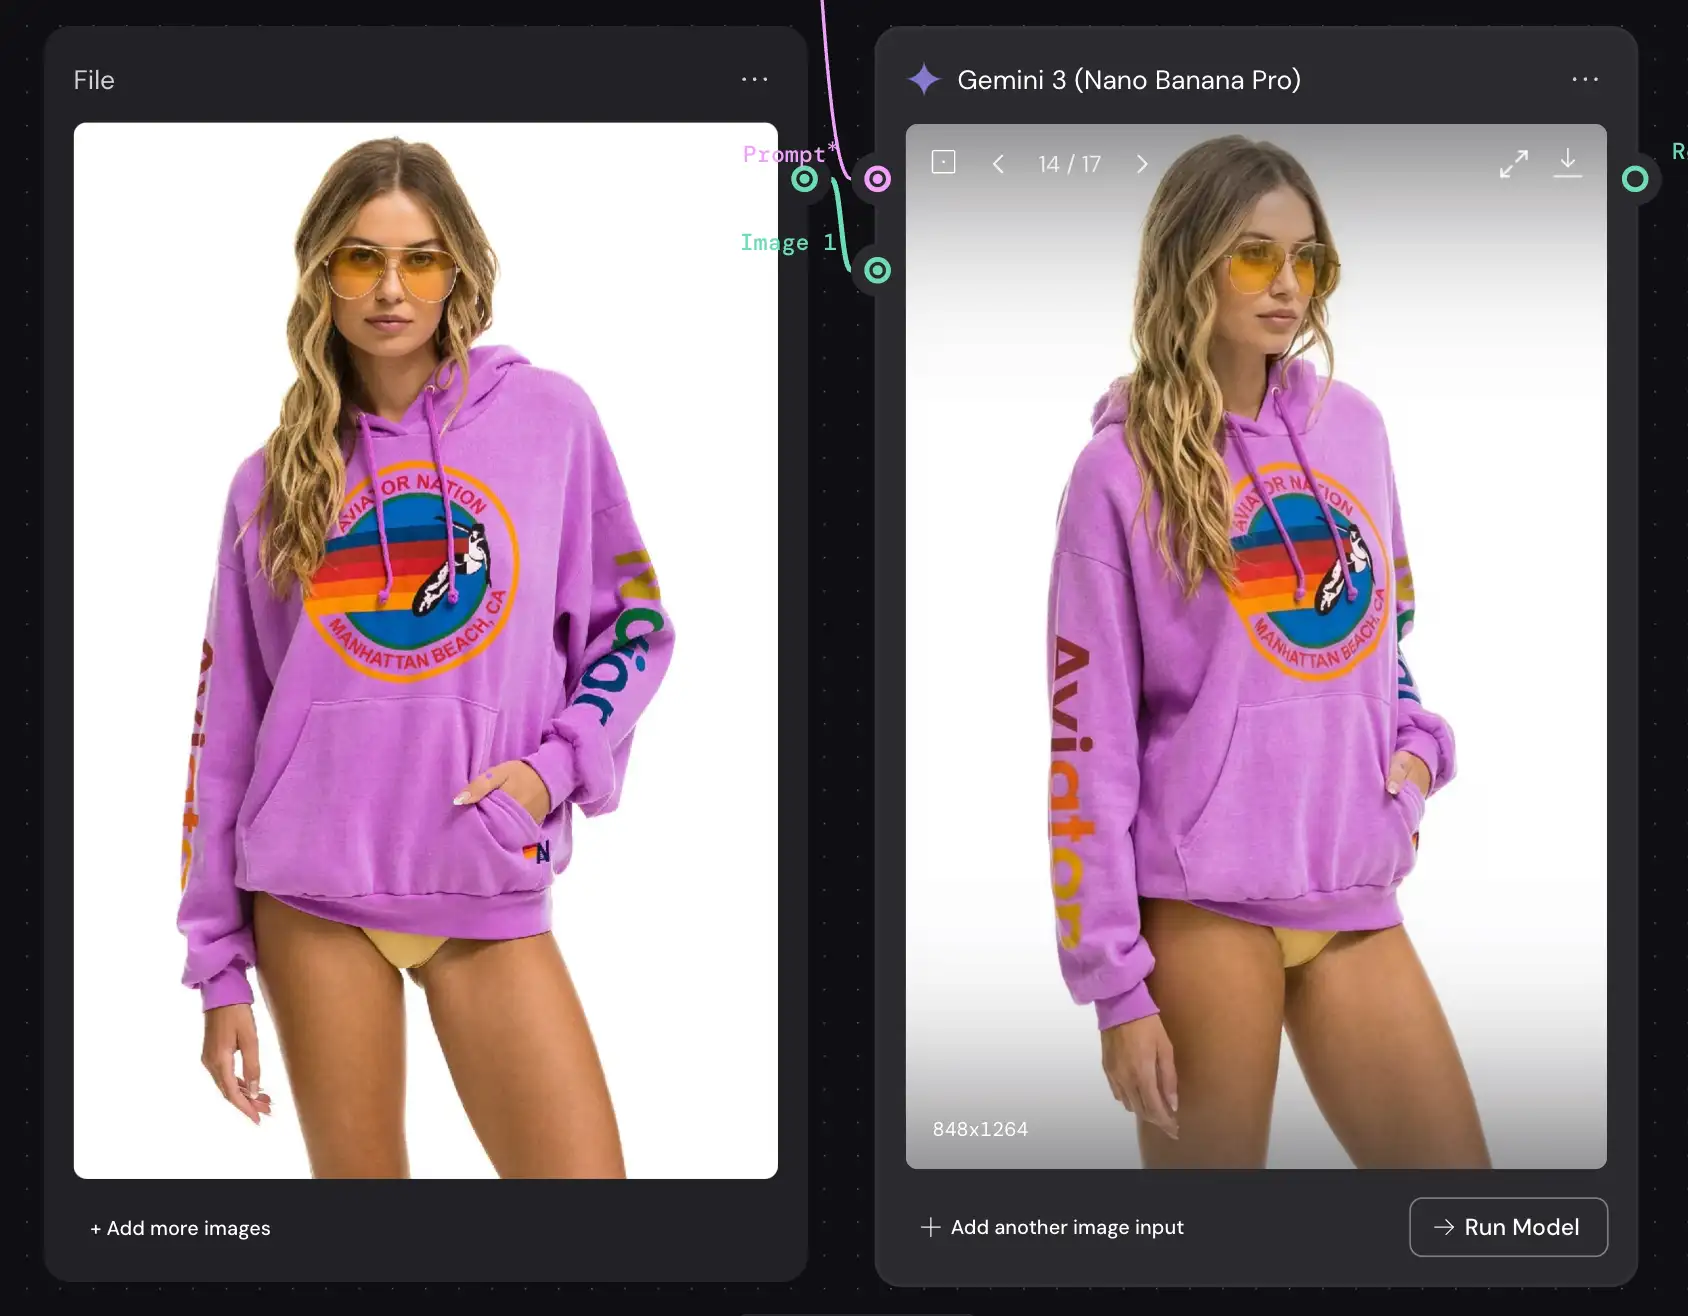
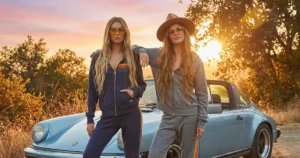
Create entirely new angles from any image? Yep. It just works.
The Core Workflow: Pseudo-Code Prompting
Most people use generative AI incorrectly. They type wandering, descriptive sentences like they are explaining a dream to a friend. This leads to drift—where the AI forgets details or hallucinates unwanted elements.
To get professional results with Nano Banana Pro, treat your prompt like a creative brief. The most effective method currently used by power users is Pseudo-Code Prompting.
Nano Banana Pro’s reasoning engine recognizes structured logic, so just think of it as defining all the same variables you’d think about on a photo shoot so Nano Banana knows exactly what you want.
How to Structure a Variable Prompt
Instead of writing a paragraph, break your request into defined assets.
The Structure:
- Define Variables: List your subject, environment, lighting, and style as separate entities.
- Execute Command: Tell the model how to combine them.
Example Prompt:
[VARIABLES]
SUBJECT_A = "Professional female model, mid-30s, sharp features, wearing a structured oversized beige blazer, silk texture."
LOCATION_B = "Brutalist architecture interior, concrete walls, sharp geometric shadows."

LIGHTING_C = "High-contrast rim lighting, cool blue fill from the left, warm key light from the right."

CAM_SETTINGS = "Phase One XF, 80mm lens, f/2.8, ISO 100, sharp focus on eyes."
[EXECUTION]
Render SUBJECT_A standing in LOCATION_B. Apply LIGHTING_C to emphasize the texture of the blazer. Use CAM_SETTINGS for a hyper-realistic commercial fashion look.
Why does this work? Because you are separating the what from the how. When you want to iterate—say, changing the location but keeping the model—you only change LOCATION_B. The model understands that SUBJECT_A must remain constant. This provides a level of stability that standard natural language prompting lacks.
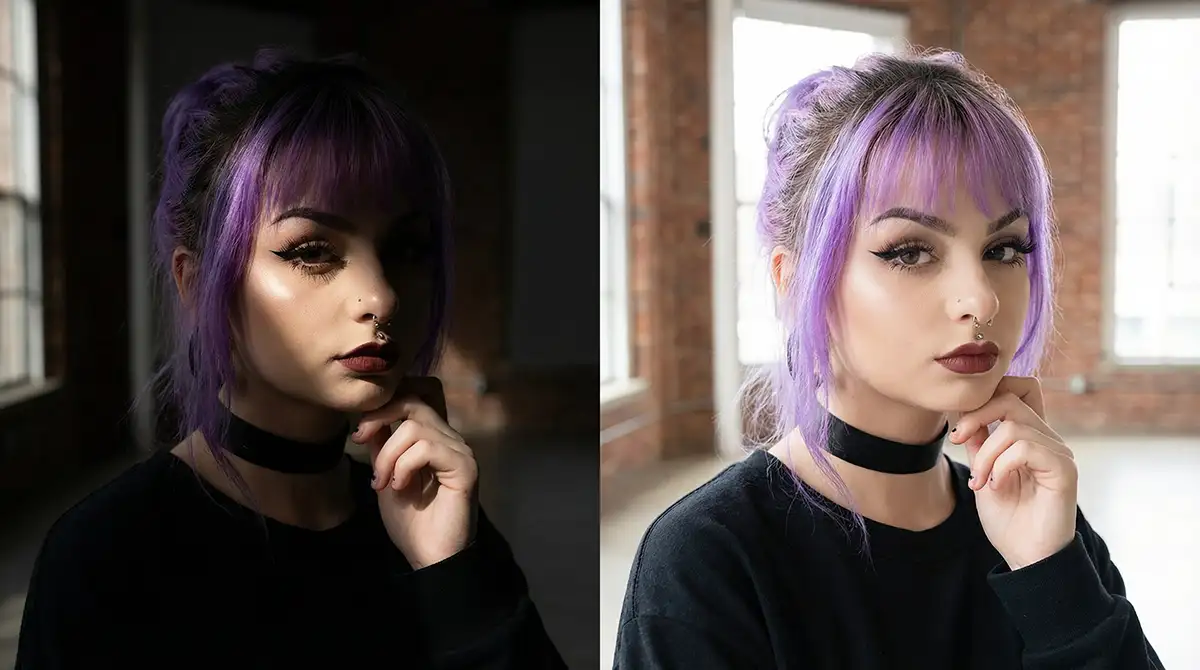
Using the lighting prompt below
Achieving Photorealistic Control
As photographers and videographers, we speak the language of lenses and light. Nano Banana Pro speaks this language too.
Early AI models ignored specific camera data, but Nano Banana Pro uses it to calculate depth of field and perspective distortion so you don’t have to settle for generic terms like “cinematic” or “professional photo.”
Camera and Lens Data
Be specific about your focal length and sensor size.
- Wide Angle: “Shot on Leica SL2 with a 24mm lens. Exaggerate foreground features. Vertical distortion on architectural elements.”
- Portrait: “Shot on Canon R5 with an 85mm f/1.2 lens. Extremely shallow depth of field. Bokeh should be creamy and circular.”
- Macro: “100mm Macro lens. 1:1 magnification. Focus stacking simulation for edge-to-edge sharpness on the product texture.”
Lighting Ratios
You can direct the behavior of light- the reasoning engine calculates light bounces shockingly well.
- Rembrandt: “Classic Rembrandt lighting. Key light at 45 degrees elevation. Triangle of light on the shadowed cheek. Deep shadow density.”
- Commercial: “High-key commercial lighting. Large softbox source overhead. White bounce cards filling shadows. Even, flattering illumination.”
The “Thinking” Model Advantage
When you select the “Thinking” or “Reasoning” mode in the Nano Banana Pro interface, the model takes longer to generate. It creates an internal blueprint.
Pro Tip: If your output looks physically impossible (e.g., shadows falling in the wrong direction), add the instruction: [REASONING: Calculate true light paths based on light source position]. It forces the model to check its physics logic before rendering.
You can use an app like Weavy with Nano Banana to make an entire virtual product shoot
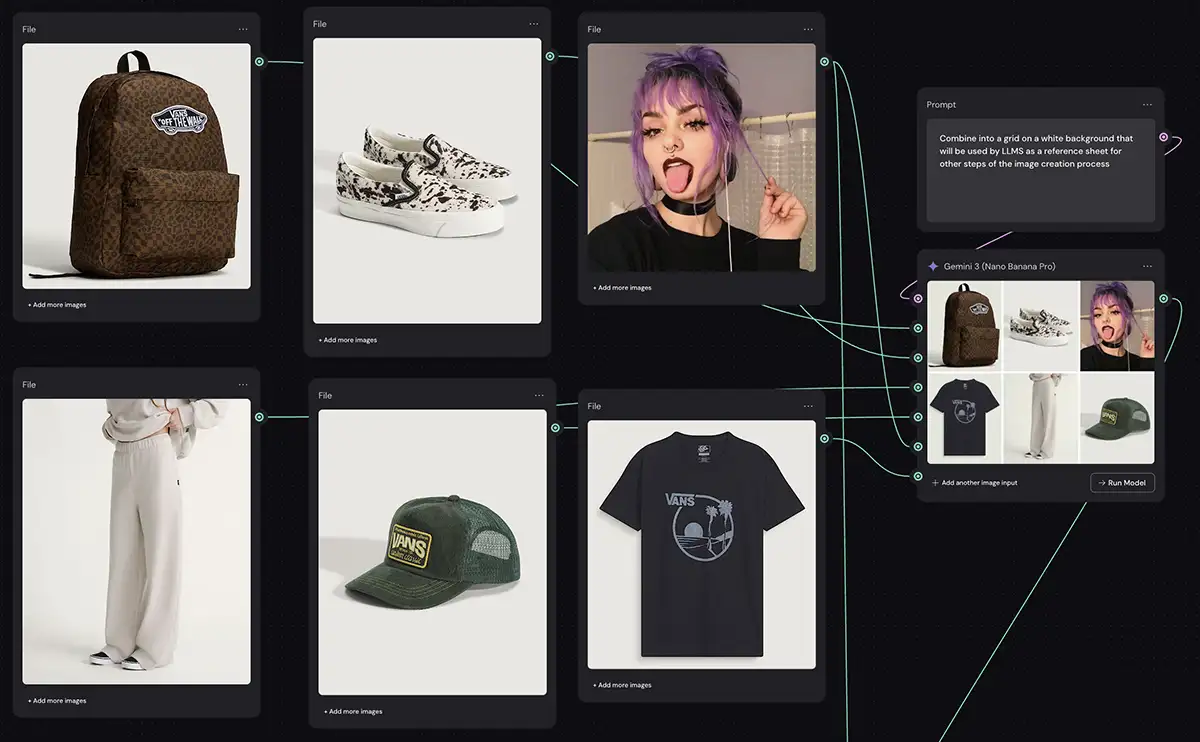
Mastering Consistency with Reference Stacks
The biggest hurdle for creative integration has always been consistency. How do you put the same character in five different scenes? How do you ensure the brand colors are exact?
Nano Banana Pro solves this with the Reference Stack.
You can upload up to 14 reference images. This acts as a “style guide” injection. This is not just image-to-image; it is “Context-to-Image.”
The 14-Slot Workflow
- Slots 1-3 (Character Turnaround): Upload a front, side, and ¾ view of your subject.
- Slots 4-5 (Brand Assets): Upload the specific logo and color palette swatches.
- Slots 6-10 (Lighting/Vibe): Upload mood board images that define the specific aesthetic you want.
The Prompt:
Using the character defined in Ref 1-3, place them into a coffee shop setting. Apply the color grading and noise profile from Ref 6. Ensure the logo from Ref 4 is visible on the coffee cup. Maintain facial structure from Ref 1 exactly.
This “Style Guide” approach allows you to run a campaign. You generate the assets, then move the character to a new location without them morphing into a completely different person.

Just make notes on the image in Figma/Photoshop/etc and it will interpret them
Natural Language Editing
The “Banana” aspect of the tool (likely a nod to “appealing” or “easy to peel”) refers to the conversational interface. The editing capability of Nano Banana Pro is where it replaces traditional masking for 90% of tasks.
Forget the lasso tool for complex composites. You can converse with the image.
Scenario: You have a perfect shot of a street scene, but there is a distracting red car in the background.
Old Way: Clone stamp, healing brush, frequency separation, 20 minutes of work.
Nano Banana Way:
- Highlight the area (rough selection).
- Prompt: “Replace the red car with a generic grey sedan that matches the lighting of the street. Add motion blur to match the shutter speed.”
Scenario: You need to change the time of day.
Prompt: “Relight this scene for Golden Hour. Long shadows casting from the viewers left. Warm the highlights to 3200K, cool the shadows to 5600K.”
Because the model understands the 3D geometry of the image (thanks to the reasoning engine), it doesn’t just paint orange over the top. It re-calculates where the shadows would fall if the sun were lower.
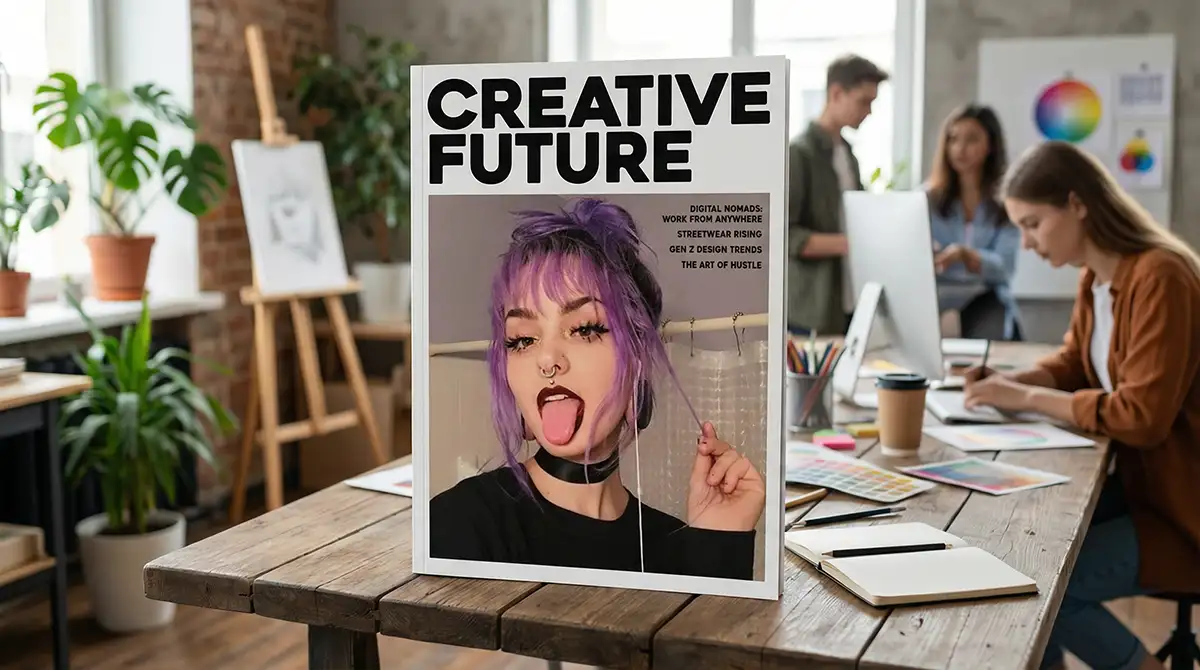
Text Rendering and Typography
For graphic designers, AI text has been a nightmare of gibberish. Nano Banana Pro is the first robust solution for legible typography and it’s SHOCKINGLY good.
You can finally mock up posters, packaging, and editorial layouts directly.
Rule: Use specific delimiters for text.
Prompt:
Generate a magazine cover. Title text at the top: "CREATIVE FUTURE" in a bold, sans-serif font (Helvetica style). Color: White. Ensure text is behind the subject's head but legible.
The model understands layering. It creates the occlusion mask for the text automatically. While you will likely refine the type in Illustrator or InDesign later, this allows you to present near-final concepts to clients in the ideation phase without leaving the tool.
Common Pitfalls to Avoid
Even with the best tools, bad habits produce bad work.
1. Over-Prompting
There is a fine balance to be struck between giving the model enough direction without adding so much that it’s just noise that distracts it. generally speaking, I find that relatively concise prompts with good reference images generate the best results, but your mileage may vary, and I encourage you to do lots of experimentation.
2. Ignoring Resolution Up-Scaling
Nano Banana Pro outputs native 2K and upscales to 4K. If you try to crop a tiny section of a 2K generaion and print it, it will look digital. Always generate your assets at the maximum intended resolution. If you need a close-up, generate a close-up; don’t crop a wide shot.
3. Accepting the first output
You may have to reroll or adjust a few times. It’s not magic. It’s just like any other part of the creative process. Iterate. Tweak the lighting variable. Adjust the camera angle by 10 degrees. Force the tool to give you exactly what you envisioned.
Advanced Technique: The Lightbox Simulation
This is for the studio photographers. You can use Nano Banana Prompts to simulate complex studio setups before you ever rent the gear. It’s not perfect, but it’s a great ideation tool to get you started.
The Prompt Strategy:
Describe the “unavailable” elements.
[SETUP]
Subject in center.
Light 1: 10ft Octabank, camera left, 50% power.
Light 2: Snooted kicker, camera right rear, 100% power, teal gel.
Light 3: Ring light fill, on-axis.
Background: seamless grey paper.
Nano Banana Pro helps you visualize lighting diagrams. You can generate the image, see that the rim light is too harsh, and adjust the prompt to “reduce Light 2 power by 50%.”
This acts as a pre-visualization tool that saves thousands of dollars in studio time. You show the client the “photo” before you shoot it. When they sign off, you replicate the lighting diagram in the real world.

The sky is the limit… it can even interpret a 3D diagram like this!
The Future of Your Workflow
Nano Banana Prompts are not a replacement for your taste. They are a multiplier for your execution.
The industry is splitting. On one side, there are creatives who refuse to adapt, viewing these tools as theft or “cheating.” On the other side, there are professionals who realize that “Nano Banana” is just a funny name for a power drill. It helps you build the house faster, but you still have to know how to build a house.
Master the variables. Build your reference libraries. Learn to speak the language of the machine. The goal isn’t to let the AI do the work—it’s to make your work impossible to ignore.
PS – More on Nano Banana Pro:
-
- How to repose a model
- How to clone any image style
- Nano Banana FAQs
- Does JSON prompting work?
- How to use Midjourney with Nano Banana Pro
- Remove the Nano Banana watermark
- Set up a virtual product shoot with Nano Banana
- How to add texture to a logo with Nano Banana
- Extend an image
- Upscale any image to 4K


")
? The 100% honest review...")


")

")

