
You’ve got your workflow, your tools, your muscle memory. You live and die by your ability to execute your vision, and the software you use is a massive part of that. For years, the conversation in post-production has been dominated by a few key players. You know the names. But there’s another name that’s moved from the periphery to the absolute center of the conversation: DaVinci Resolve.
![]()
You’ve probably heard of it. Maybe you know it as a pro-level color grading tool used on Hollywood films. Maybe you’ve heard it’s a free video editor. Both are true, but neither tells the whole story. The real story is that DaVinci Resolve has evolved into a fully-integrated post-production powerhouse that aims to replace not one, but four or five of the apps in your current workflow. That’s a bold claim, and it’s worth a look.
What Exactly Is DaVinci Resolve?
DaVinci Resolve is a non-linear editing (NLE) and post-production application from Blackmagic Design. You can find it at the Blackmagic Design official website.
Let’s be clear about what that means. It’s not just a video editor. It’s an all-in-one suite that combines video editing, color correction and grading, visual effects (VFX) and motion graphics, and audio post-production into a single piece of software. Instead of jumping between Adobe Premiere Pro, After Effects, and Audition, the idea is that you can do it all within one project file, in one application.
It started its life as a dedicated, high-end color grading system, the absolute standard in the film industry. But over the years, Blackmagic has built out its capabilities aggressively, transforming it into a complete solution.
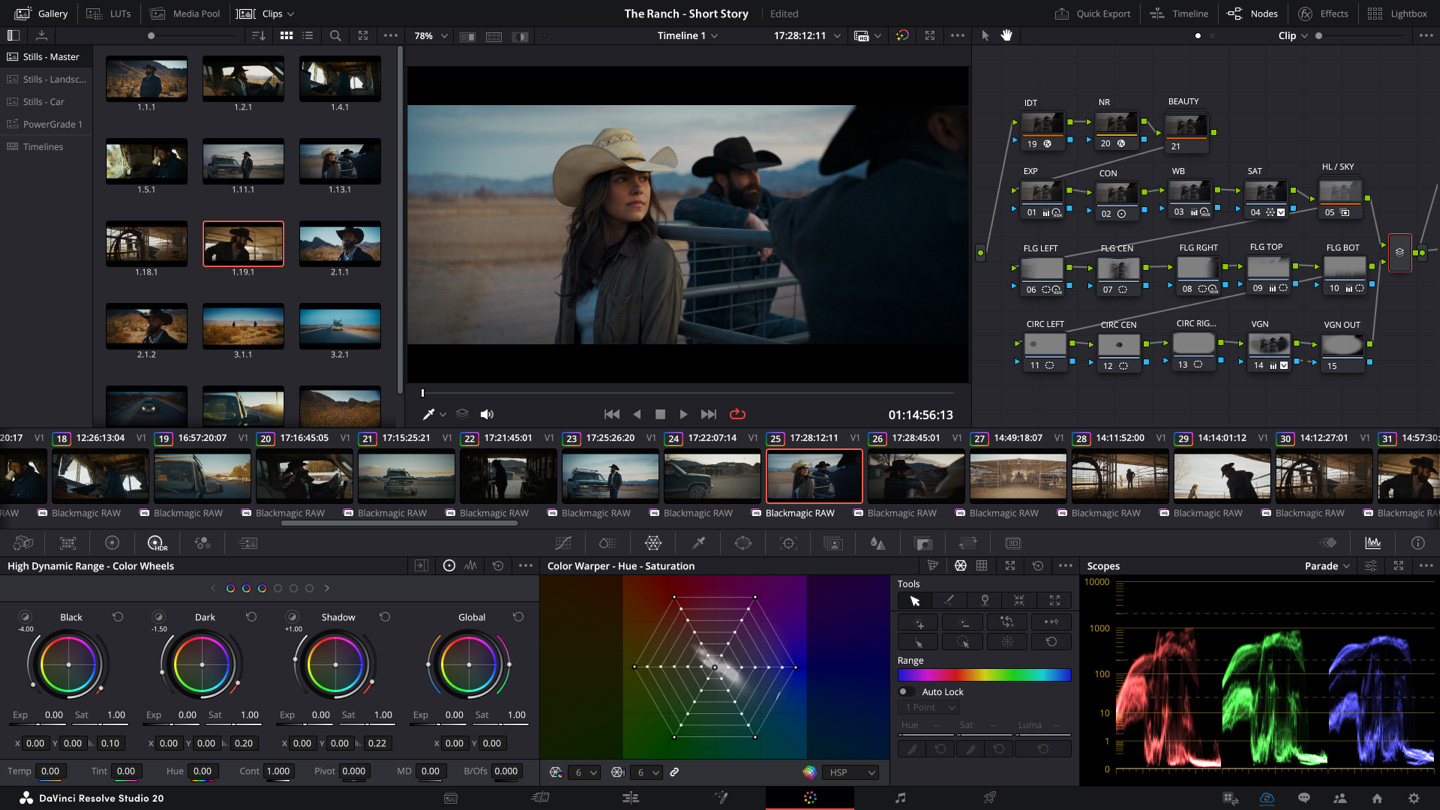
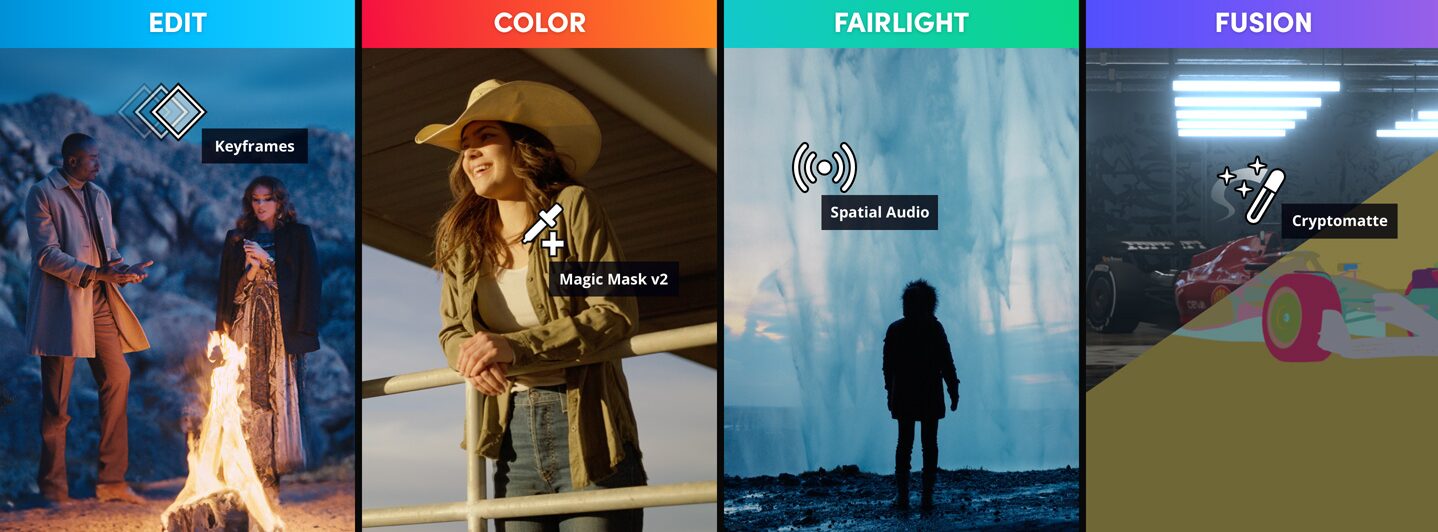
The software is structured around a series of “Pages,” which are essentially dedicated workspaces for each stage of the post-production process:
- Media Page: For importing and organizing your footage.
- Cut Page: A streamlined interface for fast editing, ideal for cutting dailies, rough cuts, or social media content.
- Edit Page: A traditional, professional NLE timeline for complex editing tasks.
- Fusion Page: A node-based compositing environment for VFX and motion graphics.
- Color Page: The world-renowned color correction and grading toolset.
- Fairlight Page: A full digital audio workstation (DAW) for audio mixing, mastering, and sound design.
- Deliver Page: For exporting your final project in various formats.
Crucially, there are two versions: a powerful free version that is remarkably capable for most users, and a paid Studio version that adds more advanced features like specific AI tools, noise reduction, and support for higher resolutions and frame rates. The fact that the free version is not a crippled, “lite” version is a major disruptor in the industry.
How Can Creative Professionals Use It?
This is where the rubber meets the road. An all-in-one solution sounds great, but only if the individual components are strong enough to replace the dedicated tools you already master. Let’s break down the core functionalities from the perspective of a seasoned creative.
The Edit Page: Your New NLE?
If you’re coming from Premiere Pro or Final Cut Pro, the Edit Page will feel familiar. It’s a professional-grade NLE with all the features you’d expect: multiple video and audio tracks, a source viewer, a timeline viewer, an inspector for adjusting clip properties, and a vast library of effects and transitions.
The trimming tools are precise and versatile, offering slip, slide, roll, and ripple edits. The keyboard-driven workflow is fast and customizable, which is critical for professionals who spend hours a day in their NLE. It handles a massive range of codecs and formats natively, from RED RAW to Blackmagic RAW to ProRes and H.265. For a photographer getting into video, this means you can throw your high-bitrate footage from a Canon, Sony, or Fujifilm camera at it without needing to transcode everything into an intermediate codec first, saving you time and drive space.
One of the standout features is its performance. Resolve is built to leverage modern GPUs, making playback of high-resolution, effects-heavy timelines smoother than many competitors, even on moderately-specced machines. However, it is demanding, so a system with a powerful, dedicated GPU (Nvidia or AMD) with plenty of VRAM is non-negotiable for serious work.
The Color Page: The Main Event
This is DaVinci Resolve’s home turf. No other NLE comes close to the power and precision of the Color Page. For photographers, this is the tool that will feel the most intuitive and powerful. Concepts like primary and secondary corrections, curves, qualifiers, and power windows are all here, but with a level of control that Lightroom or Photoshop’s Camera Raw can’t match for motion.
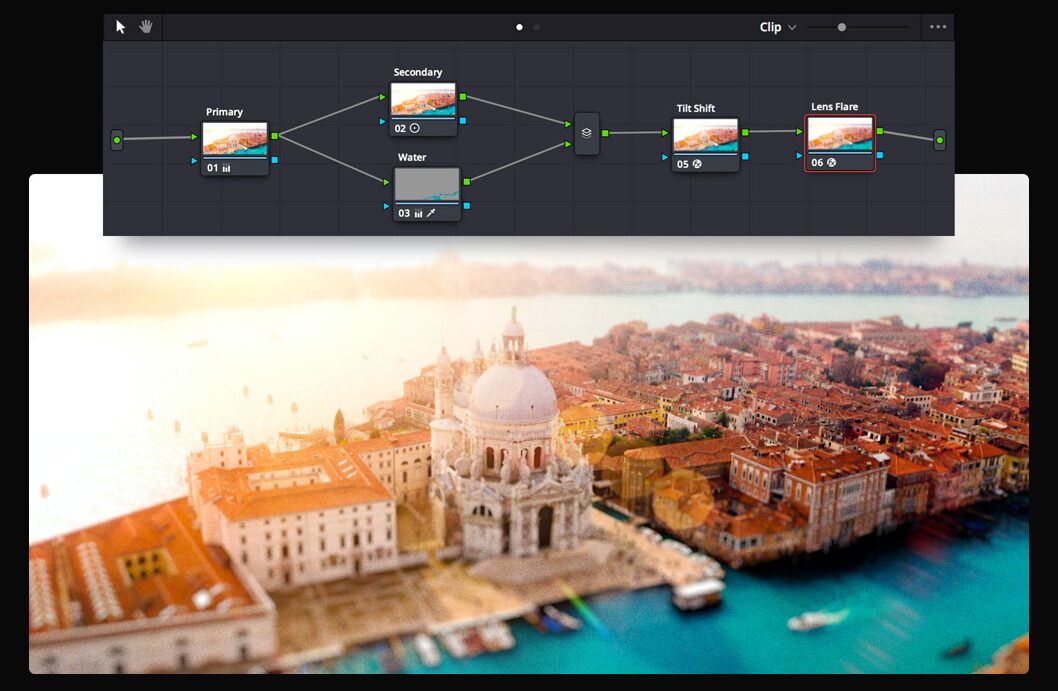
The workflow is node-based. Instead of stacking adjustment layers, you build a tree of nodes, where each node performs a specific operation (e.g., exposure correction, a color LUT application, a sharpening pass). This modular approach offers incredible flexibility. You can easily re-order operations, combine them in parallel, or apply a single correction to multiple clips.
- Actionable Tip for Photographers: Think of the first node as your “Camera Raw” adjustment. Use it to balance the shot—correct exposure, set white balance, and manage contrast using the Log wheels or HDR palettes. Use subsequent serial nodes for creative looks, secondary corrections (like isolating a skin tone or the color of a product), and effects like film grain or glow.
- Power Windows: These are essentially masks that you can track to any object in your frame. You can brighten a face, desaturate a distracting background, or change the color of a moving car with incredible precision. The tracking is best-in-class.
- Qualifiers: Isolate parts of your image based on hue, saturation, or luminance. Want to make the blues in the sky deeper without affecting the blue in the talent’s shirt? The HSL qualifier is the tool for that.
Even if you don’t edit your primary projects in Resolve, many professionals use a “round-tripping” workflow where they edit in Premiere Pro and then send the project to Resolve just for the color grade, because the tools are that much better.
Fusion Page: The After Effects Competitor
Fusion is Resolve’s answer to Adobe After Effects, but it operates on a completely different paradigm: a node-based workflow. Instead of a layer-based system, you connect nodes that represent different elements (media, effects, masks) into a flow chart or tree.
This is a steeper learning curve, period. For creatives used to the layer stack in Photoshop and After Effects, it can feel alien at first. However, for complex composites, a node-based workflow is arguably more powerful and organized. It allows you to visualize the entire signal flow of your composite and make intricate changes with surgical precision.
Fusion is capable of high-end visual effects—think green screen keying, 3D compositing, and complex particle systems. For the average creative professional, it’s a powerful tool for creating sophisticated motion graphics, title sequences, and animated logos directly within your editing timeline. You can create a complex graphic in Fusion, save it as a template, and then access and modify it directly from the Edit Page timeline. This level of integration is something you can’t get when bouncing between Premiere and After Effects.
Fairlight Page: Pro-Level Audio Integrated
Audio is often an afterthought for visually-focused creatives, but it’s half the experience. The Fairlight Page is a full-fledged Digital Audio Workstation (DAW) baked right into Resolve. It’s a tool designed to compete with Adobe Audition or even Avid Pro Tools.
You get a professional multi-track mixer with equalization (EQ), dynamics (compression, gating, limiting), and panning for every track. It supports a huge range of VST and AU audio plugins, so you can bring your existing toolkit from iZotope or Waves right into Resolve.
- Key Features for Video Creators:
- Voice Isolation: An AI-powered tool (Studio version) that is shockingly good at removing background noise from dialogue. Got a great interview take ruined by an air conditioner or street traffic? This tool can save it with a single click.
- Dialogue Leveler: Automatically balances the volume of different dialogue clips, saving you the tedious task of manually riding the faders.
- ADR (Automated Dialogue Replacement) Tools: Professional-level tools for re-recording and syncing dialogue in post.
For photographers expanding into hybrid work or short films, having an integrated audio suite of this caliber means you don’t have to learn another complex application to get professional-sounding audio.
AI Tools & Blackmagic Cloud
Blackmagic has been aggressively integrating AI-powered features (they call it the DaVinci Neural Engine) into the Studio version. Tools like Magic Mask allow you to create a mask around a person or object with a single click, which is a massive timesaver for secondary color corrections or VFX. Object Removal can eliminate unwanted elements from a shot, and Super Scale can upscale HD footage to 4K with impressive results.
The recent introduction of Blackmagic Cloud has also been a game-changer for collaboration. It allows multiple users—an editor, a colorist, a VFX artist, a sound designer—to work on the same project timeline, from anywhere in the world, simultaneously. Changes one user makes are reflected in the project for everyone else. For creative teams, this is a powerful and cost-effective alternative to other remote workflow solutions.
Is DaVinci Resolve Right for You?
So, the bottom line. Should you invest the time to learn this tool?
DaVinci Resolve is right for you if:
- You’re a multidisciplinary creative. If you shoot photos, edit videos, and dabble in motion graphics and sound, the value of an integrated, all-in-one suite cannot be overstated. The seamless workflow between editing, color, VFX, and audio will save you a staggering amount of time rendering, exporting, and round-tripping between different apps.
- You are serious about color. If you want the most powerful color grading tools available in an NLE, the decision is simple. Resolve is the industry standard for a reason. Photographers who already have a deep understanding of color will feel right at home and empowered by the toolset.
- You’re budget-conscious but demand professional tools. The free version of DaVinci Resolve is more powerful than many paid NLEs. The one-time cost for the Studio version ($295, with lifetime updates included) is a stark contrast to the subscription model of Adobe Creative Cloud. This isn’t about being cheap; it’s about investing in a tool that you own.
- You work collaboratively. The Blackmagic Cloud workflow is a powerful and efficient way for teams to work together on the same project.
DaVinci Resolve might not be right for you if:
- You are deeply embedded in the Adobe ecosystem. If your entire workflow relies on Dynamic Link between Premiere Pro, After Effects, Photoshop, and Illustrator, and you collaborate with others who are standardized on Adobe, switching can be disruptive. The muscle memory is real, and the time it takes to become proficient in a new ecosystem is a real cost.
- You primarily do complex motion graphics. While Fusion is incredibly powerful, After Effects still has a larger community, more third-party plugins and templates, and a lower barrier to entry for many motion graphics tasks. If mograph is 90% of your work, sticking with After Effects might be the more efficient path.
- You have older or underpowered hardware. Resolve is a resource-hungry application. It demands a strong GPU. If you’re working on an older laptop with integrated graphics, your experience will be frustrating.
The learning curve is real, but the power and workflow efficiency waiting on the other side are undeniable. For any creative professional looking to streamline their process and elevate their work, ignoring DaVinci Resolve is no longer an option. Download the free version. The only thing it will cost you is the time to see for yourself.


")


? The 100% honest review...")
")
")


