
You’re about to see how to take a messy napkin sketch and turn it into a consistent, studio-quality character using a workflow that actually respects your creative intent, using Nano Banana (Google’s amazing image model) and Weavy (node-based canvas app).
And importantly, the character will stay consistent across scenes, poses and even styles (want to render it as a B&W cartoon? Not a problem).
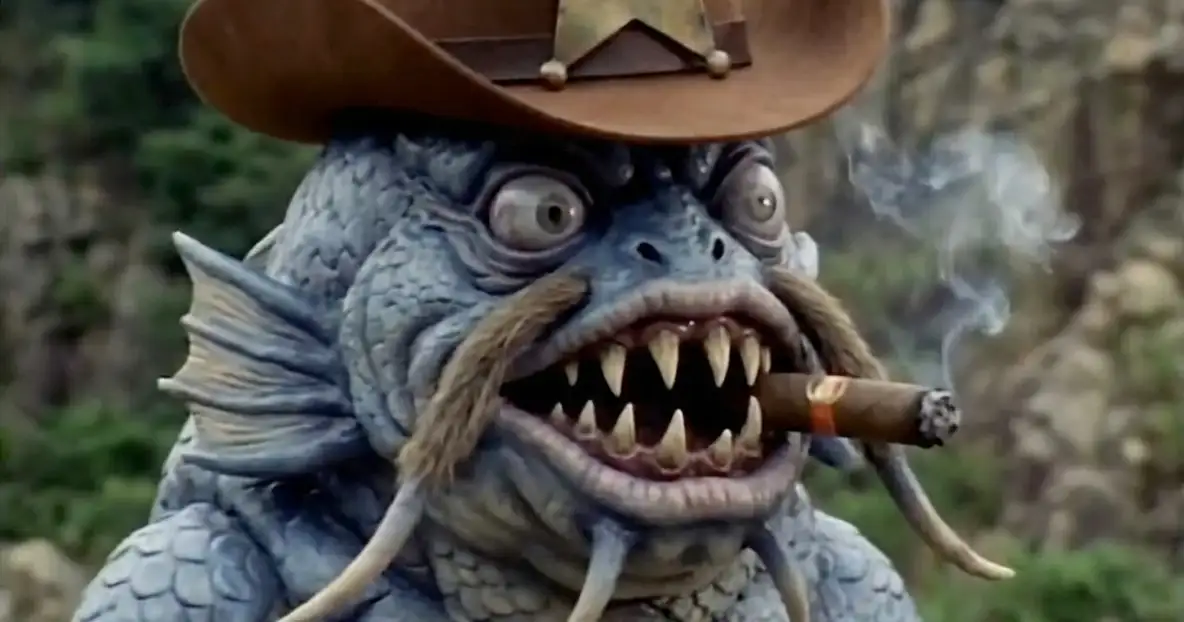
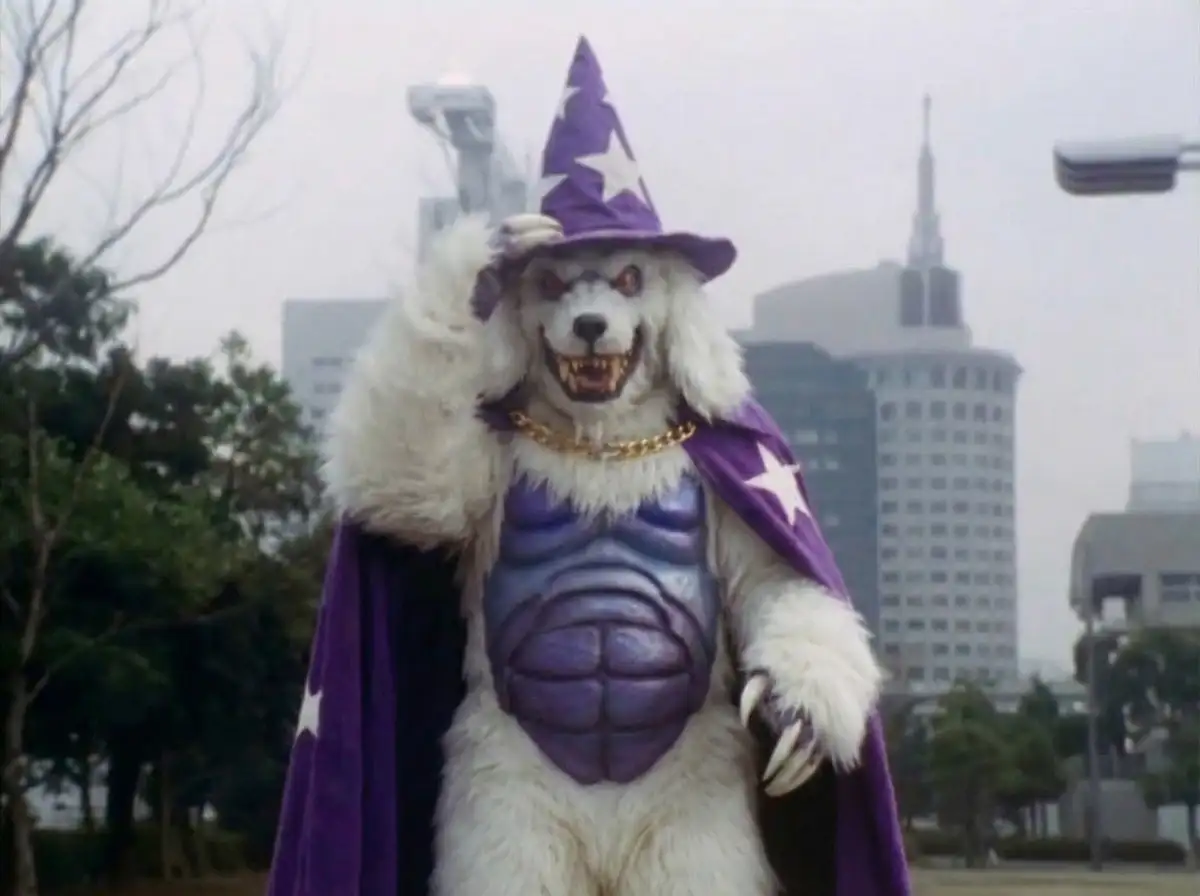
I’ll show you the step-by-step breakdown of how we built the “Fish Sheriff” and the “Yeti Wizard,” in the style of everybody’s favorite 90s show Mighty Morphin Power Rangers, but this approach will work with any character in any style.

The whole workflow at a glance – it’s not as complex as it looks
Setup: The Modular Approach
When you try to generate a complex character in one shot – “a fish-sheriff monster fighting a wizard in a desert” – you’ll probably end up disappointed.
You’re asking the AI to guess dozens of little details correctly all at once. And if one of them is off, you have to redo the whole thing. Maybe it forgets the cowboy hat, it makes the trout look like a catfish, etc.
So instead, we’ll build the characters in parts, then combine them at the end.
By isolating these parts, we get 100% control over the details. If the boots look wrong, we just re-roll the Legs node – we don’t risk messing up the perfect face we just generated.
Step 1: The Sketch is Still King
Everything starts with your hand. It can be messy, raw, etc – it just needs to have character and vision.
Nano Banana is shockingly good at interpreting very, very rough sketches so don’t worry about a lack of drawing ability. These sketches are far from masterpieces, but they communicated very specific intent: eg, the spikes on the wizard’s tongue or the barbell-mustache on the fish sheriff.
And as you can see, it stuck very very close to my sketches.
Step 2: Build Each Character Part
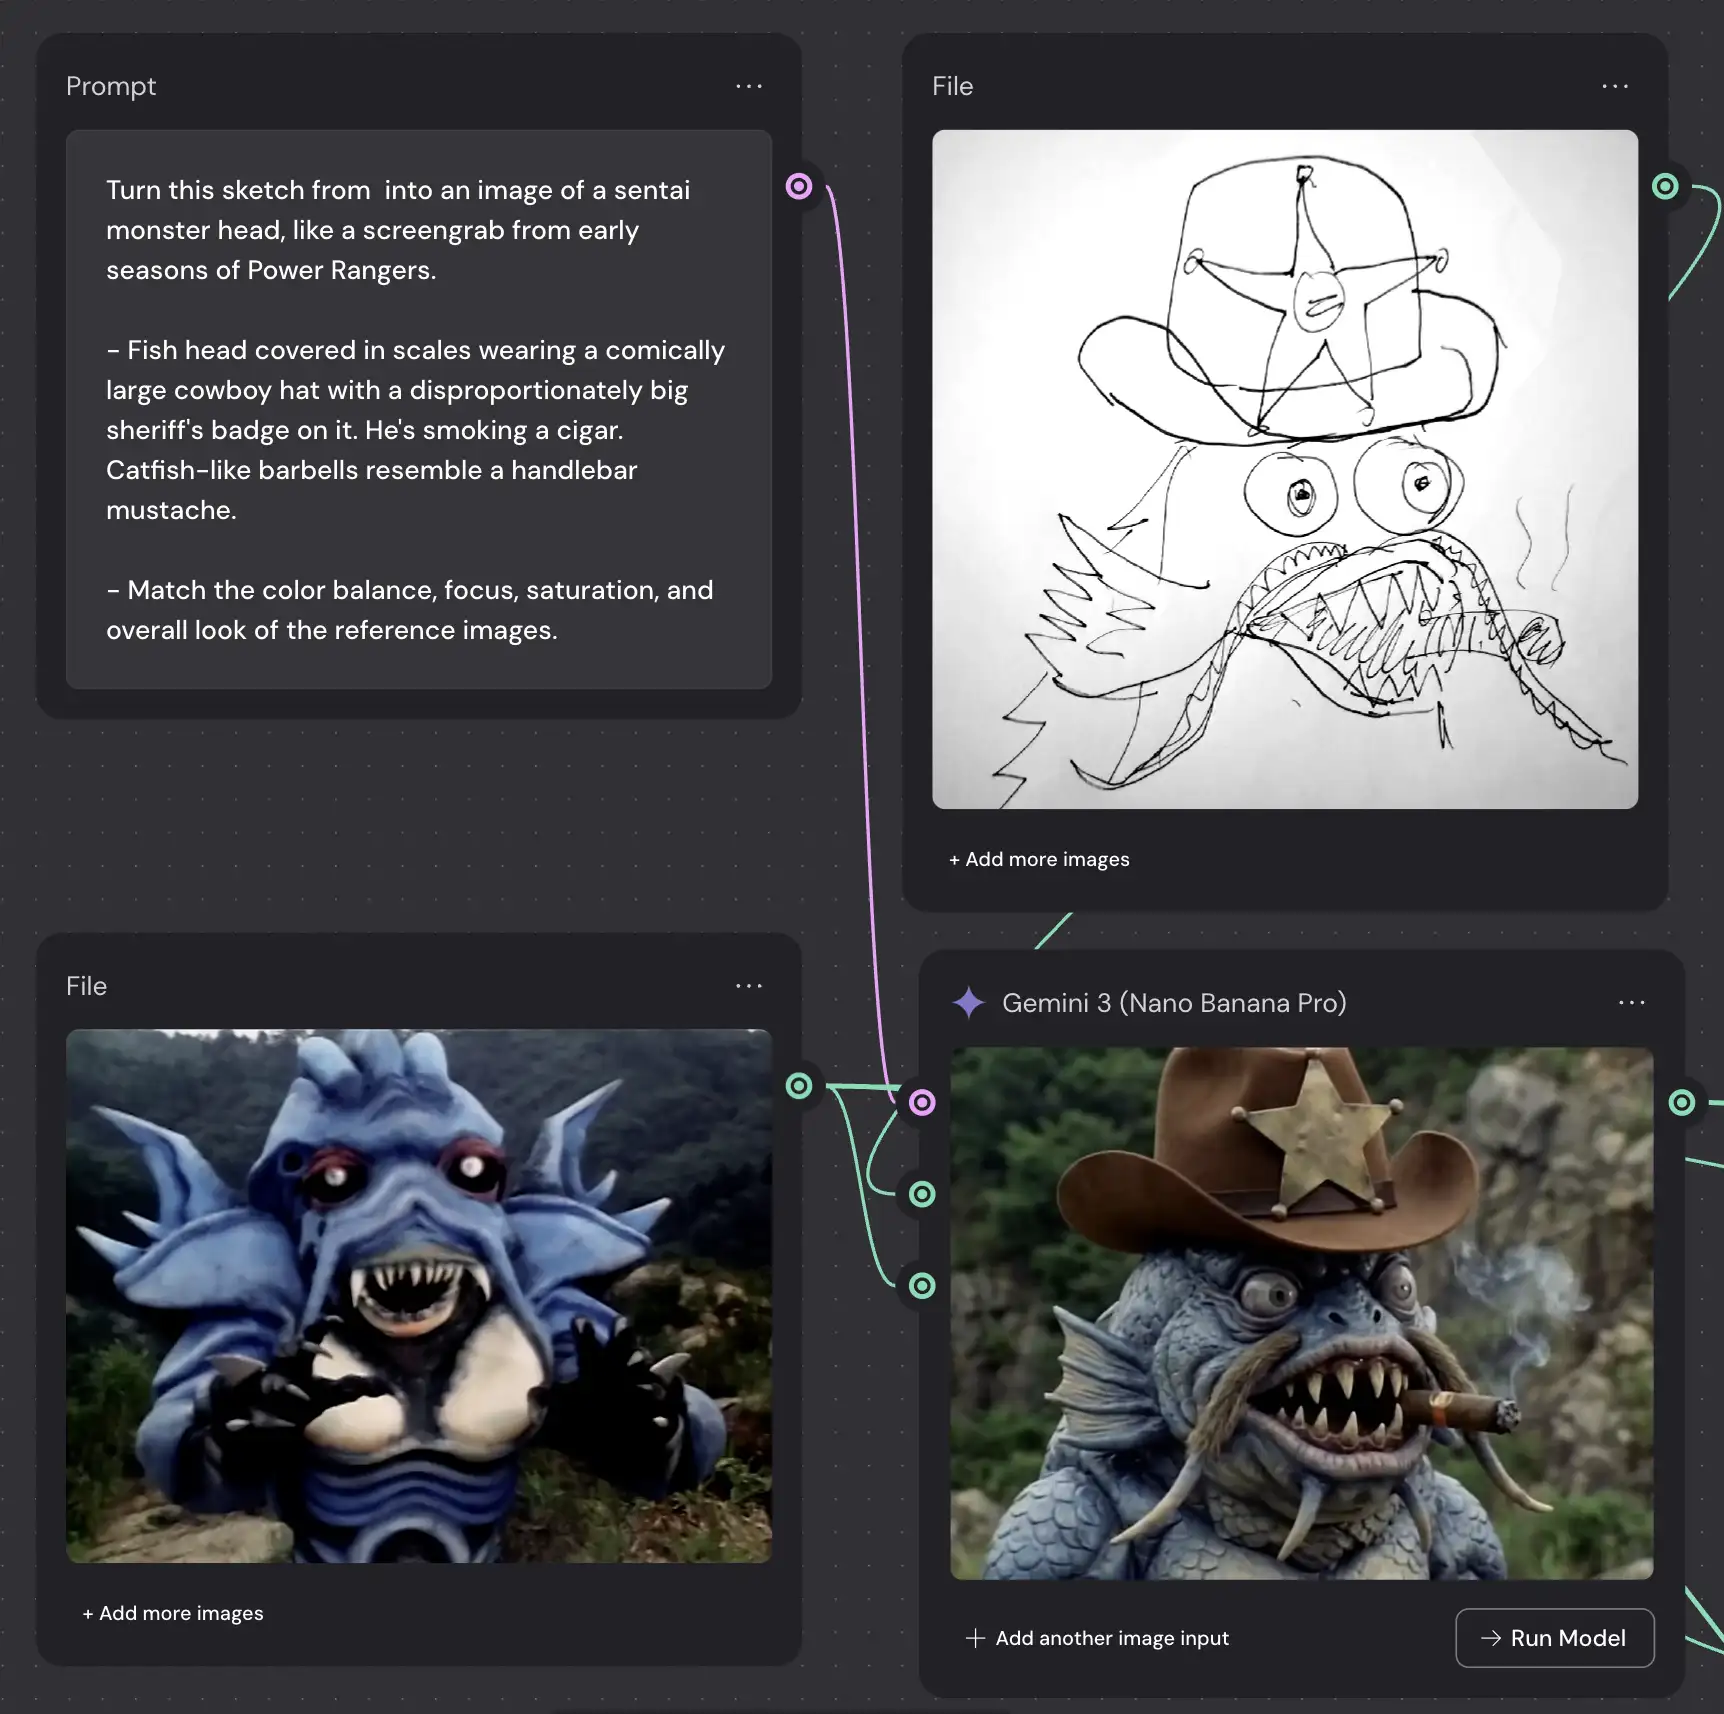
This is where Weavy shines. Instead of one giant prompt, we create a flow of nodes. We break the character down into 4 distinct assets:
-
The Head: We feed the sketch into a
Gemini 3 (Nano Banana Pro)node. The prompt is specific: “Fish head covered in scales wearing a comically large cowboy hat… like a screengrab from early seasons of Power Rangers”. -
The Body: Next, we generate the torso. We ask for a “White fish body with blue scales… pot belly gut and skinny arms”.
-
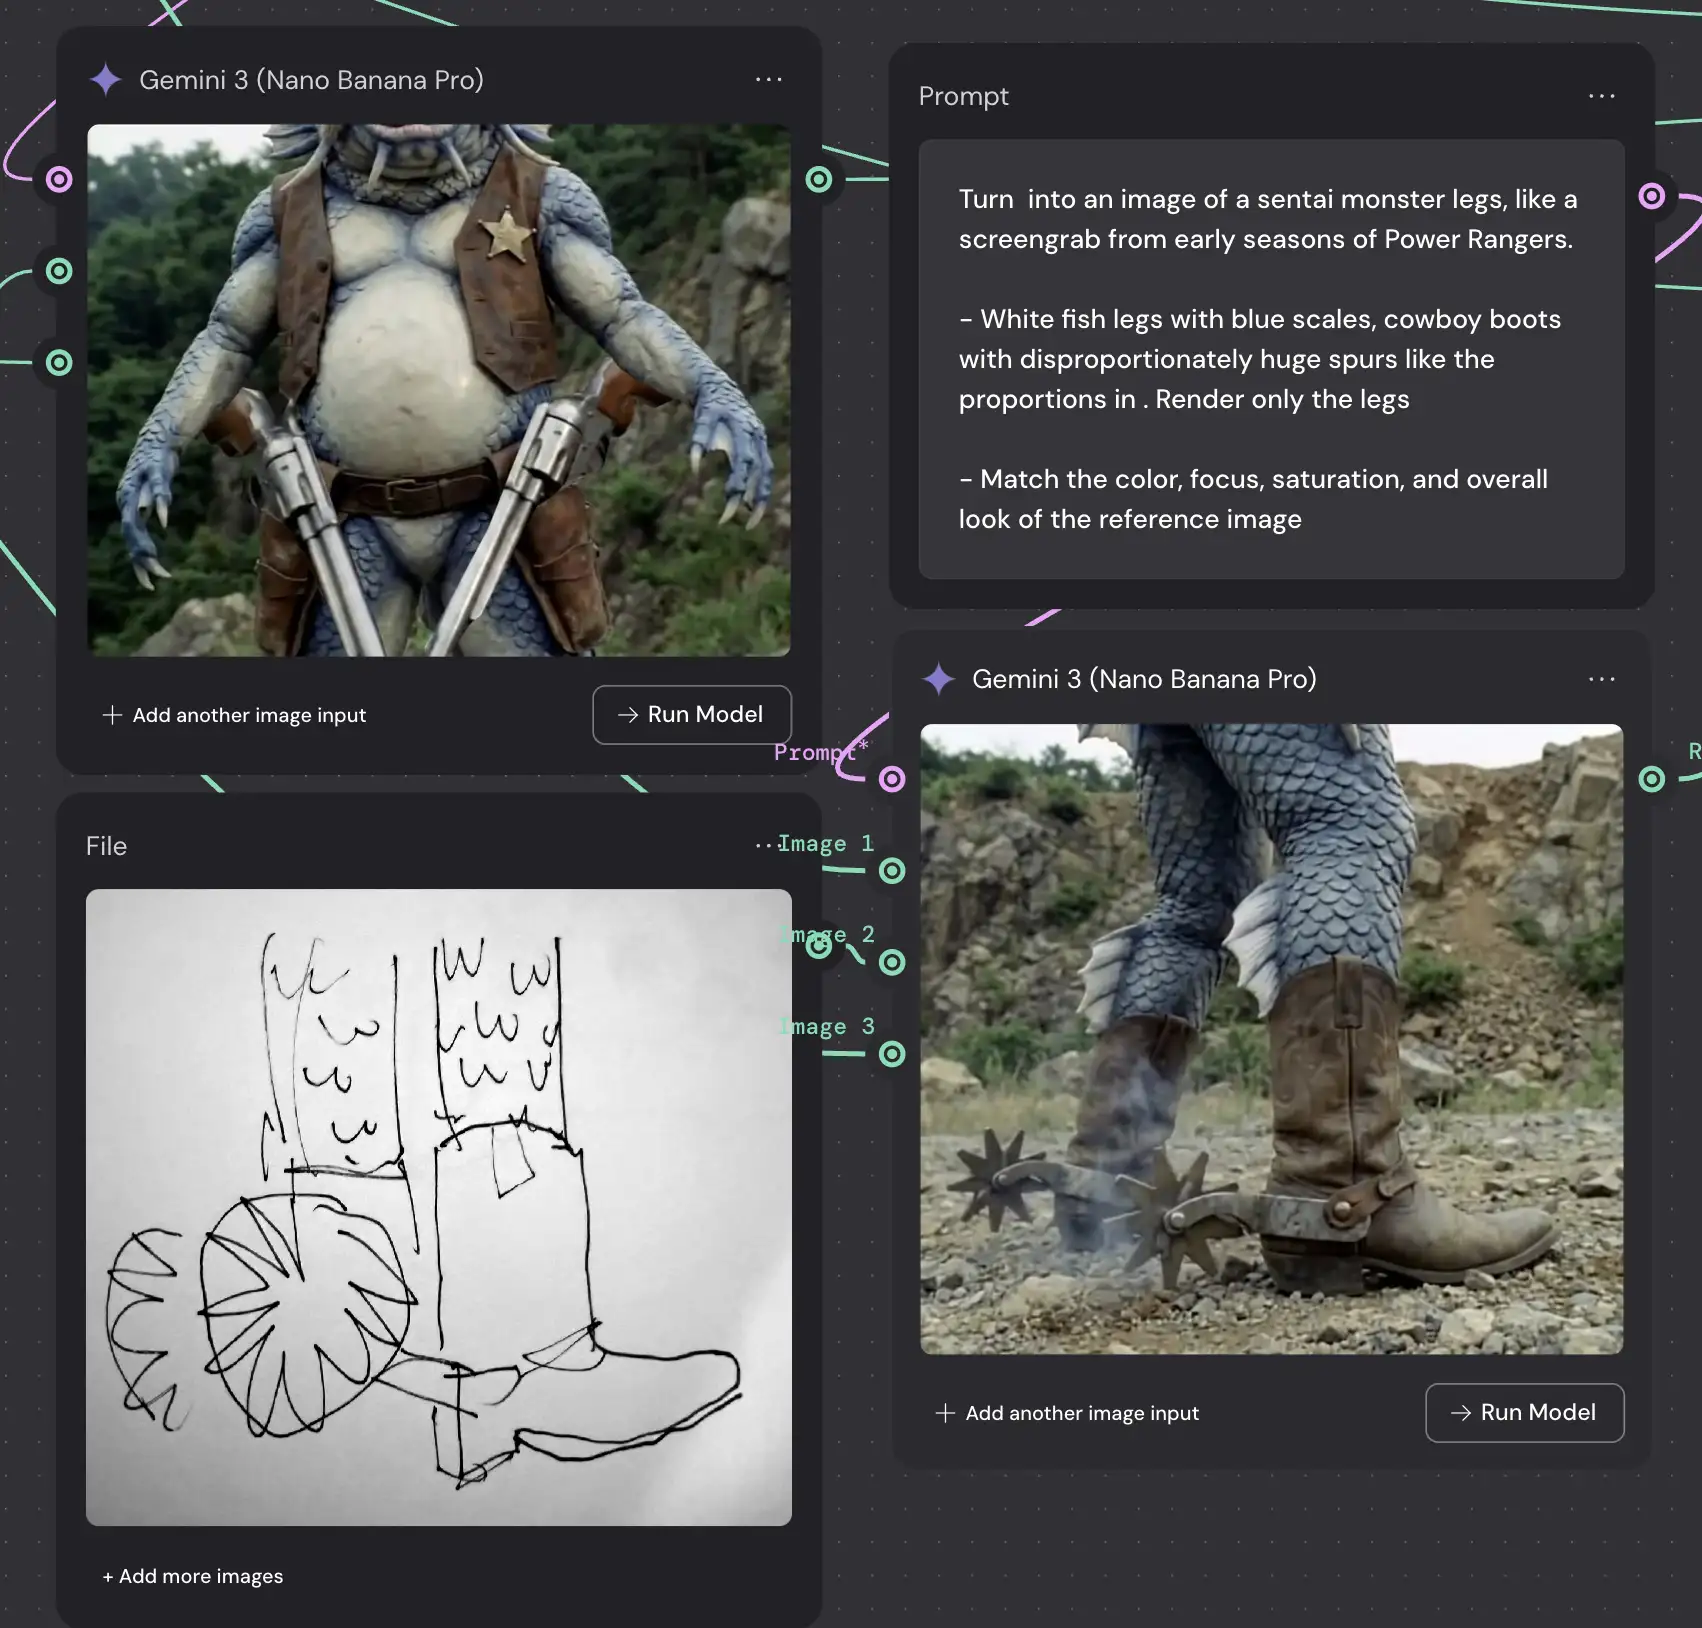
The Legs: Finally, the boots. We want “Cowboy boots with disproportionately huge spurs”.
- Accessories (optional): For the wizard, his magic staff, hat and cloak.
Note that you probably won’t get every one of these right on the first try. Don’t be afraid to re-roll, iterate, etc. It took me 3-5 tries on most of these.
Also, make sure you use 2K or 4K resolution for each step – it makes the model more accurate, and it doesn’t cost more credits in Weavy.
And although I’m using Weavy, the same basic approach should work with any node-based app like Freepik Spaces, Flora, etc.
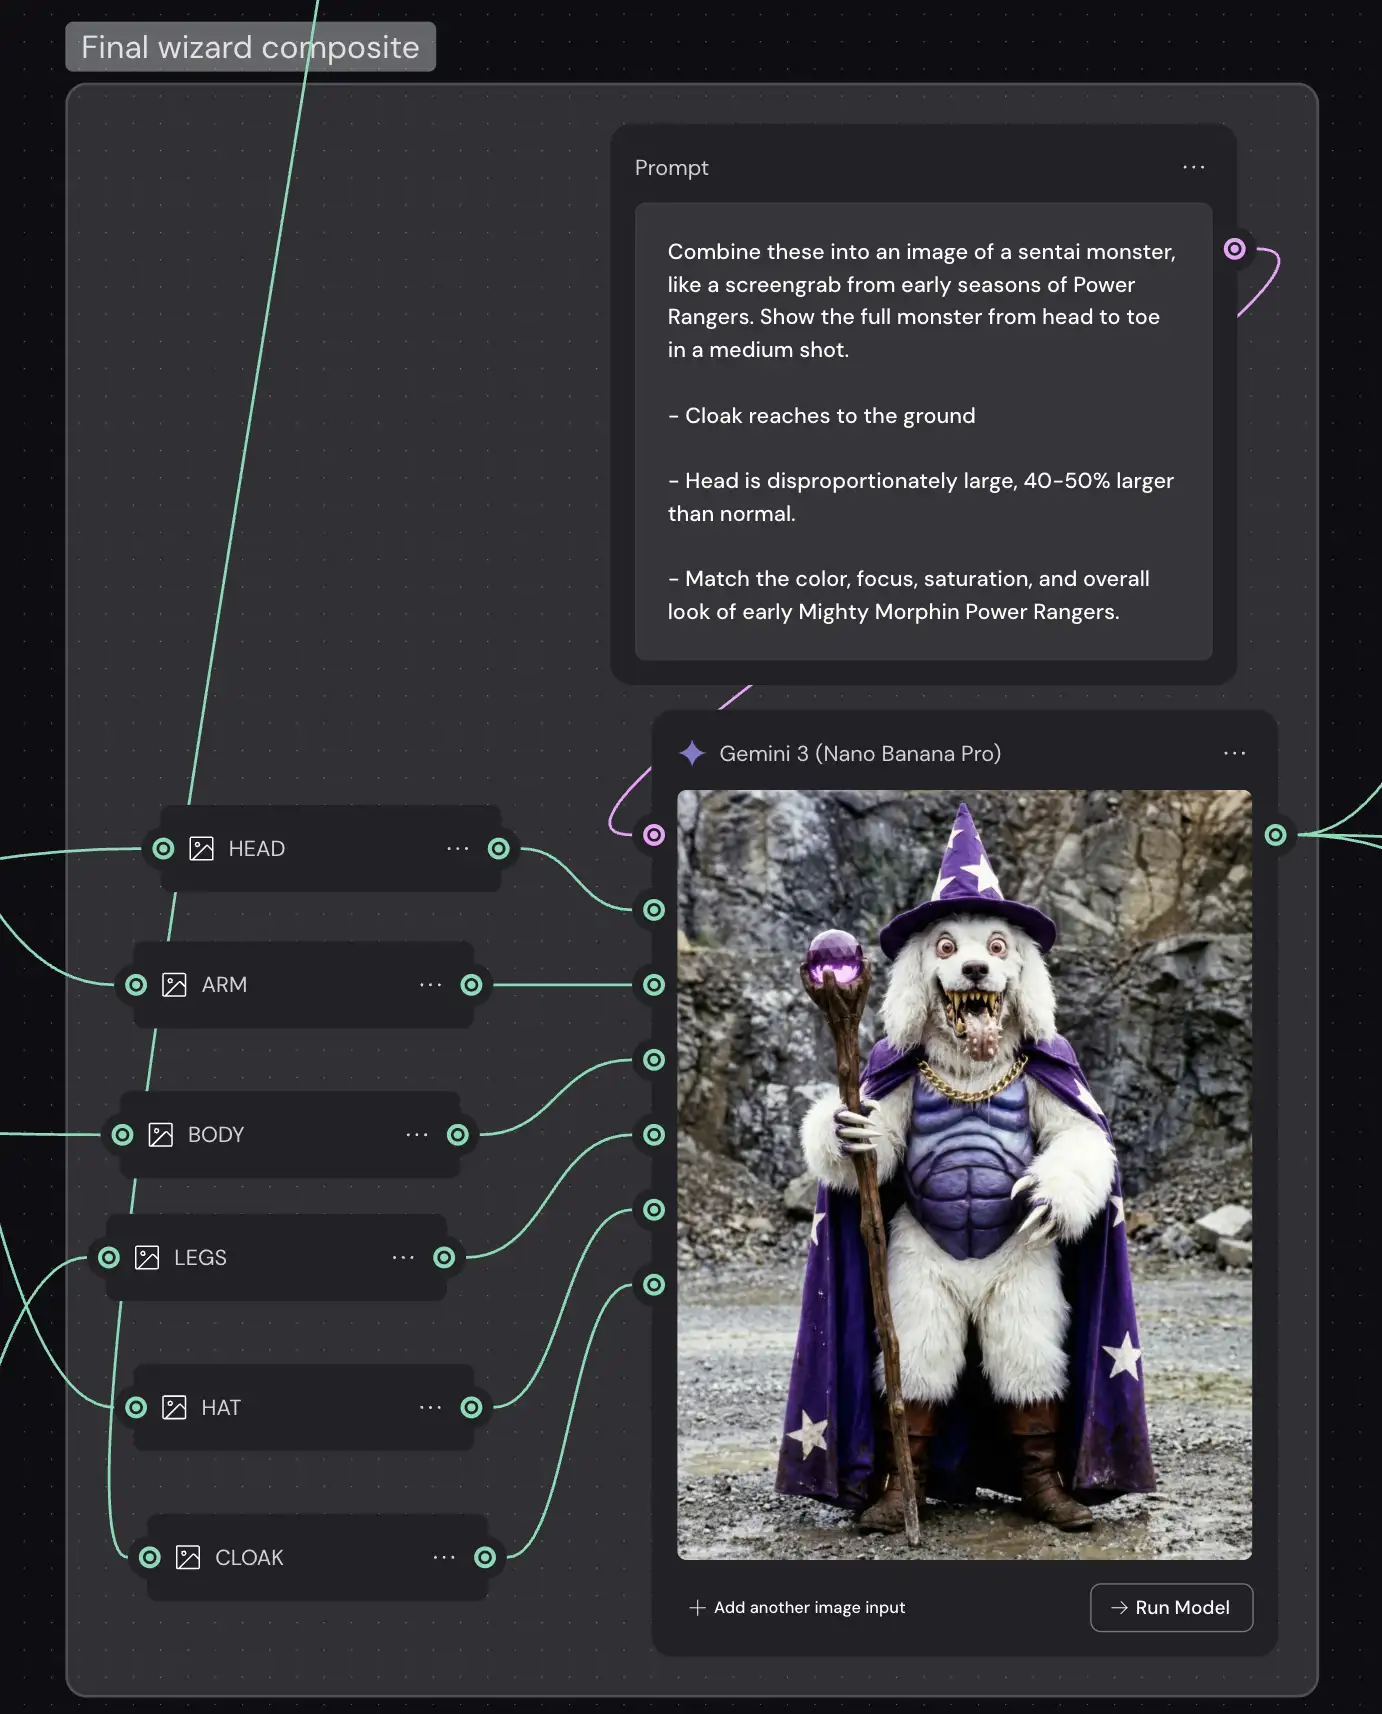
Step 3: Assemble the Final Character
Once we have our high-res assets, we feed them into a final composite node. I used router nodes here to be a little more organized (labeling each body part), but that’s totally optional.
In Weavy, you can wire the outputs of your Head, Body, and Leg nodes directly into a “Combiner” prompt. We tell Nano Banana: “Combine these into an image of a sentai monster… match the color, focus, saturation, and overall look”.
Because Nano Banana Pro has massive context awareness (it’s built on Gemini 3), it understands how to blend the lighting and texture so it looks like a single photograph, not a bad Photoshop job.
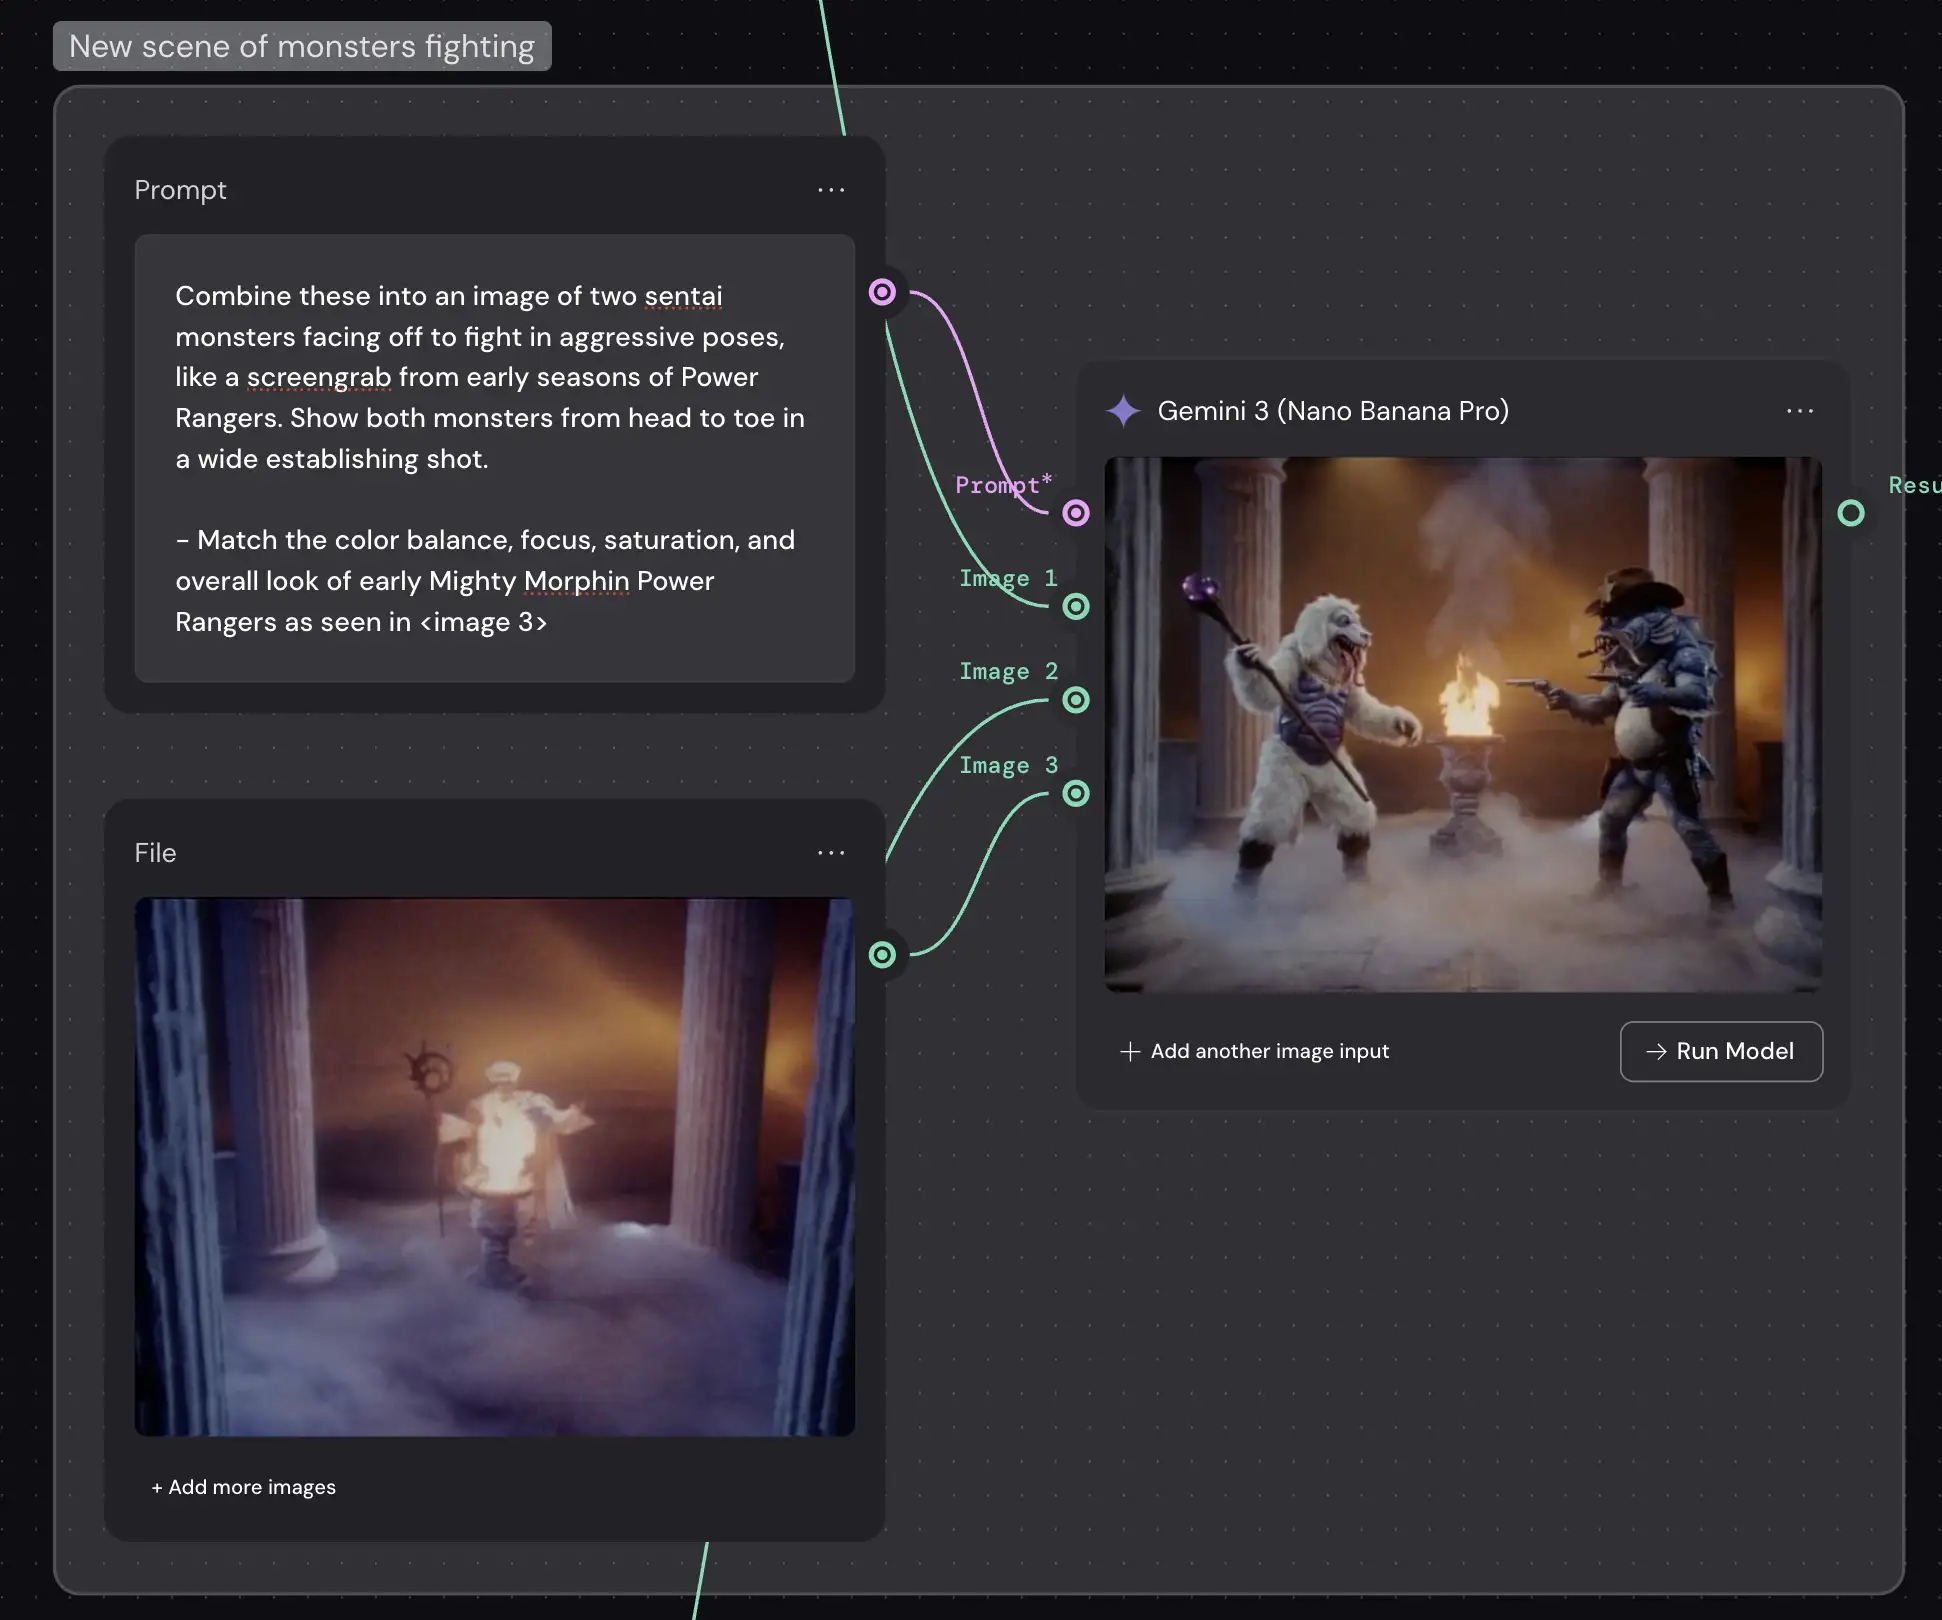
Step 4: Put Them In A Scene (Action!)
Now for the magic trick. Once you have your character defined, you can put them anywhere.
We took our Fish Sheriff and our Wizard Monster (built using the same modular process) and dropped them into a new scene: “Monsters facing off to fight… wide establishing shot”.
Because we built them structurally first, the AI knows what they look like. It’s not guessing anymore. It’s referencing the data we just created.
Step 5: Animate (optional)
For motion, you can take these final composite frames and run them through a video model like Veo, Kling or Grok. Since the character consistency is already baked in, the animation comes out surprisingly stable.
And most importantly, remember: Tools like Weavy and Nano Banana are just that – tools. They remove the friction between the idea in your head and the image on the screen.
But you still have to have the idea. You’re still the Creative Director.
PS – More on Nano Banana Pro:
- How to repose a model
- How to do style transfer in Nano Banana
- Nano Banana FAQs
- Does JSON prompting work?
- How to master Nano Banana prompting
- Add a halftone effect
- How to use Midjourney with Nano Banana Pro
- Remove the Nano Banana watermark
- Set up a virtual product shoot with Nano Banana
- Nano Banana pricing
- Add texture to a logo


")
")

? The 100% honest review...")


