
If you are delivering assets in 2025, pixelated, soft, or low-resolution images are a career-ending non-starter. Clients demand archival quality, large-format print readiness, and razor-sharp digital assets.
For years, “upscaling” meant interpolation—math that guessed new pixels based on surrounding ones, resulting in soft, muddy images. AI changed that. Now, algorithms don’t just guess; they generate.
Two names dominate this conversation: Topaz Labs (specifically Topaz Photo AI and Gigapixel) and Magnific AI.
Most reviews will tell you “it depends.” That’s useless advice. You need to know exactly which tool fits your specific workflow, budget, and creative output. This guide breaks down the technical reality of Topaz vs. Magnific, stripping away the marketing hype so you can make the right investment.
The Core Difference: Fidelity vs. Hallucination
Before we talk about sliders and pricing, you must understand the fundamental difference in how these two engines operate. This is not a nuance; it is a binary choice in how your image is processed.
Topaz Labs is built on Restoration and Fidelity.
Its models are trained to look at a low-resolution image and ask, “What did this originally look like?” It attempts to recover lost detail—eyelashes, brick textures, fabric weaves—without altering the subject’s identity or the scene’s composition. If the data isn’t there, Topaz tries to sharpen what exists. It is conservative. It is safe. It is built for photographers.
Magnific AI is built on Hallucination and Reimagining.
Magnific is closer to a text-to-image generator (like Midjourney) than a traditional upscaler. It uses latent diffusion to look at your low-resolution blob and ask, “What could this look like?” It will invent details that never existed in the original file. It will add skin pores, individual strands of hair, and intricate background textures. It creates new pixels based on semantic understanding, not just pixel adjacency. It is aggressive. It is creative. It is built for digital artists and AI creators.
Topaz Photo AI: The Professional Standard for Photography
Topaz Labs has been the industry standard for nearly a decade. Their flagship product, Topaz Photo AI, combines their three previous standalone tools: DeNoise AI, Sharpen AI, and Gigapixel AI.
Local Processing and Workflow
Topaz runs locally on your machine. This is a critical distinction for commercial work. You do not need an internet connection, and you are not uploading client assets to a cloud server. If you are working under strict NDAs (Non-Disclosure Agreements) or dealing with sensitive IP, Topaz is often the only compliant option.
Because it uses your local GPU (Graphics Processing Unit), speed is determined by your hardware. On an M2 or M3 Mac Studio or a PC with an NVIDIA RTX 4090, Topaz screams. You can process thousands of images in a batch while you sleep.
Key Features and Settings
- Autopilot: Topaz starts by analyzing the image for noise, blur, and compression artifacts. It suggests a “stack” of edits. You should almost always review this manually for critical work, but it gets you 90% of the way there.
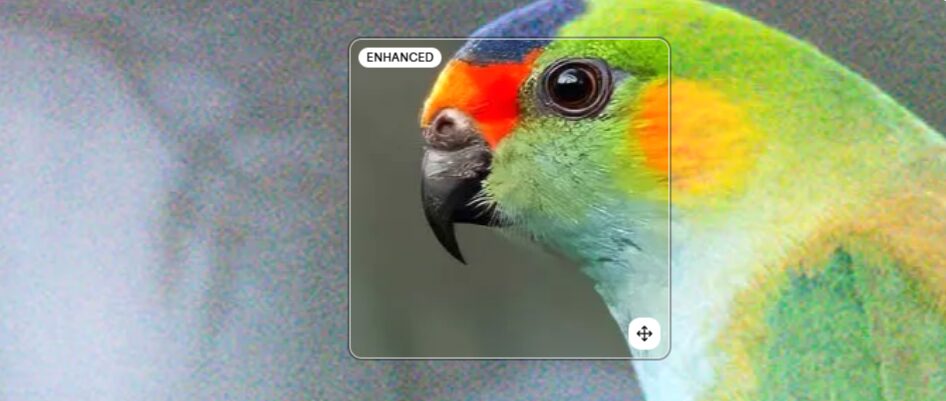
- Face Recovery: This is Topaz’s killer feature. It detects low-resolution faces and reconstructs them using a specialized model trained on human facial features. Unlike Magnific, which might change the person’s ethnicity or bone structure if the “Creativity” setting is too high, Topaz Face Recovery prioritizes identity preservation. It focuses on sharpening eyes and teeth without turning your subject into a stranger.
- Remove Noise Raw: If you shoot raw, Topaz applies demosaicing and denoising at the raw level, before the image is converted to a TIFF or JPEG. This retains significantly more dynamic range and detail than denoising a compressed file.
When to Use Topaz
- Event Photography: You shot a wedding in a dark venue at ISO 12,800. Topaz Photo AI will strip the noise and sharpen the soft focus.
- Archival Restoration: You are scanning 35mm film or old family prints. You want them to look like the original photo, not a sci-fi reimagining of it.
- Product Photography: You need accurate text on a label to be sharp. Topaz preserves text; generative upscalers often garble it.
Magnific AI: The Creative Powerhouse
Magnific AI is a web-based tool that feels like magic. It doesn’t just sharpen; it adds “micro-contrast” and detail density that rivals medium-format photography. However, it is a volatile tool that requires a steady hand.
Cloud Processing and Cost
Magnific runs in the cloud. You pay a monthly subscription for “credits.” Upscaling a single image to 4k or 8k resolution costs a significant amount of credits. It is expensive compared to Topaz.
The processing is slow. You upload, you wait (sometimes minutes), and you get a result. There is no batch processing. This is a boutique tool for “hero” assets, not for culling a 500-image shoot.
Key Features and Settings
- Creativity Slider: This is the most dangerous and powerful slider in the software.
- Value 0-2: Minor enhancements. Safe for some photography.
- Value 3-5: The sweet spot for AI art. It adds skin texture, fabric imperfections, and lighting bloom.
- Value 6+: Complete hallucination. The AI will start turning a blurry background rock into a detailed house, or a pattern on a shirt into a face.
- HDR and Resemblance: The HDR slider controls the local contrast and “crunchiness” of the image. The Resemblance slider forces the AI to stick closer to the original input capability. If you find Magnific is changing your subject’s face too much, crank Resemblance up and turn Creativity down.
- Prompting: Unlike Topaz, Magnific allows you to input a text prompt. If you are upscaling a picture of a cyberpunk city, you can type “neon lights, rain, wet pavement, highly detailed 8k” into the prompt box. Magnific will use that text to guide the hallucination of details, ensuring the new pixels match the vibe you want.
When to Use Magnific
- AI Art Upscaling: Midjourney and DALL-E generate low-resolution files (usually 1024×1024). Magnific is the essential second step to turn those generations into usable professional assets.
- Creative Retouching: You have a flat, somewhat boring studio shot. You can use Magnific with a low creativity setting to add “texture” to the skin and clothes, making the lighting feel more expensive and three-dimensional.
- Concept Art: You have a rough sketch or a low-res photobash. Magnific can bind the elements together and render the final polish for you.
Direct Comparison: Topaz vs. Magnific
Let’s look at the hard metrics that matter to your business.
1. Workflow Speed
Winner: Topaz Labs
Topaz is a production workhorse. The ability to drag-and-drop 100 images, apply a preset, and export to a specific folder structure is vital for working photographers. Magnific is a “one at a time” creative session.
2. Pricing and Value
Winner: Topaz Labs
Topaz Photo AI typically costs around $199 for a perpetual license (with one year of upgrades). You own it. You can use it forever.
Magnific AI uses a SaaS (Software as a Service) model. Plans range from roughly $39 to hundreds of dollars per month. If you stop paying, you lose access. For sheer ROI (Return on Investment), Topaz wins easily. However, if Magnific saves a $5,000 ad campaign by saving a bad image, the subscription pays for itself instantly.
3. Image Fidelity
Winner: Topaz Labs
If you are photographing a CEO for an annual report, you cannot use Magnific. It might fix her skin texture but accidentally change the shape of her nose or the lettering on the company sign behind her. Topaz respects the pixels that are there.
4. Creative Output
Winner: Magnific AI
Topaz cannot add detail that isn’t suggested by the source file. If you have a blurry, flat texture, Topaz will just make it a sharper blurry, flat texture. Magnific will invent a leather grain or a metallic sheen that looks photorealistic. For creative impact, Magnific is currently unrivaled.
The Hybrid Workflow: The Pro Move
The best creative professionals often don’t choose one; they use both in a specific sequence.
Scenario: You have a low-res AI generation of a person that you need to use for a print ad.
Step 1: Run the image through Magnific AI. set Creativity to roughly 2 or 3. Use a prompt to describe the scene. This will add the necessary high-frequency detail (skin pores, hair) that the low-res generation lacked.
Step 2: The result from Magnific typically comes back huge and sometimes “noisy” or with slight artifacts (weird eyes, strange background distortions).
Step 3: Downscale the image slightly (if needed) and run it through Topaz Photo AI. Use the “Face Recovery” tool to fix any weirdness Magnific introduced to the eyes or irises. Use Topaz’s “Remove Noise” to clean up the “digital grain” Magnific often adds.
By sandwiching the creative hallucination of Magnific with the corrective fidelity of Topaz, you get the best of both worlds: incredible detail and a clean, professional finish.
Final Verdict
Do not buy tools based on hype. Buy them based on the problem you solve daily.
Get Topaz Photo AI if:
- You are a photographer processing real-world images.
- You need to process large batches of files.
- Fidelity and subject identity are legally or artistically required.
- You hate monthly subscriptions.
Get Magnific AI if:
- You are a digital artist, retoucher, or AI creator.
- You need to add detail and texture that simply isn’t in the source file.
- You are working on “hero” images where spending 10 minutes and $1.00 per image is acceptable.
The industry is moving toward generative upscaling, but for now, the “truth” of your image still matters. Choose the tool that respects your source material.


")

")


")
